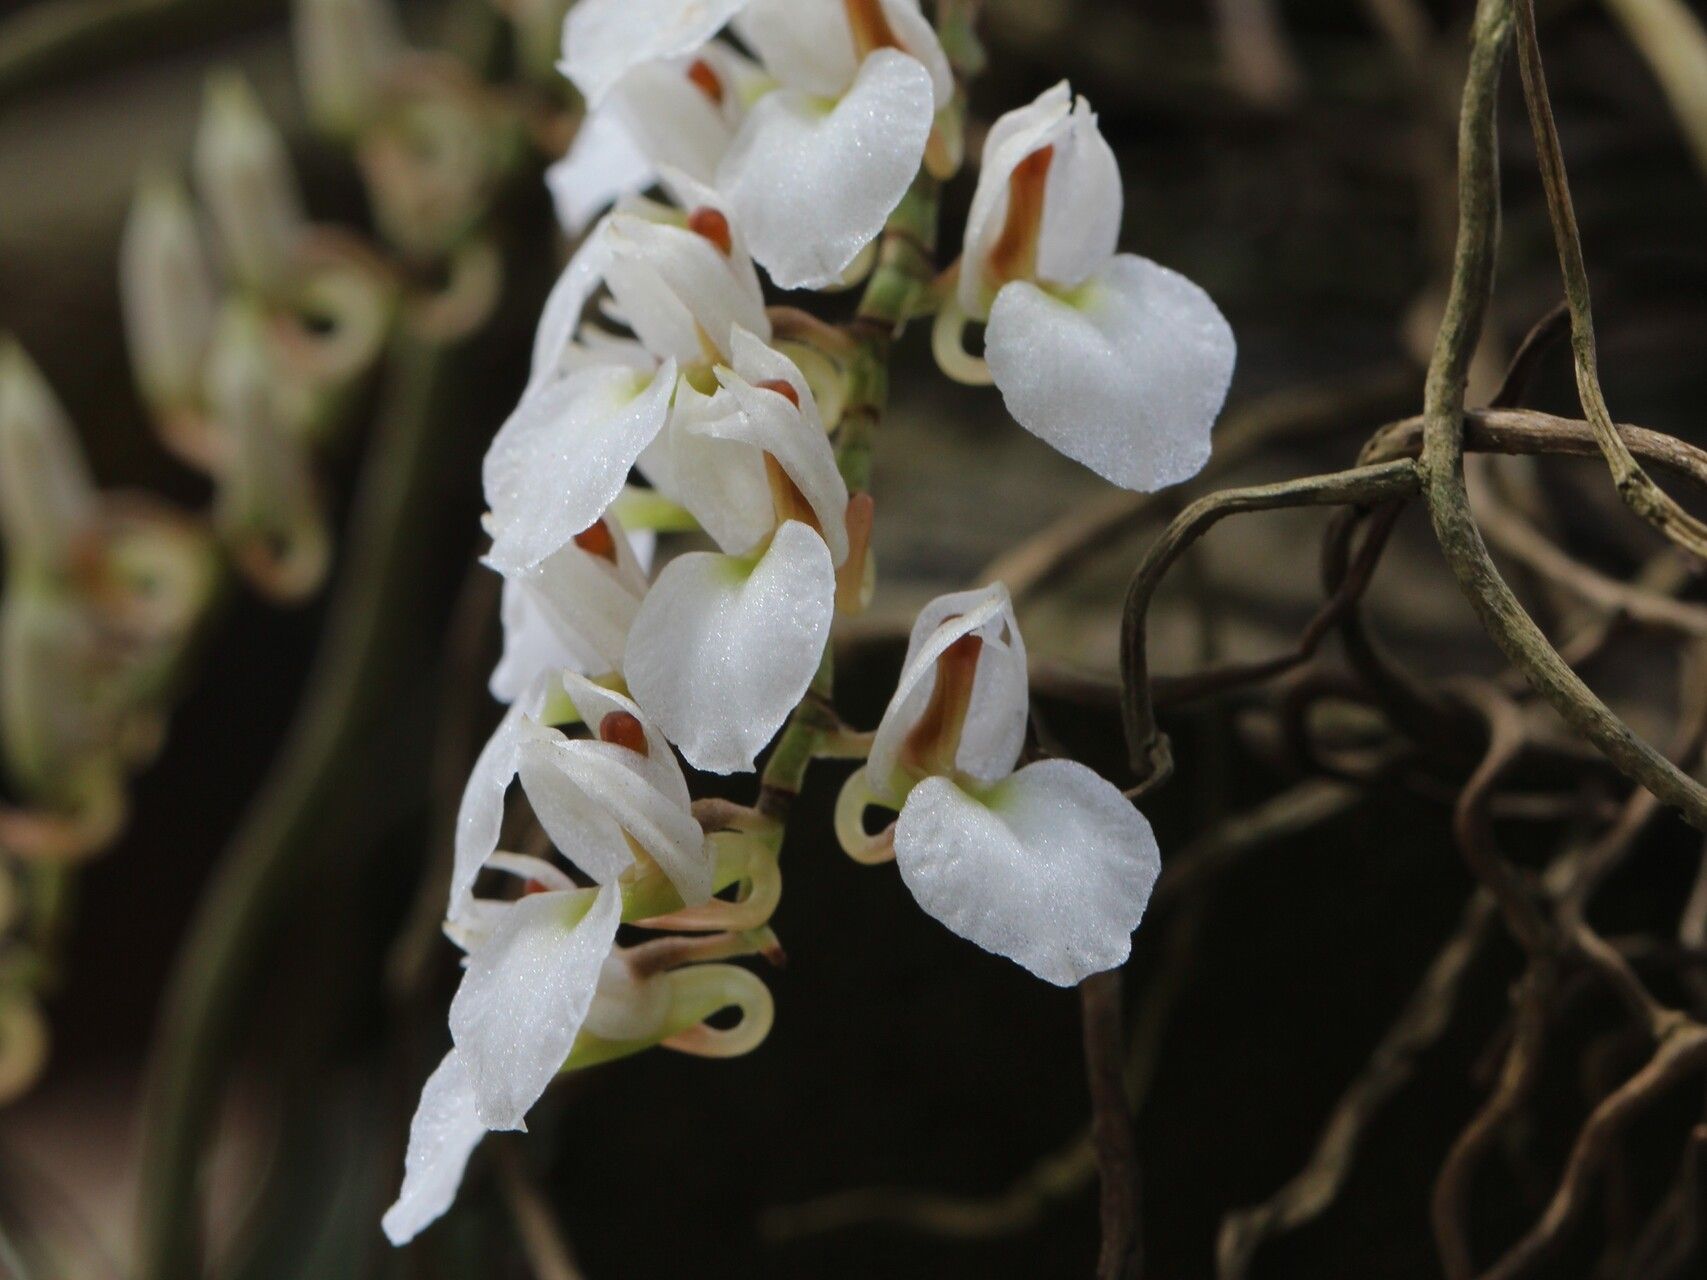
Hello fellow garden lovers! Today, we’re diving into something truly special: propagating Microcoelia konduensis. If you haven’t met this beauty, I’m so excited for you to discover it! Microcoelia konduensis is a fascinating orchid, known for its delicate, almost ethereal white flowers and its unique, leafless growth habit for much of its life. Watching a tiny piece of this magical plant grow into a whole new specimen is incredibly rewarding. Now, I’ll be honest, Microcoelia isn’t a plant for the absolute beginner orchid grower. It requires a bit of patience and understanding of its specific needs. But with a little guidance, you absolutely can succeed!
The Best Time to Start
When it comes to getting new Microcoelia babies going, timing is everything. The ideal window is during its active growth phase. For most Microcoelia species, this means after it has finished flowering and is starting to show new root or pseudobulb development. Think late spring to early summer. This is when the plant has the energy reserves to dedicate to rooting and establishing itself. Trying to propagate when it’s dormant or stressed is just setting yourself up for disappointment.
Supplies You’ll Need
Before we get our hands dirty, let’s gather our tools and ingredients. Having everything ready makes the process so much smoother.
- Sharp, sterile pruning shears or a clean razor blade: For making precise cuts. Sterilize with rubbing alcohol between cuts!
- Potting medium: A very airy, well-draining orchid mix is crucial. I usually use a blend of coarse bark, perlite, and charcoal. For Microcoelia, even chunkier is better.
- Small pots or containers: Clean and with good drainage holes. Terracotta pots are wonderful because they breathe.
- Watering can or spray bottle: For gentle hydration.
- Rooting hormone (optional but helpful): A powdered or liquid form can give your cuttings a boost.
- Clear plastic bags or a propagation dome: To create a humid environment.
- Potting label and pen: Don’t forget to label your projects!
Propagation Methods
Microcoelia konduensis is best propagated through division or by taking keikis (baby plantlets that form on the mother plant). Stem cuttings aren’t typically a successful method with this particular orchid.
1. Division (The Most Reliable Method)
This is my preferred method for Microcoelia, as it’s the most straightforward and successful.
- Wait for the right moment: As I mentioned, propagate when the plant is in active growth. You’ll usually see new roots or a developing pseudobulb.
- Gently remove from pot: Carefully ease the orchid out of its current container. You might need to loosen the root ball gently with a chopstick.
- Inspect the roots and pseudobulbs: Look for natural divisions. A healthy division should have at least 2-3 pseudobulbs and a good portion of healthy roots.
- Make the cut: Using your sterile pruning shears or razor blade, carefully cut between the pseudobulbs, ensuring each division has enough roots to support it. If there are any dead or mushy roots, trim them away.
- Allow to dry (important!): Let the cut surfaces of the separated divisions dry and callous over for 24-48 hours in a well-ventilated spot. This helps prevent rot.
- Pot up your new babies: Gently pot each division into its own small container with your prepared orchid mix. Make sure the roots are spread out and secure. Don’t pack the mix too tightly.
2. Keikis (Baby Plants)
Sometimes, Microcoelia will produce little plantlets, called keikis, on the mother plant. These are like bonus gifts!
- Identify a healthy keiki: Look for a keiki that has developed its own roots – at least an inch or two long is ideal. It should also have at least one or two tiny leaves or pseudobulbs.
- Carefully detach: Using your sterile razor blade, make a clean cut to separate the keiki from the mother plant, cutting close to the stem of the parent to ensure you get as much of the keiki’s base as possible.
- Let it callus: Similar to division, allow the cut surface of the keiki to dry and callous over for about 24 hours.
- Pot or mount: You can pot the keiki in a small pot with orchid mix or mount it on a piece of cork bark, just as you would an adult orchid.
The “Secret Sauce” (Pro Tips)
Here are a few little tricks I’ve learned over the years that can really make a difference.
- Humidity is your best friend, but not soggy roots: After potting your divisions or keikis, pop them into a clear plastic bag or under a propagation dome. This creates a humid microclimate that encourages root and growth development. However, ensure the pot itself isn’t sitting in water. Good air circulation is still key. You can achieve this by placing the pot on a layer of pebbles in a tray of water, making sure the bottom of the pot stays dry.
- Gentle misting is better than soaking: Until you see significant new growth, water your new propagations very sparingly. A light misting of the roots and leaves every few days is usually sufficient. Overwatering is the quickest way to lose a new plant.
- Patience with pseudobulbs: Microcoelia can sometimes take a while to show new pseudobulb or leaf growth after division. Don’t panic! Focus on keeping the roots healthy and the environment stable. Growth will come when it’s ready.
Aftercare & Troubleshooting
Once your little Microcoelia has settled in, it needs consistent care to thrive.
- Light: Provide bright, indirect light. Avoid direct sun, which can scorch the delicate roots and leaves.
- Watering: Water when the potting medium is almost dry. This might mean watering every 7-10 days, but always check the moisture level yourself before reaching for the watering can.
- Fertilizing: Once you see signs of new growth (a new leaf or root), you can start a weakly diluted orchid fertilizer every few watering cycles.
- Troubleshooting: The most common issue you’ll encounter is rot, which is usually caused by overwatering and poor air circulation. Signs include mushy, blackening roots or leaves. If you see this, immediately reduce watering, improve air flow, and if it’s severe, you may need to repot using fresh, dry medium. Another sign of stress can be shriveling pseudobulbs. This usually indicates underwatering or roots that are not functioning well.
A Little Encouragement
Propagating any plant takes a bit of know-how and a whole lot of heart. Don’t be discouraged if your first attempt isn’t a runaway success. Each plant is an individual, and every gardening journey has its learning curves. Be patient, observe your plants closely, and celebrate every tiny sign of new growth. Happy propagating, and may your Microcoelia flourish!
Resource: