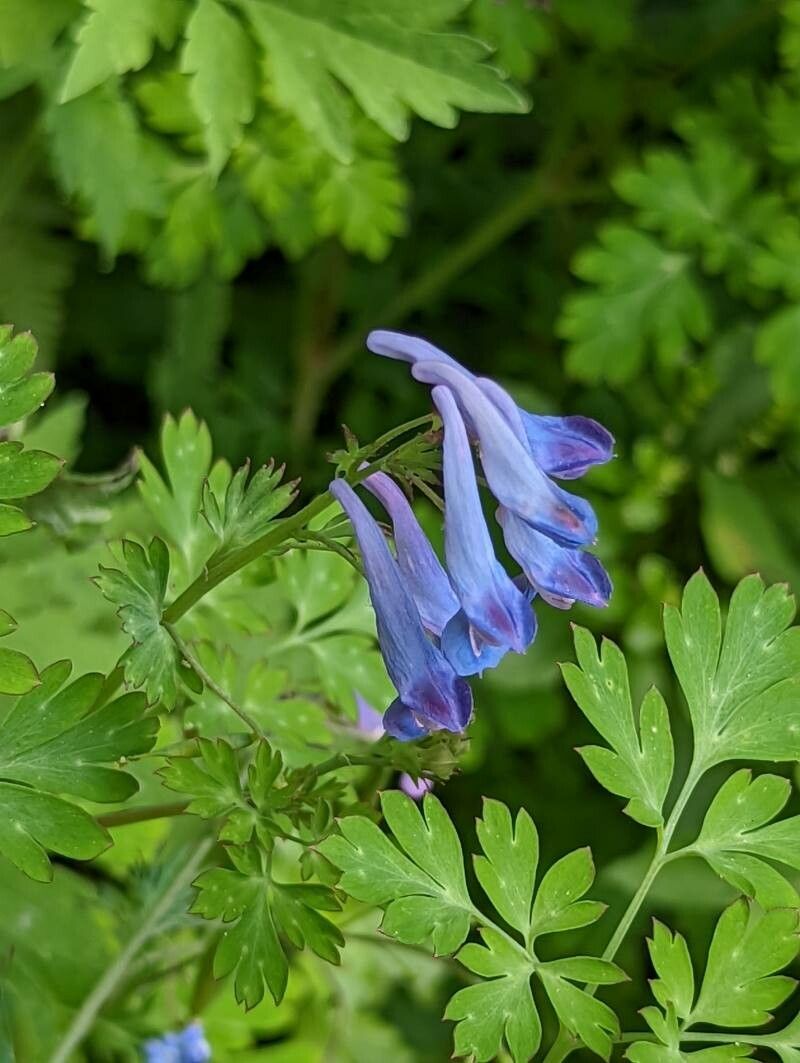
Hello fellow gardeners! It’s so lovely to have you here. Today, we’re going to dive into the wonderful world of Corydalis flexuosa. If you’ve ever been captivated by those delicate, airy blooms of electric blue or pure white, often gracing shady corners with their ethereal beauty, then you know why this plant holds a special place in many hearts.
Propagating Corydalis flexuosa isn’t just about getting more of a good thing; it’s a deeply satisfying part of the gardening journey. Watching a tiny cutting transform into a thriving plant is pure magic. Now, I know some plants can be a bit finicky, but I’m happy to report that Corydalis flexuosa is generally quite forgiving. With a little know-how, even beginners can have success!
The Best Time to Start
For the highest success rate, I find spring is your best friend for propagating Corydalis flexuosa. Aim for when the plant is actively growing, typically after the last frost has passed. You can also take cuttings in early summer, but try to avoid the intense heat of mid-summer, which can be stressful for young cuttings.
Supplies You’ll Need
Gathering your supplies beforehand makes the whole process much smoother. Here’s what I always have on hand:
- Sharp, clean pruning shears or a sharp knife: Essential for making clean cuts.
- Rooting hormone: I prefer a powder form, but liquid works too. It gives those cuttings a helpful boost.
- Well-draining potting mix: A good blend of peat moss or coco coir, perlite, and a bit of compost works wonders. You can also buy a pre-made seed starting mix.
- Small pots or seed trays: Clean ones are important to prevent disease.
- Watering can with a fine rose or mister: Gentle watering is key.
- Plastic bags or a propagation dome: This helps maintain humidity.
- Marker and labels: Don’t forget to label your experiments!
Propagation Methods
There are a couple of reliable ways to multiply your Corydalis flexuosa. I usually lean towards stem cuttings as my go-to, but division is also a fantastic option.
Stem Cuttings
This is my favorite method for this lovely plant.
- Take Your Cuttings: In spring, select a healthy, non-flowering stem. Using your clean shears, cut a section about 4-6 inches long, just below a leaf node (where a leaf meets the stem).
- Prepare the Cuttings: Gently remove the lower leaves, leaving just a few at the top. If your cutting is very long, you can cut it in half.
- Apply Rooting Hormone: Dip the cut end into your rooting hormone. Tap off any excess.
- Pot Them Up: Fill your small pots or trays with your potting mix. Water it thoroughly so it’s evenly moist but not soggy. Make a small hole in the center of the soil with your finger or a pencil. Carefully insert the cut end of your Corydalis cutting into the hole. Gently firm the soil around the stem.
- Create a Humid Environment: Water the soil again very gently. Place the pot inside a plastic bag, sealing it loosely, or cover it with a propagation dome. This keeps the humidity high, which is crucial for cuttings to root.
- Provide Light and Warmth: Place the pots in a bright location, but out of direct sunlight. A spot on a windowsill away from the sun’s harshest rays is perfect. Aim for a consistent, moderate temperature.
Division
If you have an established Corydalis flexuosa clump, division is a straightforward way to get new plants.
- Gently Excavate: In early spring, carefully dig up the entire plant. You might need to tease away some of the soil to see the root structure clearly.
- Identify Natural Divisions: Look for sections of the plant that seem like they have their own root system. You can gently pull the clump apart with your hands. If it’s a bit stubborn, use a clean, sharp spade or knife to divide the clump.
- Replant Immediately: Pot up the divided sections into well-draining soil. Water them in well and treat them like newly planted specimens.
The “Secret Sauce” (Pro Tips)
Here are a few little things I’ve learned over the years that can really help your Corydalis cuttings get a head start:
- Bottom Heat is Your Friend: If you have the space, placing your pots on a heating mat specifically designed for plants can significantly speed up root development. Corydalis roots love warmth!
- Don’t Drown Them: While humidity is key, don’t let the soil become waterlogged. Ensuring good drainage is paramount. Rot is the enemy of fresh cuttings. Stick your finger into the soil every now and then; if it still feels wet a couple of inches down, wait to water.
- Air Circulation is Crucial: Once your cuttings show signs of rooting, it’s important to gradually introduce them to drier air. Start by opening the plastic bag or propagation dome for an hour or two each day, slowly increasing the time until they are acclimatized.
Aftercare & Troubleshooting
Once you start seeing new growth popping up from your cuttings, that’s a good sign that roots are forming! Gently tugging on a cutting should reveal some resistance.
- Continued Care: Once rooted, water regularly, allowing the soil to dry slightly between waterings. As they grow larger, you can transplant them into slightly larger pots.
- Watch for Rot: The most common issue is rot. If your cuttings turn mushy and brown, it’s usually a sign of too much moisture and/or poor air circulation. This is why proper drainage and humidity control are so vital. Don’t be discouraged if a few don’t make it; that’s part of gardening. Just try to figure out what might have gone wrong and apply it to your next attempt.
A Little Patience Goes a Long Way
Propagating plants is a journey, and it requires a bit of patience. Don’t get discouraged if you don’t see results immediately. Keep your cuttings in a good environment, check them regularly, and celebrate those little triumphs when they appear. Enjoy the process of nurturing new life – it’s one of the most rewarding aspects of having a garden. Happy propagating!
Resource:
https://identify.plantnet.org/k-world-flora/species/Corydalis%20flexuosa%20Franch./data