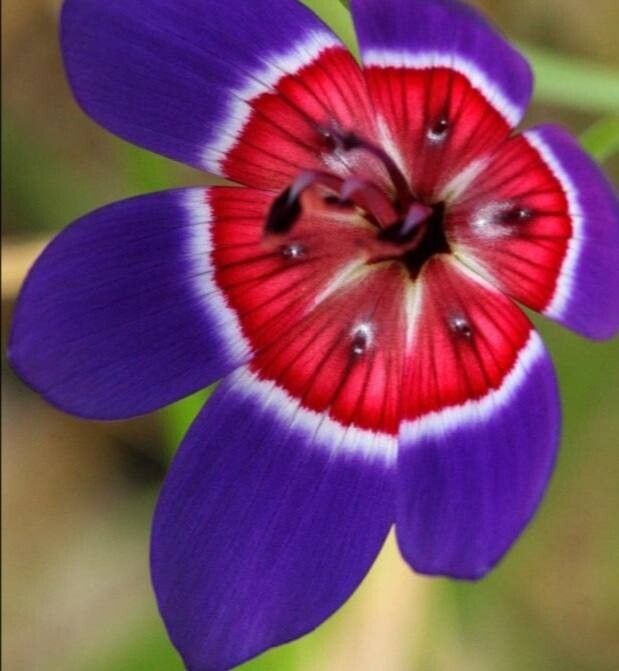
Hey there, fellow garden enthusiasts! If you’ve ever laid eyes on the breathtaking beauty of Geissorhiza radians, you know exactly why I’m so excited to talk about it today. That vibrant splash of color, the delicate structure – it’s truly a gem. And guess what? The sheer joy of coaxing this beauty to life yourself? Absolutely unparalleled!
Now, be upfront, Geissorhiza radians isn’t the absolute easiest plant for a brand-new gardener to propagate. It requires a bit of finesse and understanding of its natural rhythms. But don’t let that deter you! With a little patience and these tips, you’ll be well on your way. I promise, the reward is so worth it.
The Best Time to Start
Timing is everything, especially with delicate plants like our Geissorhiza. For the best chance of success, aim to propagate during its active growing season, which for Geissorhiza radians is typically in the late spring or early summer. This is when the plant is full of energy and ready to put out new growth, making it more receptive to propagation.
Supplies You’ll Need
Before we get our hands dirty, let’s gather our essentials. Think of this as prepping your gardening toolkit for success:
- Well-draining potting mix: A mix designed for succulents or cacti works wonders. You can also make your own by combining peat moss, perlite, and coarse sand in equal parts.
- Sharp, clean pruning shears or a sharp knife: For taking clean cuttings. Sterilize them with rubbing alcohol to prevent disease.
- Small pots or propagation trays: With drainage holes, of course!
- Rooting hormone (optional but recommended): This little helper can significantly speed up root development.
- Spray bottle: For gentle misting.
- Plastic wrap or a clear plastic dome: To create a humid environment for cuttings.
- Small labels and a marker: To keep track of your precious new plants!
Propagation Methods
Geissorhiza radians can be propagated through a couple of lovely methods, but my go-to is usually through cuttings.
Stem Cuttings: My Favorite Approach
This is where the magic happens!
- Select a healthy stem: Look for a plump, vigorous stem that’s about 3-4 inches long. You want one that hasn’t flowered yet if possible.
- Make the cut: Using your sterilized shears or knife, take a clean cut just below a leaf node. A leaf node is where a leaf attaches to the stem. This is where roots are most likely to form.
- Prepare the cutting: Gently remove the lower leaves from the cutting, leaving just a few at the top. This prevents them from rotting in the soil.
- Dip in rooting hormone (optional): If you’re using rooting hormone, dip the cut end of the stem into the powder. Tap off any excess.
- Plant the cutting: Fill your small pots with your prepared well-draining potting mix. Make a small hole with your finger or a pencil and gently insert the cutting. Make sure the part where you removed the leaves is covered by the soil.
- Water gently: Water the soil lightly, just enough to make it moist but not soggy.
- Create humidity: Cover the pot with plastic wrap or a clear plastic dome. This is crucial for keeping the cutting hydrated until it develops roots.
- Place in bright, indirect light: Find a spot that receives plenty of bright, filtered light but is protected from direct sun.
The “Secret Sauce” (Pro Tips)
Over the years, I’ve discovered a few little tricks that really make a difference:
- My absolute favorite trick for cuttings? Bottom heat! If you can, place your pots on a seedling heat mat. This gentle warmth encourages root development from below without cooking your precious cuttings from above. You’ll see roots forming much faster!
- When you’re misting your cuttings, be very careful. Never let the leaves touch the water in the pot. If they do, they’re much more prone to developing rot or fungal issues. Try to mist just the soil and the air around the leaves.
- Don’t be afraid to experiment with slightly larger cuttings. While shorter ones are common for many plants, I’ve found that Geissorhiza radians often takes to slightly longer cuttings (up to 6 inches) with a bit more stored energy, especially if they have a bit more foliage at the top.
Aftercare & Troubleshooting
Once you see signs of new growth – that’s your cue that roots are forming! You might see tiny new leaves or even a slight resistance when you gently tug on the cutting.
- Acclimate gradually: Once roots have formed and new growth is evident, gradually remove the plastic cover over a few days to let the plant get used to normal humidity.
- Watering: Continue to water sparingly, allowing the soil to dry out slightly between waterings. Overwatering is the quickest way to lose a new propagation.
- Repotting: Once the new plant is established enough to handle more, you can transplant it into a slightly larger pot with fresh, well-draining soil.
Now, what if things don’t go as planned? The most common foe is rot. If you notice the stem turning mushy and brown, or a foul smell, it’s likely rot. This usually means your cutting was kept too wet or lacked adequate air circulation. Don’t get discouraged! Just clean your tools, grab another cutting, and try again. Sometimes, a bit of trial and error is part of the learning process.
A Little Encouragement
Growing plants from cuttings is a deeply rewarding experience. It’s a lesson in patience, in observing nature’s cycles, and in the sheer miracle of life. Don’t rush the process, and try not to get too disheartened if your first attempt isn’t perfect. Every gardener, myself included, has faced our share of propagation mishaps. Just keep nurturing, keep observing, and soon enough, you’ll be admiring your very own Geissorhiza radians, a testament to your green-thumbed dedication. Happy propagating!
Resource: