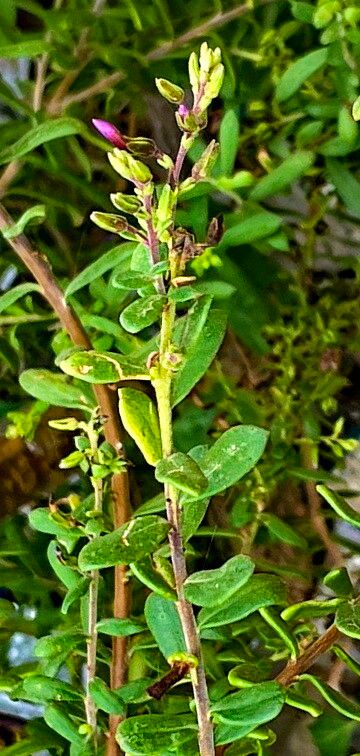
Hello fellow garden lovers! Today, we’re diving into the wonderful world of Campylanthus glaber. This charming Mediterranean native, with its delicate, whip-like stems and lovely little blooms, brings such a unique texture and subtle charm to any garden. It’s one of those plants you don’t see everywhere, which makes it even more special. And the best part? If you love it as much as I do, you can easily share the love by propagating it! While it might seem a little… unexpected, propagating Campylanthus glaber is actually quite accessible, even for those of you just getting your hands dirty.
The Best Time to Start
For the absolute best chance of success, I always recommend starting your Campylanthus glaber cuttings in the late spring or early summer. This is when the plant is actively growing and has plenty of energy to put into developing new roots. You’re looking for stems that are firm but not woody – think of them as being gloriously in their vegetative prime! Avoid taking cuttings from flowering stems, as the plant will be focusing its energy on those blooms instead of root development.
Supplies You’ll Need
Gathering your tools before you start makes the whole process much smoother. Here’s what I usually have on hand:
- Sharp pruning shears or a clean knife: For taking clean cuts.
- A well-draining potting mix: I like a blend of equal parts perlite and a good quality potting soil. Some fine orchid bark mixed in also works wonders.
- Small pots or seedling trays: About 3-4 inches deep are perfect. Make sure they have drainage holes!
- Rooting hormone (optional but recommended): A powdered or gel rooting hormone can significantly speed up the process.
- A clear plastic bag or propagator lid: To create a humid environment.
- Water spray bottle: For keeping things moist.
- Labels and a marker: To keep track of your efforts!
Propagation Methods
Campylanthus glaber is wonderfully amenable to stem cuttings. It’s my go-to method and usually yields fantastic results.
Step-by-Step Stem Cuttings:
- Select your parent plant: Find a healthy, vigorous Campylanthus glaber.
- Take the cuttings: Using your clean shears or knife, snip off 4-6 inch sections of non-flowering stems. Aim for tips that are slightly soft but not floppy.
- Prepare the cuttings: Gently remove the lower leaves from the bottom half of each cutting. This is important to prevent them from rotting once planted. You can leave the top few sets of leaves on.
- Apply rooting hormone (optional): If you’re using rooting hormone, dip the cut end of the stem into the powder or gel, tapping off any excess.
- Plant the cuttings: Make small holes in your prepared potting mix with a pencil or your finger. Insert the cut end of each stem into the hole, burying the leafless portion. Gently firm the soil around the base of the cutting.
- Water thoroughly: Give your new cuttings a good watering. You want the soil to be evenly moist but not waterlogged.
- Create humidity: Cover the pot or tray with a clear plastic bag or propagator lid. This creates a mini-greenhouse effect, which is vital for preventing the cuttings from drying out before they root. Prop the bag up so it doesn’t touch the leaves.
The “Secret Sauce” (Pro Tips)
Here are a few things I’ve learned over the years that can make a big difference:
- Bottom warmth is your friend! If you can, place your pots on a heated propagator mat. This gentle warmth encourages root development from below and can really speed things up. It’s like giving them a cozy little incubator.
- Be patient with air circulation. While you want humidity, you don’t want stagnant air, which can lead to fungal issues. Once a day, gently lift the plastic bag or lid for a few minutes to let some fresh air in. It’s a small step, but it makes a world of difference.
- Don’t let those lower leaves touch the soil. I cannot stress this enough! Even if you think you removed them all, double-check. Any leaf material in contact with moist soil is a VIP ticket to rot town for your precious cuttings.
Aftercare & Troubleshooting
Once your cuttings have been in their humid environment for a few weeks, you’ll start to see the magic happen. Gently tug on a cutting – if you feel resistance, that’s a good sign of new root growth.
Caring for New Roots:
- Gradually acclimatize: Once you see good root development, begin to slowly reduce the humidity. This means opening the plastic bag or propagator lid for longer periods each day over a week or so. This helps the new plant adjust to normal garden conditions.
- Watering: Continue to keep the soil consistently moist but not soggy.
- Potting up: Once the new plants are a bit larger and have a good root system, you can pot them up into individual, slightly larger pots with a bit more of your regular potting mix.
Common Issues:
- Wilting: This usually means the cutting is drying out. Ensure the soil is moist and the humidity is high enough. Sometimes, if a cutting is too far gone, it’s just not salvageable, and that’s okay!
- Rot: Black, mushy stems at the soil line are a sure sign of rot. This is often caused by overwatering or poor drainage. If you see this, unfortunately, that cutting is a loss. Start again, ensuring better drainage and watering practices.
- No root growth: Patience is key! Some plants take longer than others. Ensure they are getting adequate light (bright, indirect light is best for cuttings) and warmth.
Happy Propagating!
There you have it! Propagating Campylanthus glaber might take a little practice, but it’s an incredibly rewarding way to expand your collection and share these unique plants with friends. Don’t be discouraged if not every cutting takes. Gardening is all about learning and observing, and with a little perseverance, you’ll soon have a small army of these beauties to enjoy. So, happy snipping, and may your cuttings root with joy!
Resource:
https://identify.plantnet.org/k-world-flora/species/Campylanthus%20glaber%20Benth./data