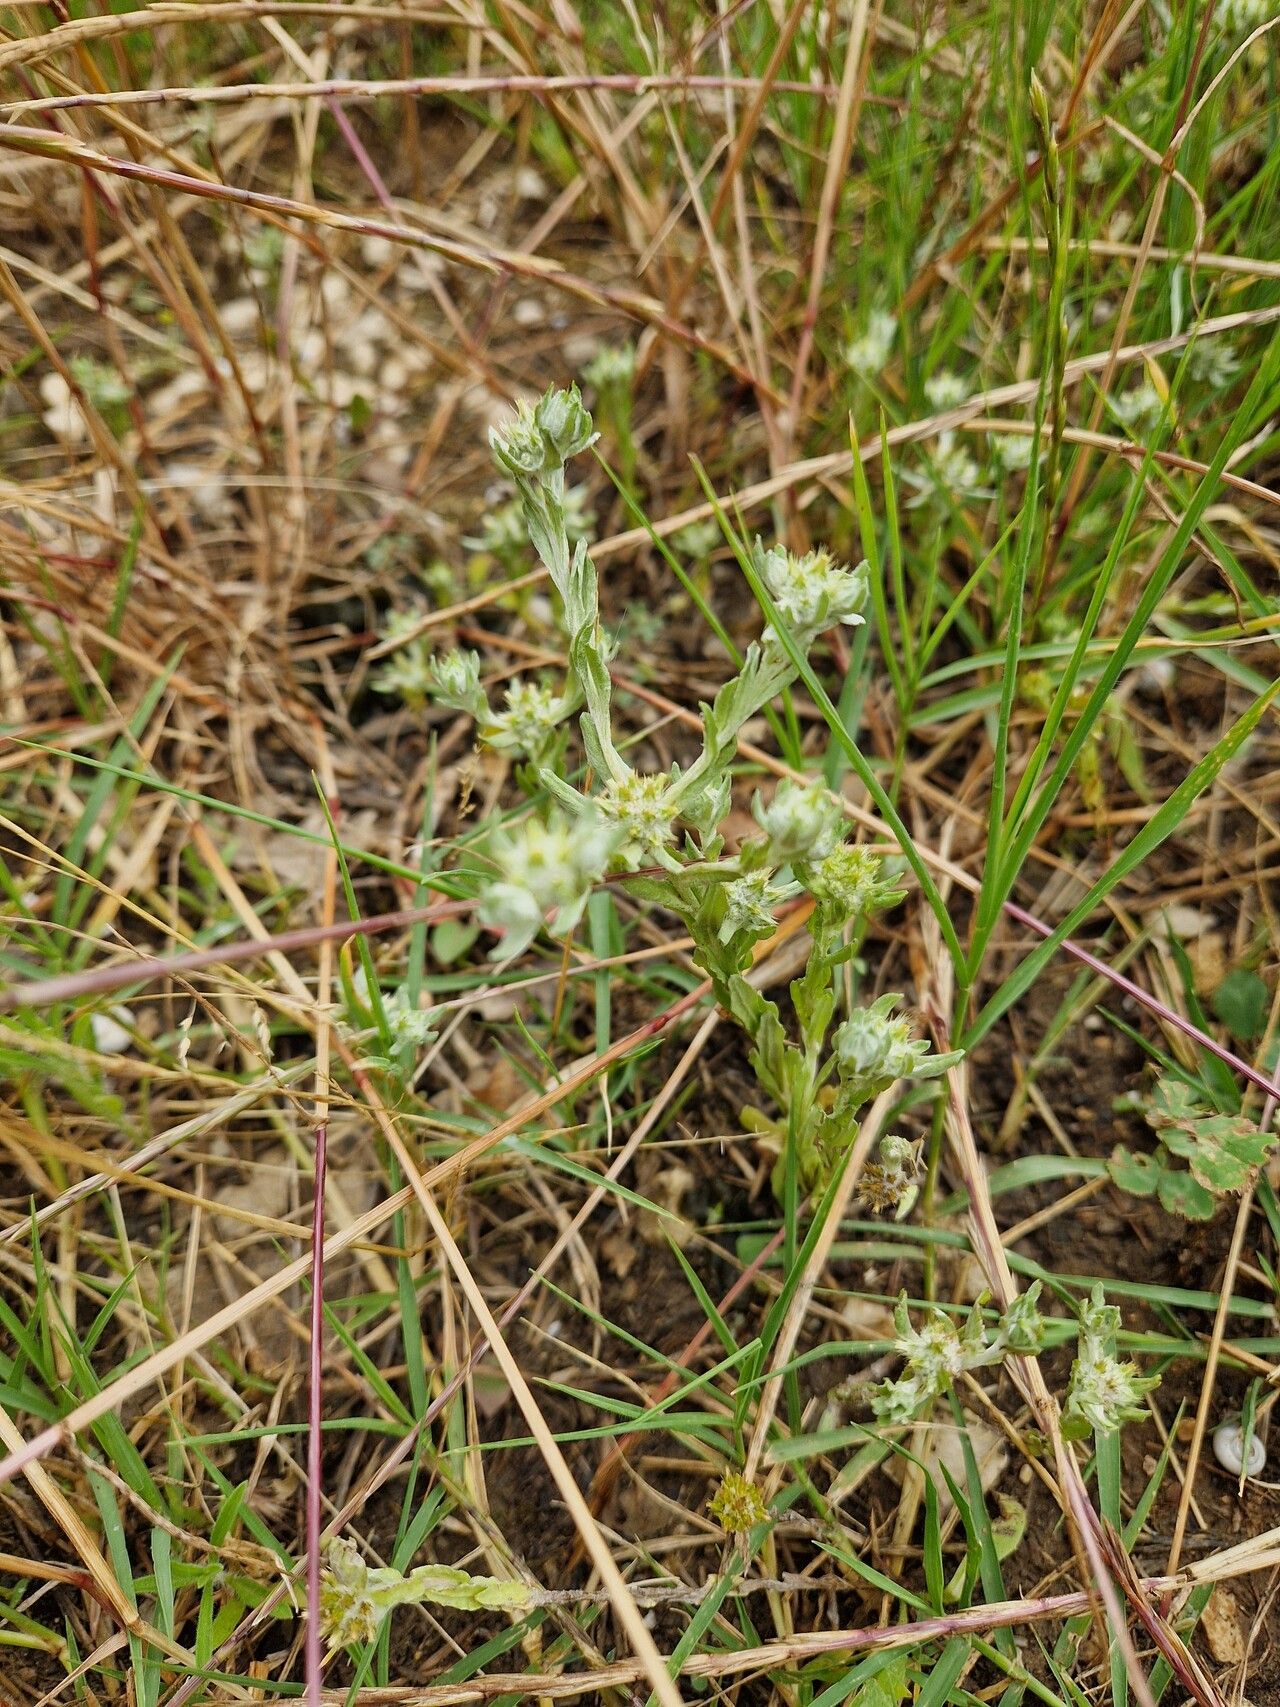
Hey there, fellow garden enthusiasts! Today, I want to chat about a little gem that often gets overlooked: Filago pyramidata, also known as the little cotton heads. If you love that fuzzy, ethereal look in your garden, you’re going to fall for this one. Its delicate, silvery-grey foliage and quirky little flower heads add such a unique texture and charm. And the best part? Propagating these beauties is a wonderfully rewarding experience, especially when you see those tiny roots start to appear. I’d say Filago pyramidata is quite beginner-friendly, making it a fantastic choice if you’re just dipping your toes into the world of plant propagation.
The Best Time to Start
For Filago pyramidata, the sweet spot for propagation is generally in late spring or early summer. This is when the plant is actively growing and has plenty of energy to put into developing new roots. You’re looking for nice, healthy growth – not flowers, but robust leafy stems. Starting too late in the season might mean your new cuttings don’t have enough time to establish before cooler weather arrives.
Supplies You’ll Need
- Sharp pruning shears or a clean, sharp knife: For taking clean cuttings.
- Well-draining potting mix: A good seed-starting mix or a blend of peat moss, perlite, and a bit of compost works wonderfully. You can even use a cactus/succulent mix.
- Small pots or seed trays: With drainage holes, of course!
- Rooting hormone (optional but recommended): A powder or gel form can give your cuttings a helpful boost.
- Watering can or spray bottle: For gentle watering.
- Labels: So you don’t forget what you planted where!
- A plastic bag or propagation dome: To create a humid environment.
Propagation Methods
Filago pyramidata is a marvel because it’s quite amenable to a few different methods. My go-to is usually stem cuttings, as it’s straightforward and yields great results.
Stem Cuttings:
- Select your parent plant: Choose a healthy, mature Filago pyramidata that’s not flowering.
- Take your cuttings: Using your sharp shears or knife, cut a stem about 3-4 inches long. Try to get a piece with several sets of leaves. Make your cut just below a leaf node (where a leaf attaches to the stem).
- Prepare the cuttings: Gently remove the lower leaves from the cutting. You only want a couple of sets of leaves left at the top. This prevents them from rotting in the soil.
- Apply rooting hormone (optional): If you’re using it, dip the cut end of the stem into the rooting hormone, tapping off any excess.
- Plant your cuttings: Make small holes in your potting mix with a pencil or your finger. Insert the prepared cuttings, ensuring the leafless portion is buried in the soil. Gently firm the soil around the base of each cutting.
- Water gently: Water thoroughly but avoid over-saturating the soil. You want it moist, not soggy.
- Create humidity: Cover your pots or trays with a plastic bag or propagation dome. Make sure the leaves don’t touch the plastic. You can prop up the bag with a few stakes if needed.
- Place in bright, indirect light: Find a spot that gets plenty of light but is shielded from direct, harsh sun, which can scorch the delicate cuttings.
The “Secret Sauce” (Pro Tips)
Now, for a couple of little tricks I’ve picked up over the years that can really make a difference:
- Think “air circulation” when covering: While you want to create that humid microclimate, don’t seal it up completely tight. Occasionally lift the plastic bag or dome for a few minutes each day to allow for some fresh air exchange. This helps prevent fungal issues.
- Bottom heat is your friend: If you’re struggling to get cuttings to root or live in a cooler climate, using a seedling heat mat can work wonders. It encourages root development from the bottom up, creating a cozy environment for those developing roots. You don’t need it super hot, just gently warm.
Aftercare & Troubleshooting
Once your cuttings have roots (this can take anywhere from a few weeks to a couple of months), it’s time to transition them to more regular care.
- Acclimatize slowly: Gradually remove the plastic covering over a few days so the new plants can get used to the ambient humidity.
- Watering: Keep the soil consistently moist but not wet. Water when the top inch of soil feels dry.
- Light: Continue to provide bright, indirect light. As they get stronger, they can handle a bit more direct sun, but always watch for signs of stress.
- Signs of Failure: The most common issue you’ll see is rot, which looks like a mushy, brown stem base. This is usually a sign of too much moisture and poor air circulation. If a cutting rots, unfortunately, it’s best to discard it and try again, focusing on a drier mix and better airflow. Yellowing leaves without new growth can sometimes indicate insufficient light or nutrients.
A Encouraging Closing
Propagating your own Filago pyramidata is such a satisfying journey. Don’t be discouraged if your first few attempts aren’t perfect. Gardening is all about learning and experimenting! Be patient with your little cuttings, give them consistent care, and celebrate each tiny bit of progress. Soon, you’ll have a whole new collection of these lovely cotton heads to enjoy and even share with friends. Happy planting!
Resource:
https://identify.plantnet.org/k-world-flora/species/Filago%20pyramidata%20L./data