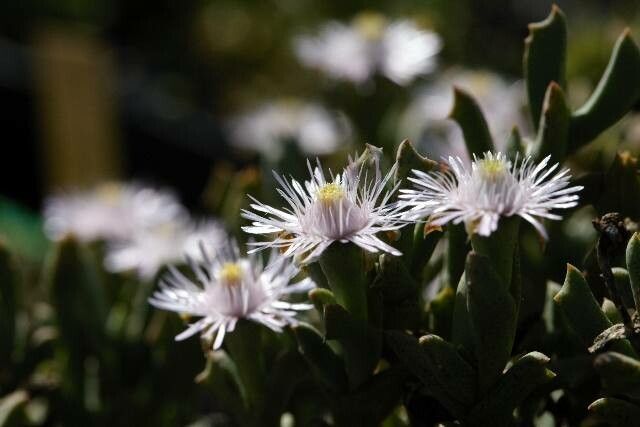
Hello fellow plant enthusiasts! I’m so excited to talk to you today about a real gem in the succulent world: Ruschia rupicola. If you haven’t met this beauty yet, picture a cascade of tiny, jewel-like leaves, often with a lovely bronze or purplish hue, especially when basking in the sun. It’s a groundcover that can tumble over pots or walls in the most charming way. And the best part? Propagating it is surprisingly rewarding, and while it might seem a bit delicate at first glance, I find it quite manageable even for those just dipping their toes into the succulent propagating pool.
The Best Time to Start
For the highest chance of success with Ruschia rupicola, I always aim for the late spring to early summer. This is when the plant is actively growing, and its stems are nice and firm, but not yet woody. You want vibrant, healthy growth to work with. Think of it as harvesting when the plant is at its most energetic – ready to sprout!
Supplies You’ll Need
Here’s what I keep handy when I’m ready to get propagating:
- Sharp, clean pruning shears or a sharp knife: For making clean cuts.
- Free-draining succulent/cactus potting mix: You can buy this or mix your own with perlite and coarse sand. The key is excellent drainage.
- Small pots or trays: Shallow ones are perfect.
- Rooting hormone (optional but recommended): A powder or gel to give your cuttings a boost.
- Perlite or coarse sand: For added aeration in your potting mix.
- Watering can with a fine rose or a spray bottle: For gentle watering.
- Labels or plant markers: To keep track of what you’ve propagated.
Propagation Methods
Ruschia rupicola is a champion when it comes to stem cuttings. It’s straightforward, and you can get quite a few new plants from a single mother plant.
-
Take Your Cuttings: First, identify a healthy, mature stem on your Ruschia rupicola. Using your sharp pruning shears or knife, make a clean cut about 2-4 inches long. Try to snip just below a leaf node (where the leaves grow from the stem). Remove the lower leaves from the bottom inch or so of the cutting. This exposes the stem where roots will form.
-
Let Them Callus: This is a crucial step to prevent rot. Place your cuttings on a dry paper towel or in an empty tray in a bright, indirect light spot for 2-5 days. You’ll see the cut end start to dry and form a callus. This protective layer is your best friend against fungal infections.
-
Dip in Rooting Hormone (Optional): Once callused, dip the cut end of each cutting into your rooting hormone powder or gel. Tap off any excess.
-
Plant Your Cuttings: Prepare your small pots or trays with your well-draining succulent mix. Make a small hole in the soil with your finger or a pencil. Gently insert the callused end of the cutting into the hole, ensuring some of the leaf nodes are buried. You can plant several cuttings in one pot, leaving a little space between them.
-
Watering: Water very sparingly at first. You want the soil to be barely moist. A light misting from a spray bottle is often enough.
-
Placement: Place your pots in a bright, indirect light location. Avoid direct, harsh sunlight, which can scorch the delicate cuttings.
The “Secret Sauce”
Here are a couple of little tricks I’ve learned over the years that really make a difference:
- The “Dry Spell” is Key: Resist the urge to water constantly. Succulents are built for drought. Let the soil dry out almost completely between waterings, especially in the early stages. Overwatering is the quick route to rot.
- Bottom Heat is Your Friend: If you have them, placing your pots on a gentle heated propagation mat can significantly speed up root development. It mimics the warmth of spring and encourages those roots to establish more quickly. It’s like giving them a cozy little spa treatment!
Aftercare & Troubleshooting
Once your cuttings have rooted, you’ll notice a few things. The stems might plump up a bit, and if you gently tug on a cutting, you’ll feel some resistance – that’s a good sign of roots! At this point, you can start watering a little more regularly, allowing the soil to dry out between waterings.
The most common issue you’ll face is rot. If a cutting turns mushy, black, or translucent, it’s likely rotted. This is almost always due to too much moisture and poor drainage. If you catch it early, you might be able to salvage a healthy tip, but often, it’s best to discard the affected cutting to prevent it from spreading.
Another sign of failure is if the cuttings just shrivel up and dry out completely. This can happen if they aren’t getting enough water after they’ve formed a callus, or if they are in too harsh a light.
Happy Propagating!
Propagating plants is a journey, and Ruschia rupicola is a delightful companion on that path. Be patient with your little cuttings. Some will take off beautifully, while others might need a bit more time or perhaps won’t make it – and that’s perfectly okay! Every plant is a learning experience. Enjoy the process of nurturing these tiny new lives, and soon you’ll have a whole new cascade of Ruschia to admire! Happy gardening!
Resource:
https://identify.plantnet.org/k-world-flora/species/Ruschia%20rupicola%20(Engl.)%20Schwantes/data