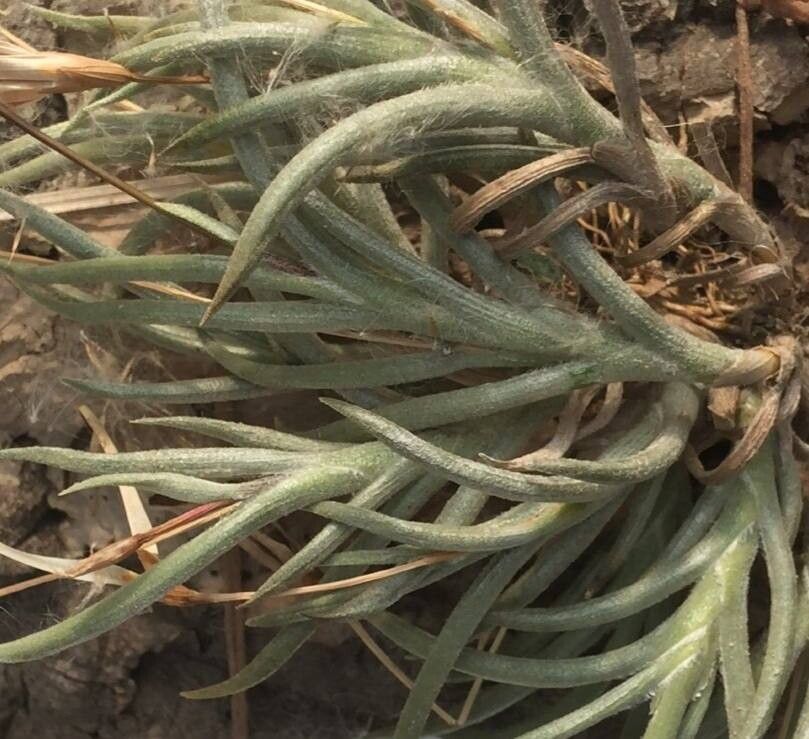
Oh, hello there! Pull up a chair and let’s chat plants. Today, we’re diving into the fascinating world of Tillandsia castellanii, a truly delightful air plant. You know, the ones known for their captivating rosettes and often, a beautiful hint of blush in their leaves. Seeing a new little castellanii sprout from an existing plant is such a thrill, like watching a tiny miracle unfold right before your eyes! It’s a wonderfully rewarding experience, and I’m happy to guide you through it. Now, for beginners, Tillandsia castellanii can be a little on the trickier side when it comes to propagation. It’s not impossible, mind you, but it does demand a bit of careful attention.
The Best Time to Start
When you’re looking to propagate your Tillandsia castellanii, spring and early summer are your golden months. This is when the plant is actively growing and has the most energy to dedicate to producing pups or recovering from division. You’ll have the best luck when your parent plant is healthy and showing good, vigorous growth, perhaps even developing a new offset or two naturally.
Supplies You’ll Need
Here’s what you’ll want to have on hand:
- Sharp, clean pruning shears or a very sharp knife: You need a clean cut to prevent disease.
- A small trowel or dibbler: For gently firming soil if you choose a more soil-based method (though we’ll mostly focus on methods that don’t use soil for Tillandsia in general, but for pups attached to a base, it can be helpful).
- A spray bottle: For misting.
- A small container or propagation tray: For housing your new babies.
- The parent plant: Of course!
- A diluted fertilizer (optional, but recommended): A very weak dose of an air plant or bromeliad fertilizer.
Propagation Methods
For Tillandsia castellanii, the most successful way to propagate is through what we call division. This is where you separate the offsets, or “pups,” that naturally grow from the base of the mother plant. They don’t typically produce stems for cuttings in the same way a succulent might.
Here’s how to do it:
- Inspect your plant: Look closely at your Tillandsia castellanii. Do you see any smaller plants growing from the base of the main one? These are your pups! They are essentially baby plants attached to the mother.
- Wait for size: Ideally, wait until a pup is at least one-third the size of the mother plant, or has developed its own recognizable root structure. Trying to separate tiny, undeveloped pups is a recipe for disappointment.
- Gently remove from the base: This is the delicate part. If the pup is firmly attached, you might need a bit of gentle persuasion. You can sometimes gently twist the pup from its base. If that doesn’t work, or if it seems too tight, use your very sharp, sterilized pruning shears or knife to carefully slice the pup away from the mother plant, trying to get as much of its base as possible, including any tiny root nubs. Your goal is a clean break.
- Let it callus: Once separated, do not pot it immediately. Place the new pup in a bright, airy spot away from direct sun for 24-48 hours. This allows the cut surface to callus over, which helps prevent rot when it’s time to settle it in. Think of it like a tiny scab forming.
- Establish your pup: Once callused, you have a couple of options for getting it started:
- Mounting: This is my preferred method. You can mount the pup onto a piece of bark, cork, or even a decorative rock using orchid wire or a bit of fishing line (don’t tie it too tightly, you don’t want to constrict it). Place it in a spot with good air circulation.
- “Nestled” in a pot (no soil): You can also place the pup in a shallow pot filled with chunky orchid bark or leca (clay pebbles). Don’t bury the pup in these materials; just let it rest on top or be gently supported by them. This method allows for good airflow as well.
The “Secret Sauce” (Pro Tips)
Here are a couple of things I’ve learned over the years that can make a difference:
- Avoid direct water contact: For Tillandsias, especially newly separated pups, don’t let the base of the leaves sit directly in standing water. This is a fast track to rot. When you mist, aim for the leaves and let them dry quickly. If you’re using the leca or bark method, you’ll water by misting the plant and the media, but ensure there’s no pool of water at the bottom.
- Gentle warmth can be your friend: While not strictly essential, if you can provide a bit of gentle bottom heat (think a seedling heat mat on a very low setting, or placing the propagation area near a gently warm appliance), it can encourage root development. Just make sure it’s not too hot!
Aftercare & Troubleshooting
Once your pup is established and showing signs of new growth (you’ll see the tiny leaves at the center start to unfurl and look more vibrant), continue to care for it as you would an adult air plant. Misting regularly (but allowing it to dry completely between waterings) and occasional fertilization with a very diluted solution every 4-6 weeks will help it grow strong.
The main thing to watch out for is rot. Signs of rot include mushy, brown, or black leaves, especially at the base. If you see this, immediately increase air circulation and reduce watering. You might even need to cut away any affected parts with your clean shears. If the entire plant turns black and mushy, unfortunately, it’s likely a lost cause, but don’t let that deter you from trying again! Another sign of failure is if the pup shrivels and dries out completely without any new growth; this usually means it didn’t get enough moisture or its roots weren’t established.
A Encouraging Closing
Propagating Tillandsia castellanii is a journey, not a race. Be patient with your new little offsets. It can take time for them to truly establish and grow. Celebrate the small victories – a new leaf unfurling, a bit more color appearing. Enjoy the process of nurturing this captivating plant, and soon you’ll have more beautiful castellanii to admire! Happy growing!
Resource:
https://identify.plantnet.org/k-world-flora/species/Tillandsia%20castellanii%20L.B.Sm./data