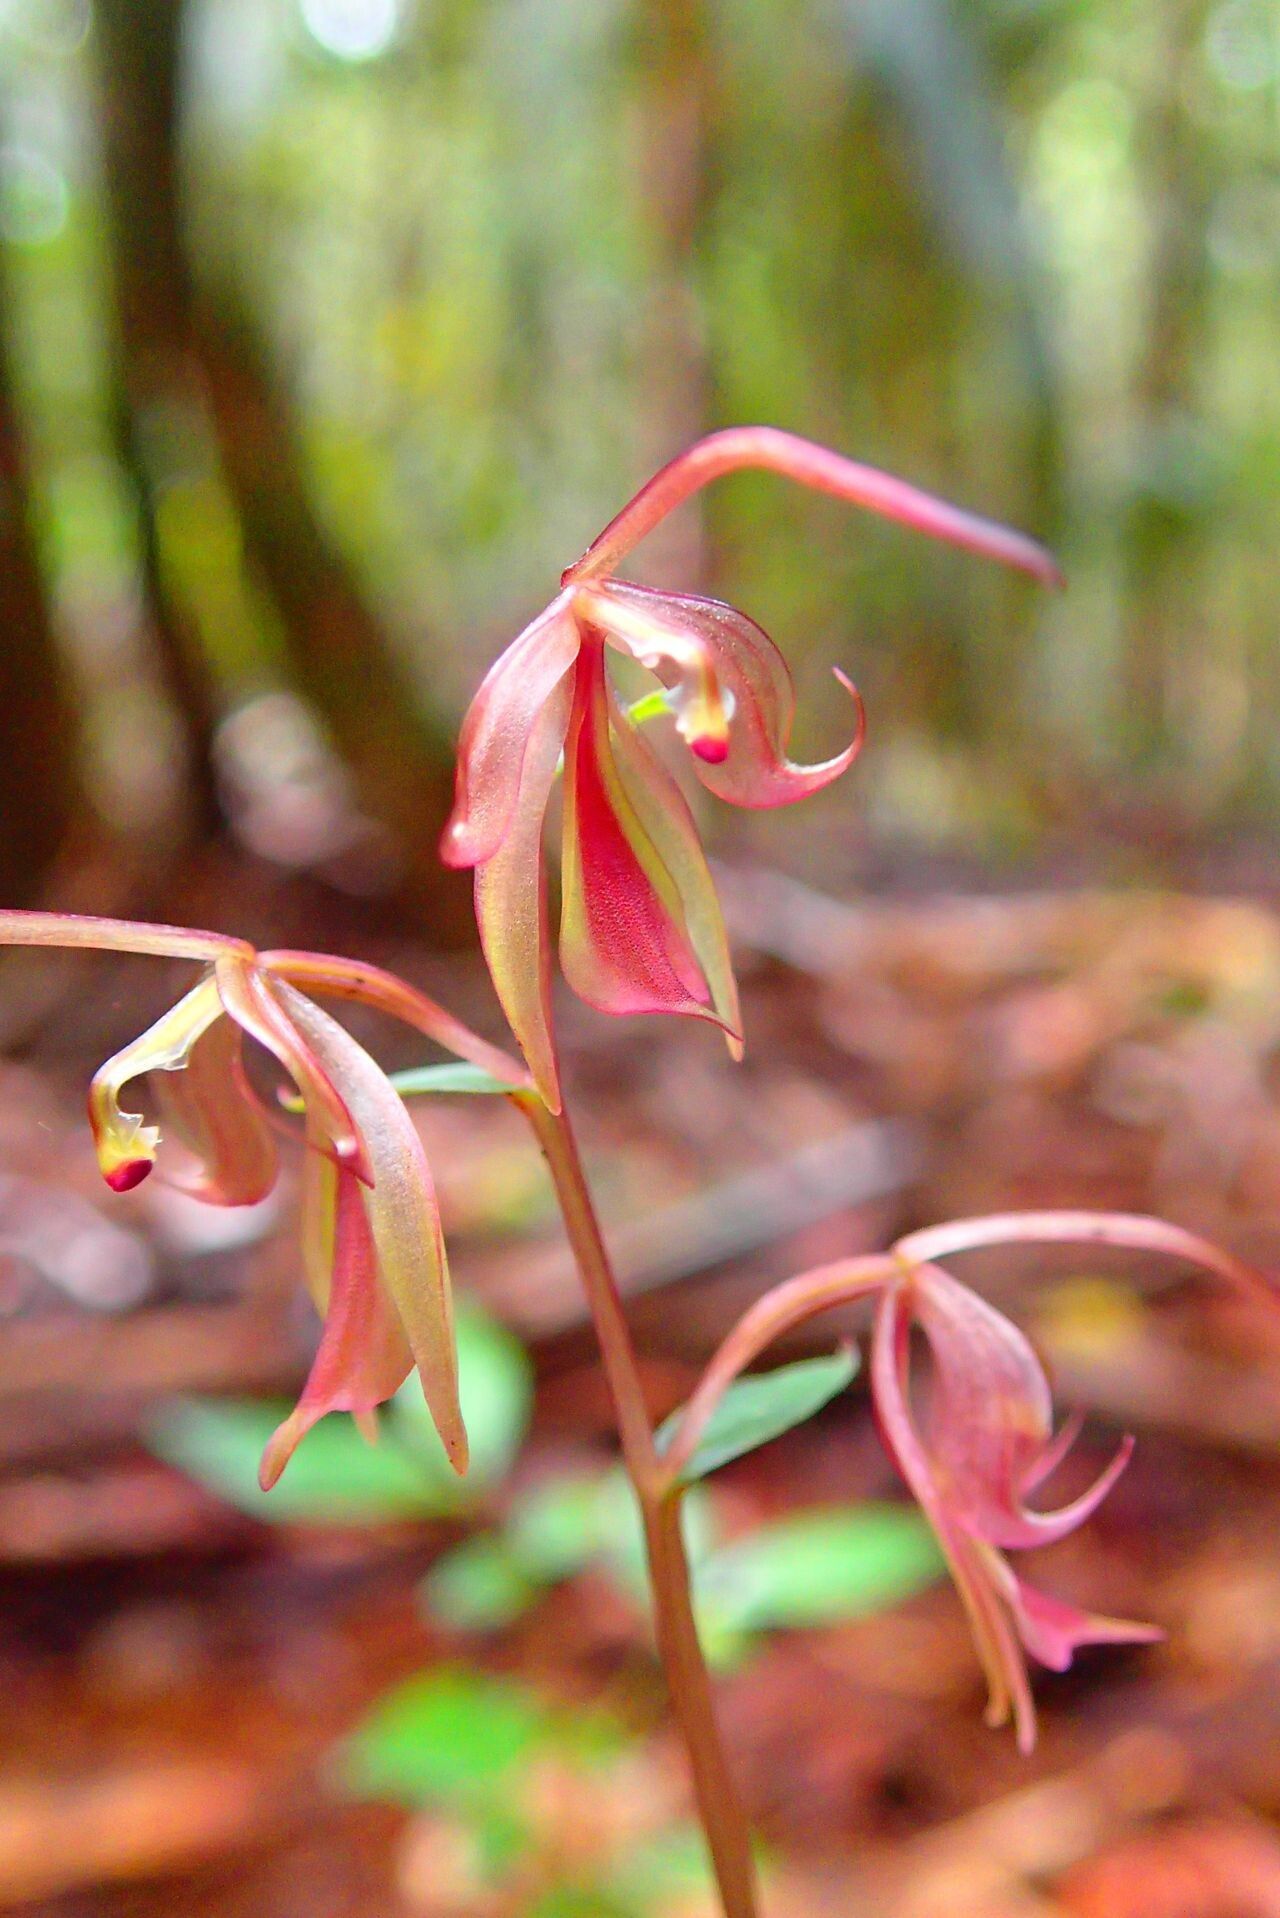
Oh, hello there! Grab a mug, let’s chat about one of my absolute favorite orchids: Stigmatodactylus cymbalariifolius. Isn’t she a gem? With those delicate, almost jewel-like flowers and charming foliage, she brings a touch of woodland magic to any space. And the best part? She can be surprisingly rewarding to propagate. Now, I’ll be honest, this little beauty isn’t quite a “stick it in the ground and forget it” kind of plant, but with a little attention, it’s a lovely challenge that will have you beaming with pride. Definitely one for the patient plant parent.
The Best Time to Start
For Stigmatodactylus cymbalariifolius, I’ve found the late spring to early summer is truly your golden window. This is when the plant is actively growing, energized from the brighter days and warmer temperatures. You’ll see new shoots emerging, and that’s your cue that she’s ready to share her bounty. Starting during her vigorous growth phase means she has the best chance of recovering quickly and sending out those healthy new roots.
Supplies You’ll Need
To get your propagation party started, here’s what you’ll want to have on hand:
- Sharp, sterile pruning shears or a razor blade: Cleanliness is key to preventing disease.
- Well-draining potting mix: I usually opt for a mix specifically for orchids, often with a good amount of bark, perlite, and sphagnum moss. You want it airy!
- Small pots or seedling trays: Something appropriately sized for the cuttings.
- Rooting hormone (optional but recommended): A gentle dip can give your cuttings a good head start. Look for one with a bit of fungicide in it.
- Humidity dome or plastic bag: To keep those little cuttings from drying out.
- Spray bottle: For gentle misting.
- A label and pen: To keep track of what you’ve propagated and when!
Propagation Methods
While Stigmatodactylus cymbalariifolius doesn’t readily produce offsets that can be simply divided like some other orchids, stem cuttings are your most reliable path. This is how we’ll tackle it:
- Identify the right stem: Look for a healthy, mature stem that has at least two to three pseudobulbs (the swollen sections) and ideally, a new growth beginning to emerge.
- Make the cut: Using your sterilized shears or razor blade, make a clean cut just below a pseudobulb. Try to get as close to the pseudobulb as you can without damaging it.
- Prepare the cutting: Gently remove any lower leaves that might rot if submerged. If you’re using rooting hormone, dip the cut end into the powder or liquid. Tap off any excess.
- Potting up: Fill your small pot with your prepared orchid mix. Make a small hole in the center and gently insert the cutting, ensuring the pseudobulbs are mostly covered by the mix. You want the nubs of any emerging roots to be in contact with the medium.
- Provide initial moisture: Water gently to settle the potting mix around the cutting.
The “Secret Sauce” (Pro Tips)
Now, for a few little tricks I’ve learned over the years that really make a difference:
- Don’t rush the water: My biggest piece of advice for this delicate orchid is to avoid letting the base of your cutting sit in standing water. The potting mix should be kept consistently moist, but never soggy. Overwatering is an express ticket to rot.
- Embrace the humidity tent: The key to success here is maintaining high humidity. Once you’ve potted your cuttings, pop them under a humidity dome or a clear plastic bag. Just make sure the plastic doesn’t touch the leaves – a few small stakes can help keep it lifted. Open it for a few minutes each day to allow for air circulation and prevent fungal issues.
- A gentle warmth is wonderful: If you have it, bottom heat can be a real game-changer. Placing your pots on a seedling heat mat set to a low temperature (around 70-75°F or 21-24°C) encourages root development. You’ll see results much faster!
Aftercare & Troubleshooting
Once you’ve potted your cuttings, patience is your best friend. Keep the soil consistently moist but not wet, and maintain that high humidity. You’re looking for signs of root growth, which can take several weeks to a couple of months. You might see tiny white nubs emerging from the pseudobulbs or pushing through the potting mix.
If you see yellowing leaves, wilting, or a mushy stem, those are signs of trouble. Usually, this points to too much moisture or not enough air circulation. If rot sets in, sadly, it’s often best to discard the infected cutting to prevent it from spreading. Don’t be discouraged if a few don’t make it – it’s all part of the learning process!
Happy Propagating!
So there you have it! Propagating Stigmatodactylus cymbalariifolius is a journey, not a race. Enjoy the process of nurturing these tiny new lives. With a little care and a lot of patience, you’ll soon be rewarded with your own little collection of these delightful orchids. Happy gardening!
Resource: