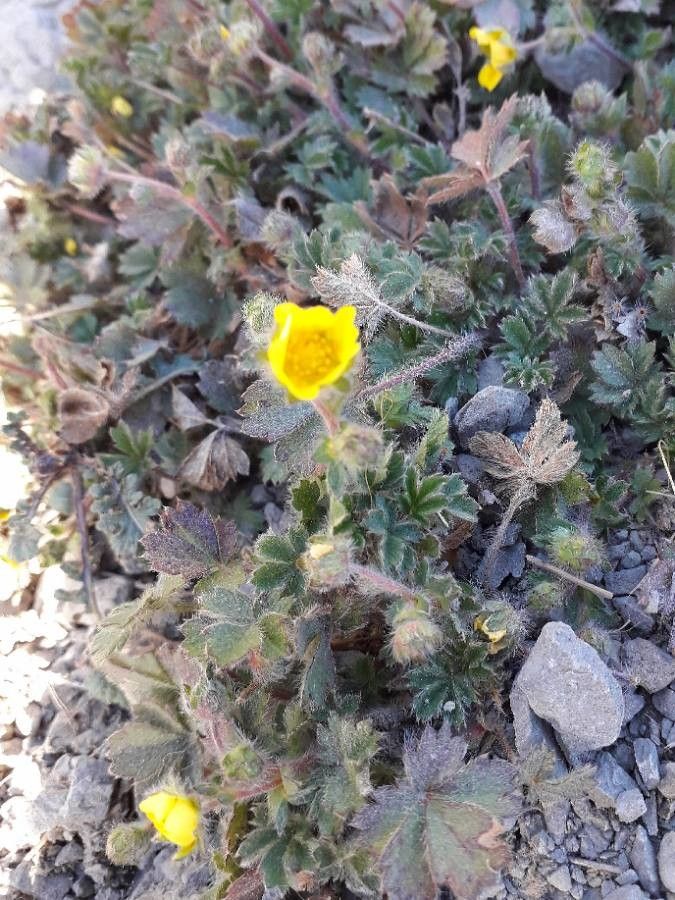
Hello, fellow garden enthusiasts! It’s so lovely to have you here. Today, we’re going to dive into the delightful world of Potentilla crantzii, a charming little plant that really deserves a spot in more gardens. Its delicate, often yellow, buttercup-like flowers bloom for ages, bringing a cheerful splash of sunshine. And the best part? You can easily multiply this joy yourself!
Why Propagate Potentilla Crantzii?
I find propagating Potentilla crantzii incredibly rewarding. It’s a fantastic way to fill out a border, share with friends, or simply experiment with growing your own plants from scratch – a truly fulfilling experience. For beginners, this one is a gentle introduction to propagation. It’s not overly fussy, which always makes me happy when I’m trying something new.
When is the Best Time to Start?
For the highest success rate, I always recommend starting your Potentilla propagation in late spring to early summer, right after the plant has finished its main flush of flowering. This is when the new growth is vigorous and has a good chance of establishing itself quickly. You can also try in early autumn, but spring is generally your best bet.
What You’ll Need
Gathering your supplies ahead of time makes the whole process run so much smoother. Here’s what I usually have on hand:
- Sharp pruning shears or a clean craft knife: For making clean cuts.
- Small pots or seedling trays: With good drainage holes.
- A well-draining potting mix: I like a blend of seed starting mix and perlite or horticultural grit. This ensures good aeration and prevents waterlogging.
- Rooting hormone (optional but recommended): This can give your cuttings a helpful boost. Look for one specifically for softwood or semi-hardwood cuttings.
- A watering can with a fine rose: To mist gently.
- A plastic bag or propagation dome: To create a humid environment.
- Labels: To keep track of what you’ve planted!
How to Propagate Potentilla Crantzii
There are a couple of fantastic ways to get more Potentillas. My favorite is stem cuttings, as it’s quite reliable.
Method 1: Stem Cuttings
- Take the Cuttings: On a mild day, select healthy, non-flowering stems from your mature Potentilla. Look for stems that are current season’s growth, usually a bit green and flexible but not floppy. Make a clean cut just below a leaf node (where a leaf attaches to the stem). You’re aiming for cuttings about 4-6 inches long.
- Prepare the Cuttings: Gently strip off the lower leaves, leaving just a couple at the very top. This prevents them from rotting when buried. If you’re using rooting hormone, dip the cut end into it now, tapping off any excess.
- Plant Them Up: Fill your small pots or trays with your prepared potting mix. Make a little hole with your finger or a pencil, and gently insert the cutting, ensuring the leaf nodes are below the soil surface. Firm the soil gently around the stem.
- Provide Humidity: Water the soil lightly and then cover the pots with a plastic bag or place them in a propagation dome. This creates a mini-greenhouse effect, keeping the humidity high, which is crucial for cuttings before they develop roots.
- Find a Good Spot: Place the pots in a bright spot, but out of direct sunlight, which can scorch the delicate cuttings. A warm location is beneficial.
Method 2: Division (Simpler for Established Plants)
If you have an established, overgrown Potentilla, division is a great option.
- Dig Them Up: In early spring or autumn, when the plant is dormant or just waking up, carefully dig around the plant to loosen it from the soil.
- Separate the Roots: Gently lift the entire clump out. You can often tease the root ball apart with your hands. If it’s a bit stubborn, use two forks back-to-back to separate sections, or a sharp spade for larger divisions.
- Replant: Make sure each division has a good portion of roots and some top growth. Replant them immediately into their new locations or pots, water well, and they should settle in beautifully.
The “Secret Sauce” (My Insider Tips)
Over the years, I’ve learned a few little tricks that can make a big difference.
- Bottom Heat is Your Friend: While not strictly essential for Potentilla, placing your cuttings on a heated propagator mat can significantly speed up root development. It mimics the warmth of summer soil and really gives them a kickstart.
- Don’t Drench, Mist: When you’ve potted up your cuttings, resist the urge to flood them. A good misting to start is usually enough. Then, only water when the top inch of soil feels dry, and always water gently. Overwatering is the quickest way to rot.
- Watch for the “Gingivitis”: This is a funny one, but when you’re checking your cuttings, if the stem near the soil line looks a bit swollen and pinkish, almost like early gum disease – that’s a sign of rot! It means it’s too wet, and you might need to pull it out, trim any soft rot away, let it dry for a bit, and replant into fresh, drier mix.
Aftercare and What to Look For
Once your Potentilla cuttings have started to grow, that’s a fantastic sign! You’ll know they’ve rooted when you see new leaf growth appearing.
- Acclimatize Gradually: When you see good new growth, you can start to gradually remove the plastic bag or propagation dome over a week or so. This helps them adjust to normal humidity levels before you remove it completely.
- Transplant Carefully: Once they have a decent root system (you can gently check by tugging – if there’s resistance, they’re rooted!), they’re ready to be transplanted into individual pots or their final garden spot.
Troubleshooting: The most common issue you’ll encounter is rot, usually caused by overwatering or poor drainage. If a cutting turns black and mushy, it’s unfortunately a goner. Don’t get discouraged! Sometimes it’s just a matter of trying again with better ventilation or a slightly drier schedule.
Grow On!
There you have it – a simple guide to propagating your very own Potentilla crantzii. Remember, gardening is all about patience and nurturing. Even if not every single cutting takes, the process itself is incredibly rewarding. Enjoy the journey, and soon you’ll have a whole garden full of these sunny little charmers! Happy planting!
Resource: