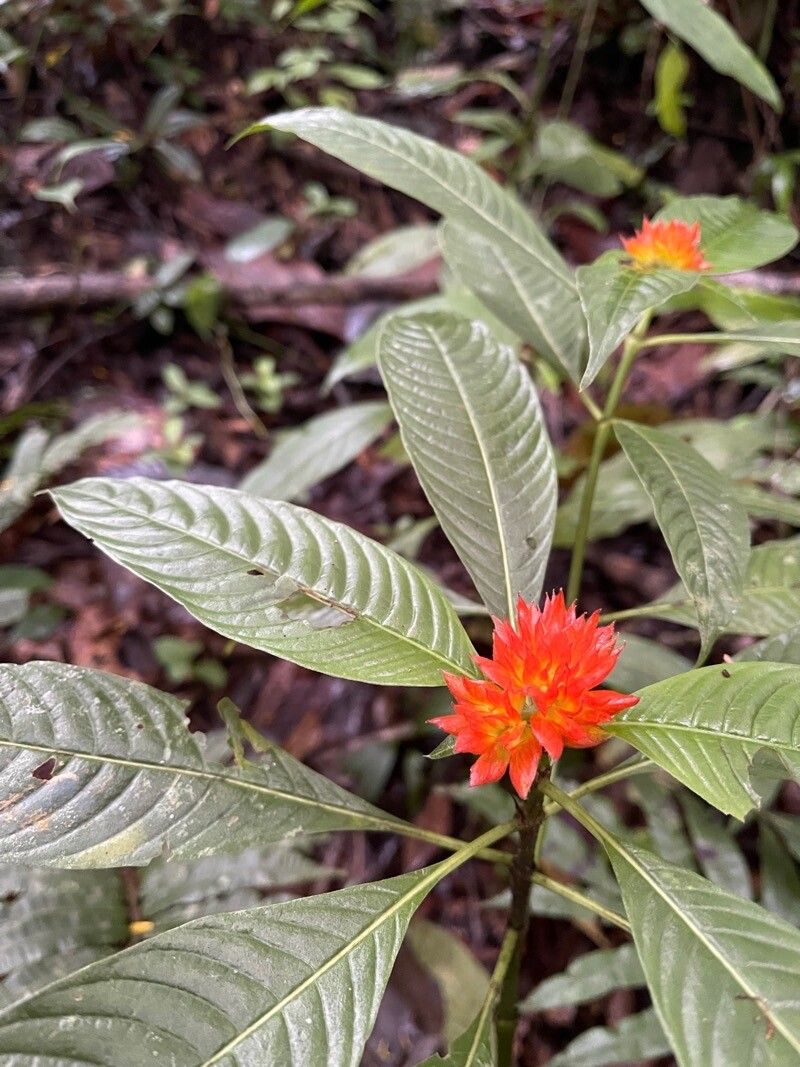
Oh, hello there! Pull up a chair and let’s chat about one of my absolute favorite garden gems: Palicourea aurantiibractea. You may know it by its common name, Orange-bracted Palicourea, and honestly, those vibrant, flame-colored bracts are just divine. They really bring a tropical flair and a joyful pop to any garden or even a bright, sunroom space. Growing your own from cuttings is such a wonderfully rewarding endeavor, a true testament to the magic of plant life. Now, I wouldn’t say this is a beginner’s plant right off the bat, as it can be a touch particular. But with a little patience and these tips, you’ll be well on your way!
The Best Time to Start
Timing is everything in gardening, and for Palicourea aurantiibractea, spring or early summer is your golden window. This is when the plant is actively growing, meaning it’s bursting with energy and much more receptive to producing roots. Look for stems that are mature but not woody – a semi-hardwood cutting is usually your best bet.
Supplies You’ll Need
Here’s what you’ll want to have on hand for a successful propagation session:
- Sharp, clean pruning shears or a sharp knife: Essential for making clean cuts that heal well.
- Rooting hormone: A good quality powder or gel will significantly boost your success rate.
- Well-draining potting mix: I like a blend of equal parts peat moss or coco coir, perlite, and a bit of coarse sand. This ensures good aeration and prevents soggy soil.
- Small pots or propagation trays: Clean pots are key to preventing disease.
- Plastic bags or a propagation dome: To create a humid environment for your cuttings.
- Watering can with a fine rose or spray bottle: For gentle watering.
- Labels or plant tags: To keep track of what you’ve rooted and when!
Propagation Methods: Stem Cuttings
This is my go-to method for Palicourea aurantiibractea, and I think you’ll find it effective too.
- Select Your Cuttings: Head out to your vibrant plant and look for healthy, non-flowering stems that are about 4-6 inches long. Gently cut them just below a leaf node. A leaf node is where a leaf attaches to the stem – this is where the magic happens and roots will emerge.
- Prepare the Cuttings: Using your clean shears, remove all but the top two to three leaves from your cutting. If the remaining leaves are large, you can trim them in half to reduce water loss.
- Apply Rooting Hormone: Dip the cut end of the stem into your chosen rooting hormone. Tap off any excess.
- Plant Your Cuttings: Fill your small pots with your prepared potting mix. Make a small hole in the center with your finger or a pencil. Insert the cutting into the hole, ensuring the hormone-dipped end is fully covered. Gently firm the soil around the stem.
- Water Gently: Water the soil thoroughly but very gently. You want it moist, not waterlogged.
- Create Humidity: Cover the pot with a clear plastic bag, propped up so it doesn’t touch the leaves, or place it under a propagation dome. This high humidity is crucial for cuttings to stay hydrated while they develop roots. Place the pot in a warm spot with bright, indirect light. Avoid direct sun, which can scorch the delicate cuttings.
The “Secret Sauce” (Pro Tips)
Now, for a couple of things I’ve learned over the years that make a real difference:
- The “Heel” Trick: Sometimes, if you can find a stem with a bit of older stem attached to it, almost like a tiny heel, these can root even more readily. It’s not always possible, but keep an eye out!
- Bottom Heat is Your Friend: If you have a propagation mat, placing your pots on top of it can significantly speed up root development. The warmth encourages the plant’s natural rooting hormones to kick in. Just make sure the heat isn’t so high that it dries out the soil too quickly.
Aftercare & Troubleshooting
Once you start to see signs of new growth – a tiny new leaf unfurling or a gentle tug on the cutting being met with resistance – you know your Palicourea is happy and making roots!
- Acclimatize: Gradually remove the plastic bag or dome over a week. Start by taking it off for a few hours a day, then longer periods. This helps the new plant adjust to normal household humidity.
- Watering: Water when the top inch of soil feels dry. Continue to keep it in bright, indirect light.
- Signs of Trouble: The most common issue is rot. If your cutting turns black and mushy, it’s a sign of too much moisture and not enough air circulation. Unfortunately, a rotted cutting usually can’t be saved. Another sign of distress is yellowing leaves that aren’t explained by the natural shedding of older leaves – this might indicate inconsistent watering or a lack of light.
A Little Patience Goes a Long Way
Propagating plants is a beautiful dance with nature, and sometimes it takes a little longer than we expect. Don’t get discouraged if your first few try don’t make it. Each attempt is a learning experience, and the joy of seeing those tiny roots develop and eventually seeing your new Palicourea aurantiibractea flourishing is incredibly satisfying. Happy propagating, my friends!
Resource: