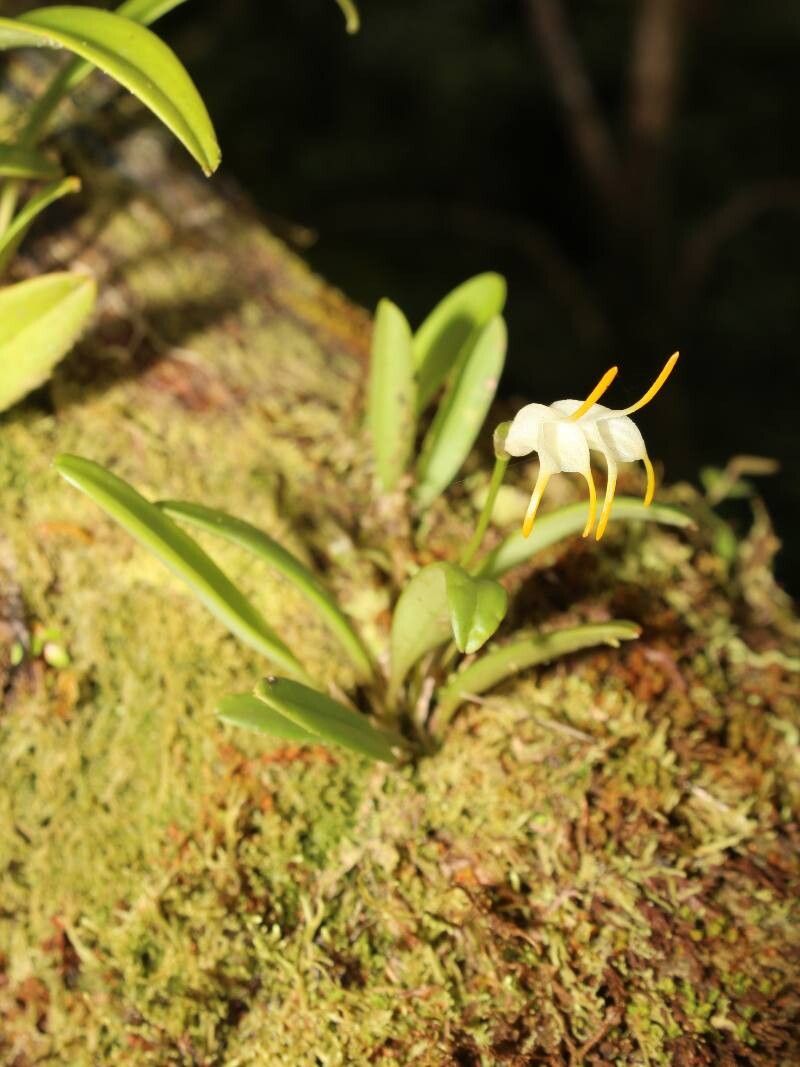
Oh, Masdevallia chontalensis! If you’ve ever admired those intricate, often jewel-toned blooms that seem to dance on delicate stems, you’re not alone. This little orchid is a true charmer, and successfully propagating it is a deeply satisfying journey. While it might sound a bit intimidating, especially if you’re new to the orchid world, I’ve found chontalensis to be reasonably cooperative once you understand its gentle needs. It’s a wonderful plant to start your orchid propagation adventure with.
The Best Time to Start
For Masdevallia chontalensis, the spring or early summer is generally your best bet. This is when the plant is actively growing and has the most energy reserves to dedicate to new growth. You’ll often see fresh leaves or flower spikes emerging around this time, which signals the plant is ready to unfurl some new life for you.
Supplies You’ll Need
Here’s what I always have on hand:
- Sharp, sterile pruners or a sharp knife. Cleanliness is key to prevent fungal infections.
- Orchid bark mix. A good quality, well-draining mix is vital. I often use a blend of medium-grade bark with a bit of perlite for added aeration.
- Sphagnum moss. For retaining just the right amount of moisture.
- Small pots or seed trays. Terracotta pots are lovely as they breathe, but clean plastic ones work well too.
- Hormone rooting powder (optional, but helpful). For a little extra encouragement.
- Watering can with a fine spray. Gentle watering is essential.
- Clear plastic bags or a humidity dome. To create a humid environment for cuttings.
- Labels and a permanent marker. So you don’t forget what you’ve propagated!
Propagation Methods
The most reliable way I’ve found to propagate Masdevallia chontalensis is through division. It’s a straightforward method that usually yields great results.
Division:
- Gently remove the mother plant from its pot. If it’s really stuck, a little gentle persuasion might be needed. You can tap the sides of the pot or even carefully run a knife around the edge.
- Clean off as much of the old potting mix as you can from the roots, being careful not to damage them. This gives you a clearer view of the pseudobulbs and their natural divisions.
- Look for natural breaks in the rhizome (the creeping stem that connects the pseudobulbs). You’ll want to divide your plant into sections, with each section having at least two to three healthy pseudobulbs and a good root system.
- Using your sterile pruners or knife, carefully cut through the rhizome to separate the divisions. Make sure your tool is sharp and clean to minimize trauma.
- Treat any cut surfaces with a fungicide or even a sprinkle of cinnamon, which has natural antifungal properties. This is a good preventative step.
- Pot each division into its own small pot filled with your orchid mix. Make sure the pseudobulbs are sitting just at the surface of the media, not buried too deeply.
- Water lightly after potting. You don’t want to drown your newly divided plants.
The “Secret Sauce” (Pro Tips)
Here are a couple of things I’ve learned over the years that make a difference:
- Don’t overwater divisions right away. It’s tempting to drench them, but newly divided orchids are a bit sensitive. It’s better to keep the potting mix evenly moist, but not soggy. Think of it like giving them a comforting drink, not a bath.
- Provide consistent humidity. Masdevallias love a humid environment. After dividing, place the potted divisions in a tray with pebbles and water, or pop them into a clear plastic bag with a few air holes. This creates a microclimate that encourages root development without drying out.
Aftercare & Troubleshooting
Once your divisions are potted, keep them in bright, indirect light and maintain that consistent humidity. You should start to see new root growth within a few weeks to a couple of months. When you see new roots clearly forming, you can gradually reduce the humidity and begin a very diluted orchid fertilizer.
The most common sign of trouble is rot. If you see yellowing leaves that quickly turn mushy, or if the pseudobulbs start to look shriveled and soft, it’s often a sign of overwatering or poor air circulation. If you suspect rot, carefully unpot the plant and examine the roots. Trim away any black, mushy parts with your sterile pruners and repot in fresh, dry mix. Sometimes, that’s all it takes to save a struggling division.
A Encouraging Closing
Propagating orchids can feel like a bit of magic, and with Masdevallia chontalensis, it truly is. Be patient with your new divisions. They’re working hard to establish themselves, and a little TLC goes a long way. Enjoy the process, celebrate each new root and leaf, and before you know it, you’ll have more of these beauties to share or simply to admire yourself. Happy growing!
Resource:
https://identify.plantnet.org/k-world-flora/species/Masdevallia%20chontalensis%20Rchb.f./data