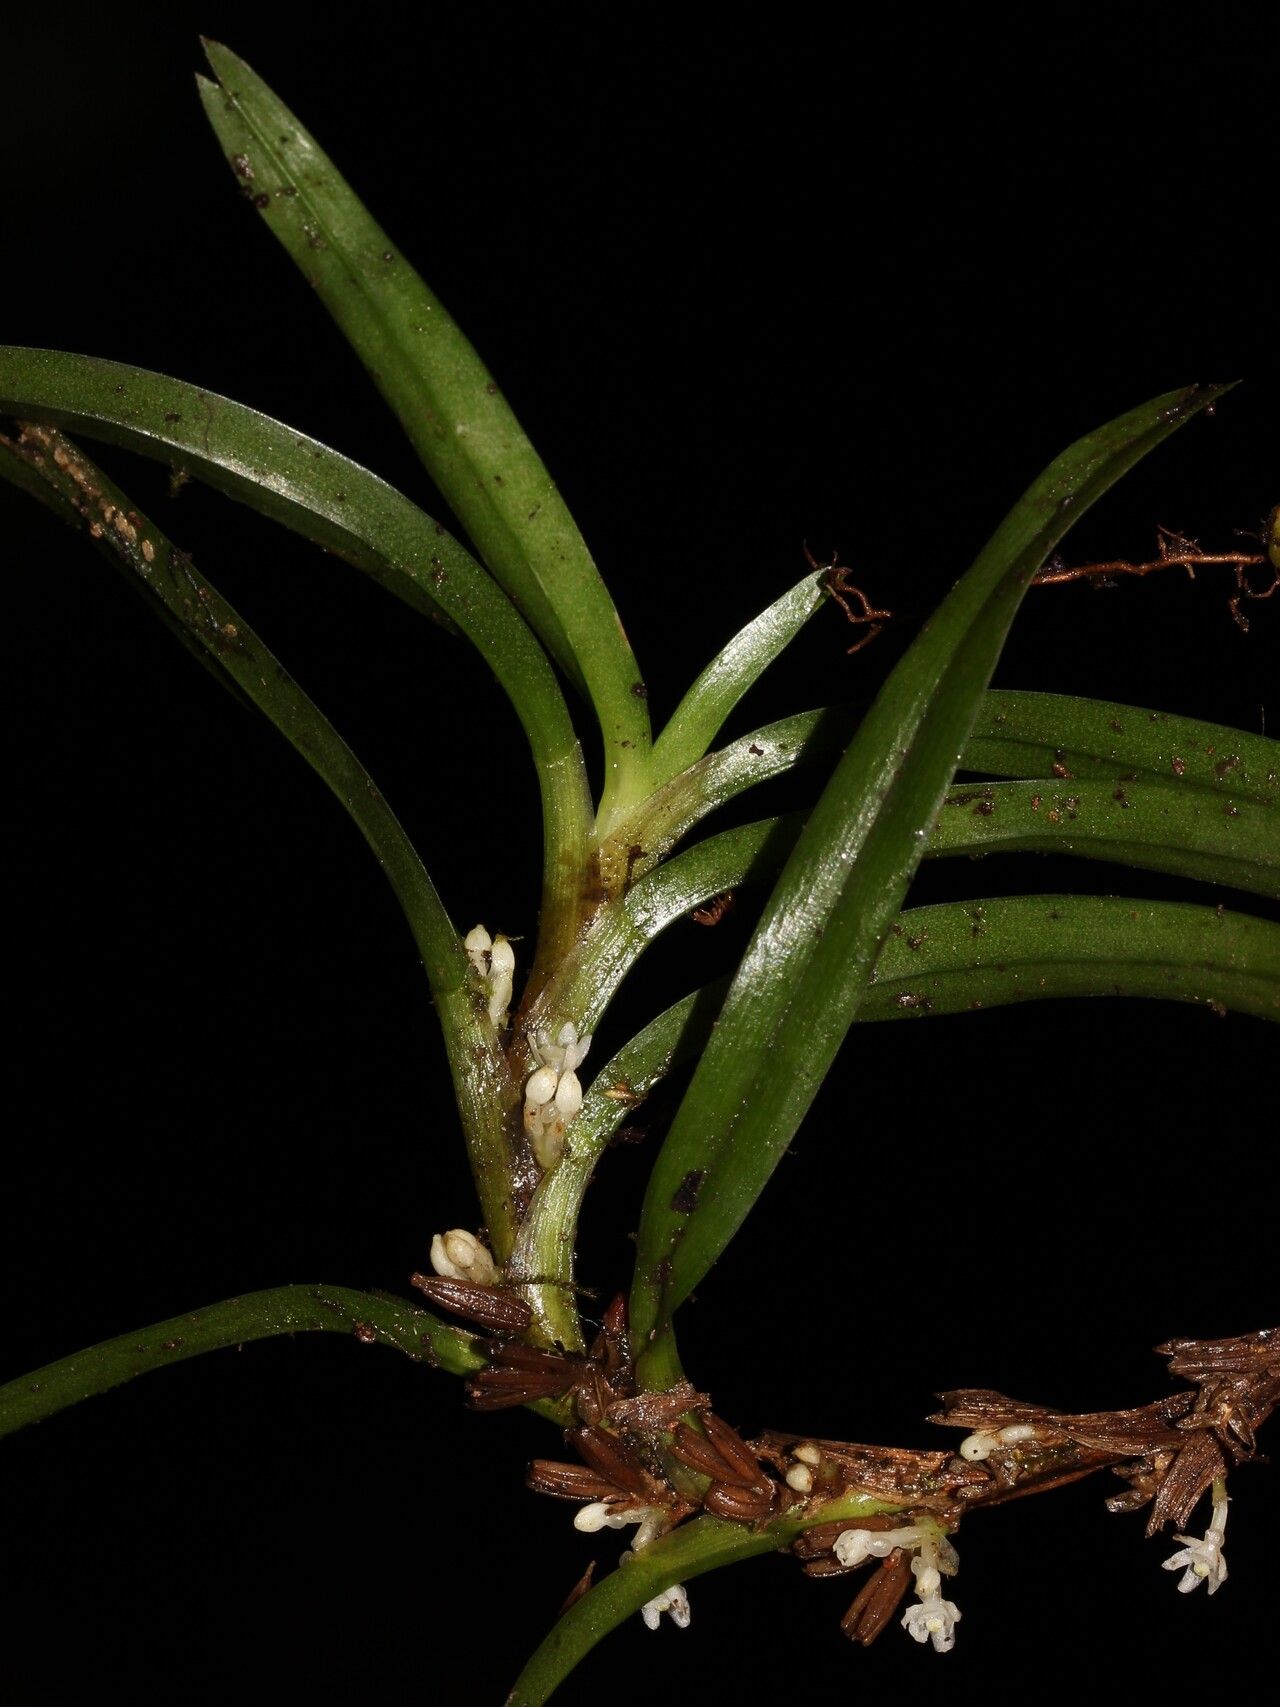
Oh, Ancistrorhynchus tenuicaulis! If you’ve ever admired its delicate, ethereal charm, its cascading leaves that shimmer just so, you’re not alone. This orchid is a real showstopper, and the joy of coaxing a new life from an existing plant is truly something special. Now, about getting started. If you’re new to orchid propagation, this one might be a little bit of a challenge, but absolutely doable with a bit of patience and the right approach. Think of it as a rewarding puzzle!
The Best Time to Start
For Ancistrorhynchus tenuicaulis, the absolute sweet spot for propagation is generally late spring to early summer. This is when the plant is in its active growing season. You’ll see new growths emerging, and that’s precisely what we want to work with. Trying to propagate when the plant is resting will likely lead to disappointment.
Supplies You’ll Need
Here’s what I’ve found works best:
- Sharp, sterile pruning shears or a razor blade: Cleanliness is key to preventing disease.
- Orchid-specific propagation mix: This is usually a blend of bark, perlite, and maybe some charcoal. It needs to be airy and drain exceptionally well.
- Small pots or community trays: Enough to give your new cuttings some space.
- Rooting hormone (optional but recommended): A product like Clonex or a general rooting powder can give your cuttings a significant boost.
- Clear plastic bag or propagator: To create a humid microclimate for your cuttings.
- Spray bottle with filtered or distilled water: For misting.
- Sphagnum moss (optional): For certain propagation methods, it can be a great tool.
Propagation Methods
Let’s dive into how we can multiply our beloved Ancistrorhynchus tenuicaulis. For this particular orchid, division is often the most straightforward and successful method.
Division: The Gentle Approach
This is how I usually tackle it, especially with more mature plants.
- Gently remove the orchid from its pot. Be thorough but kind; we don’t want to damage the roots.
- Inspect the root system. Look for natural breaks where the plant can be divided into sections. Each section should ideally have at least two to three healthy pseudobulbs and a good root system attached.
- Using your sterile shears or razor blade, carefully separate the sections. If there are a lot of intertwined roots, you might need to gently tease them apart with your fingers or a chopstick.
- Trim away any dead or mushy roots, always using clean tools.
- Pot each division into its own small pot with fresh orchid mix, ensuring the base of the plant is at the soil line.
- Water lightly after potting, just enough to settle the mix.
Stem Cuttings (for the Adventurous!)
This is a bit more advanced, but it can be rewarding if you have a vigorous plant.
- Identify a healthy, mature stem that has a new growth emerging from its base.
- Using sterile shears, cut the stem about an inch below the new growth, making sure to include the base of that growth.
- Remove any lower leaves to expose the node where the growth is emerging.
- Dip the cut end into rooting hormone, if you’re using it, tapping off any excess.
- Place the cutting into a pot filled with your orchid propagation mix. You want the base of the new growth to be just at the surface.
- Mist the cutting lightly and place it into a propagator or cover with a clear plastic bag.
The “Secret Sauce” (Pro Tips)
Here are a few nudges from my experience that can make all the difference:
- Don’t rush the roots. For stem cuttings placed in mix, allow them to establish before you even think about repotting. I usually wait until I see new leaf growth on the cutting, which is a sign that roots are forming.
- Humidity is your best friend. Ancistrorhynchus tenuicaulis loves a moist environment, especially when trying to root. Maintaining high humidity under a plastic bag or in a propagator is crucial for cuttings. Just be sure to “air out” your propagator daily for a few minutes to prevent fungal issues.
- Bottom heat can work wonders. If you have a seedling heat mat, placing your pots or trays on it can significantly speed up root development for cuttings, mimicking the warmth of tropical climes.
Aftercare & Troubleshooting
Once your division or cutting shows signs of life – new roots, new leaf – it’s time for slightly more involved care.
- Watering: Water when the potting mix is just starting to dry out. Don’t let it sit in soggy conditions, as this is a fast track to root rot.
- Light: Provide bright, indirect light. Avoid direct sun, which can scorch delicate new growth.
- Humidity: Continue to maintain good humidity levels.
- Fertilizing: Once you see consistent new growth, you can start feeding with a diluted orchid fertilizer (about quarter strength) every other watering.
Now, the dreaded rot. If you see mushy, dark roots, or blackened stems, that’s rot. Usually, this is a sign of too much moisture and not enough air circulation. If you catch it early, you might be able to trim away the affected parts with sterile tools and repot into dry, fresh mix. Sometimes, sadly, a cutting that goes mushy is beyond saving. Don’t be discouraged if this happens; it’s part of the learning curve!
A Little Patience Goes a Long Way
Propagating orchids is a journey, not a race. Some divisions will take off with gusto, while others might be a bit slower to establish. The most important thing is to observe your plant, adjust your care as needed, and celebrate every tiny sign of progress. Enjoy the process, and soon you’ll have plenty of beautiful Ancistrorhynchus tenuicaulis to admire!
Resource:
https://identify.plantnet.org/k-world-flora/species/Ancistrorhynchus%20tenuicaulis%20Summerh./data