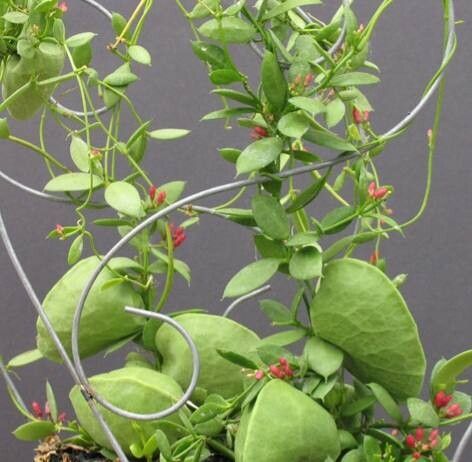
Oh, Dischidia vidalii! It’s one of those plants that just whispers “tropical jungle” wherever it goes. With its quirky, succulent-like leaves that often form little pockets, it’s a fascinating specimen to watch grow. And let me tell you, propagating it is like unlocking a little magic trick. It’s honestly quite doable for most folks, even if you’re just dipping your toes into the world of plant propagation. The reward of seeing a tiny piece of your beloved plant transform into a whole new organism is just… chef’s kiss.
The Best Time to Start
When I’m looking to get new Dischidia vidalii plants going, I always aim for the heart of its growing season. That’s generally late spring through summer. The plant is actively putting out new growth and has plenty of energy to spare for rooting. Trying to propagate in the dead of winter is like asking a napping bear to run a marathon – it’s just not going to happen with the same enthusiasm.
Supplies You’ll Need
Gathering your tools beforehand makes the whole process so much smoother. Here’s what I usually have on hand:
- Sharp Pruning Shears or Scissors: Clean cuts are key!
- Potting Mix: A well-draining mix is crucial. I love a blend of perlite, coco coir, and a bit of orchid bark. You can also use a cactus and succulent mix straight out of the bag.
- Small Pots or Seedling Trays: With drainage holes, of course.
- Rooting Hormone (Optional but Recommended): A powder or gel will give your cuttings a helpful boost.
- Plastic Bag or Humidity Dome: To create that humid environment.
- Watering Can or Spray Bottle: Gentle watering is essential.
Propagation Methods
Dischidia vidalii is pretty generous with its propagation methods. Here are a couple of my go-to techniques:
Stem Cuttings
This is by far the most common and effective way to propagate Dischidia vidalii.
- Find a healthy stem: Look for a piece of stem that has at least two or three sets of leaves.
- Make a clean cut: Using your sharp shears, cut just below a leaf node. This is the point where a leaf attaches to the stem, and it’s where roots are most likely to form. Aim for cuttings that are about 4-6 inches long.
- Prepare the cutting: Gently remove the bottom one or two leaves so you have a bare stem section. This will help prevent rot and makes it easier to place the cutting in the soil.
- Apply rooting hormone (optional): Dip the cut end into your rooting hormone, tapping off any excess.
- Plant the cutting: Fill your small pot with your well-draining potting mix. Tuck the cut end of the stem into the soil, making sure at least one leaf node is below the surface. You can plant a few cuttings in the same pot, giving them a little space.
- Water gently: Give the soil a light watering. You want it to be moist but not soggy.
- Create humidity: Cover the pot with a plastic bag or a humidity dome. This keeps the moisture in and helps the cutting stay hydrated while it roots. Place it in a bright spot with indirect light.
Water Propagation
This method is visually satisfying as you can watch the roots develop!
- Take cuttings: Follow steps 1 and 2 for stem cuttings.
- Remove lower leaves: Just like with soil propagation, remove the lowest leaves.
- Place in water: Put the cuttings in a jar or glass of water. Make sure that only the bare stem is submerged; keep the leaves above the waterline. This is super important to prevent rot.
- Change water regularly: Refresh the water every few days to keep it clean and oxygenated. Place the jar in bright, indirect light.
- Watch for roots! You should start seeing tiny white roots emerge from the nodes within a few weeks. Once the roots are about an inch long, you can carefully transplant them into potting mix using the steps in the “Aftercare” section.
The “Secret Sauce” (Pro Tips)
Here are a couple of little tricks I’ve learned over the years that really make a difference:
- Don’t let the leaves touch the water: I know I mentioned this for water propagation, but it’s worth repeating! Any part of the leaf submerged in water is an open invitation for rot, and that’s the last thing we want.
- Bottom heat is your friend: If you have a seedling heat mat, placing your pots on it can significantly speed up rooting. It mimics the warmth of spring soil and encourages those new roots to emerge faster.
Aftercare & Troubleshooting
Once your cuttings have developed strong roots (you’ll feel a gentle tug when you try to lift them, or you’ll see roots growing out of the drainage holes), it’s time for them to become independent little plants.
- Transitioning to soil: If you water-propagated, carefully pot up your rooted cuttings into your well-draining potting mix. Water them in gently.
- Continue care: Keep the new plants in bright, indirect light and water when the top inch of soil feels dry. They’re still getting established, so avoid overwatering.
- Signs of trouble: The most common culprit for failure is rot. If your cutting turns mushy, black, or smells funny, it’s likely rotten. This is often due to too much moisture and poor drainage. If you see this, unfortunately, it’s best to discard the affected cutting and start fresh, perhaps with slightly less water or a quicker-draining mix. Yellowing leaves on a cutting that hasn’t rooted yet can also indicate it’s not getting enough light or is getting too much water.
A Encouraging Closing
So there you have it! Propagating Dischidia vidalii is a wonderful way to expand your collection and share the beauty of this unique plant. Be patient, observe your little cuttings, and don’t be discouraged if a few don’t make it – it’s all part of the learning process. Enjoy watching them grow!
Resource:
https://identify.plantnet.org/k-world-flora/species/Dischidia%20vidalii%20Becc./data