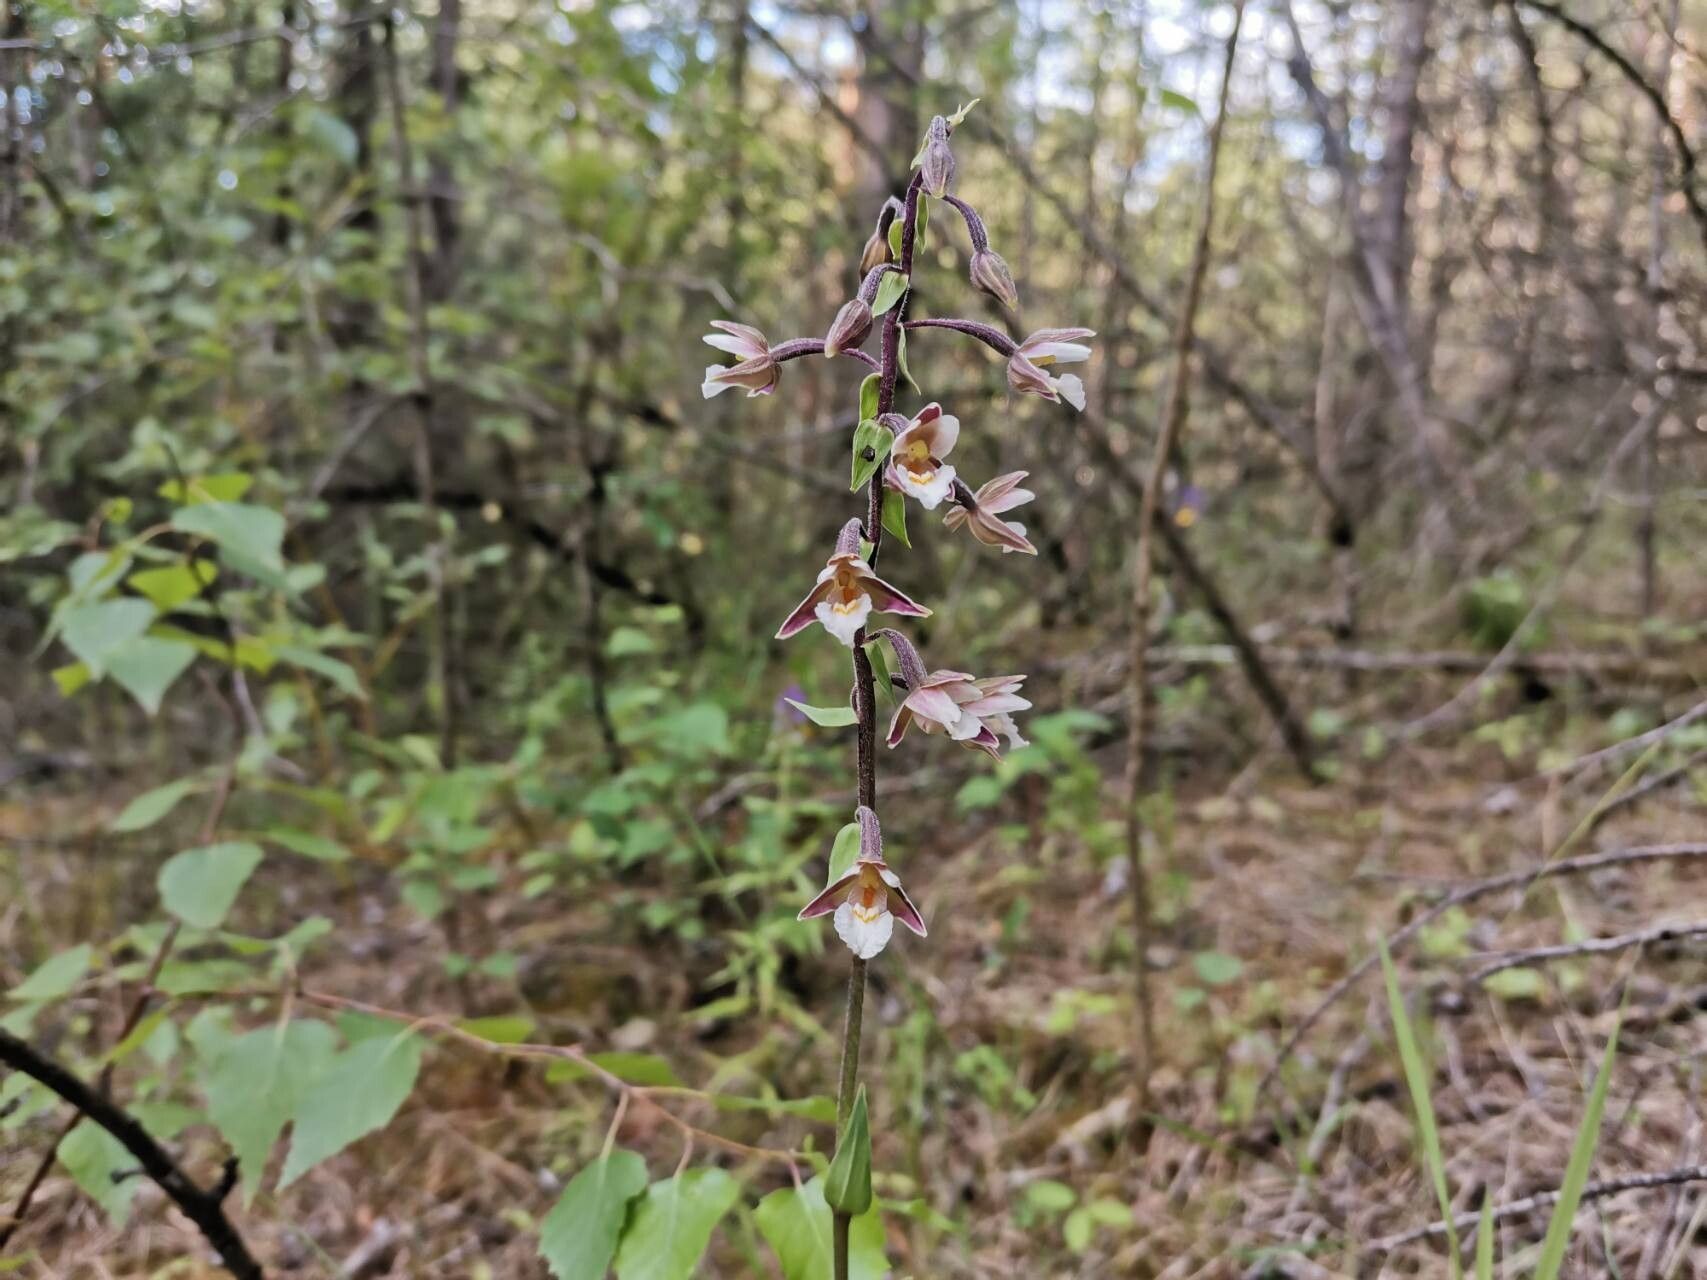
Ah, the Marsh Helleborine, Epipramis palustris. What a beauty! I remember the first time I saw one in bloom, its delicate, intricate flowers looking like tiny feathered dancers in the dappled light. It’s a truly special orchid, a real treasure for any garden. Propagating these beauties is a journey, and while it might not be the absolute easiest plant to start with, the reward of seeing a new little helleborine sprout and thrive is absolutely worth the effort.
The Best Time to Start
For Epipramis palustris, the sweet spot for propagation is really late spring to early summer. This is when the plant is actively growing, full of vigor, and has the energy reserves to put into developing new roots. You’ll want to be working with healthy, established plants.
Supplies You’ll Need
Gathering your tools is half the fun, right? Here’s what you’ll want to have on hand:
- Sharp, sterile pruning shears or a clean knife: For making precise cuts.
- A well-draining potting mix: I usually blend equal parts peat moss, perlite, and horticultural charcoal. Some growers like to add a bit of orchid bark too.
- Small pots or propagation trays: With good drainage holes, of course.
- Watering can with a fine rose: To avoid disturbing delicate new roots.
- Rooting hormone (optional but helpful): A powdered or gel form can give cuttings a boost.
- Plastic bags or a propagation dome: To maintain humidity.
- Labels: To keep track of what you’ve propagated!
Propagation Methods
While Epipramis palustris can be a bit finicky, I’ve found success with a couple of methods.
Division
This is often the most reliable way to go for established clumps.
- Gently excavate: In late spring, carefully dig up your Epipramis palustris plant. Try to disturb the roots as little as possible.
- Inspect and divide: Look for where the rhizome is naturally dividing. Using your sterile knife or shears, carefully cut through the rhizome to separate healthy sections. Each division should have at least one growing point (a bud or new shoot) and a good portion of the root system.
- Potting up: Plant each division into its own pot, using your well-draining mix. Ensure the top of the rhizome is just at or slightly below the surface.
- Water gently: Water thoroughly to settle the soil, but avoid waterlogging.
Stem Cuttings (More Challenging)
This method requires a bit more patience and a keen eye.
- Select a healthy stem: From a mature plant, choose a non-flowering stem that has at least a couple of nodes (where leaves emerge).
- Make the cut: Using your sterile shears, cut the stem below a node. Aim for a cutting that’s about 4-6 inches long.
- Prepare the cutting: Remove the lower leaves, leaving just one or two at the top. If you’re using rooting hormone, dip the cut end into it.
- Planting: Insert the cut end into your propagation mix, making sure the node is buried.
- Create a humid environment: Cover the pot with a plastic bag or place it under a propagation dome to trap humidity.
The “Secret Sauce” (Pro Tips)
Over the years, I’ve learned a few things that can make a difference.
- Don’t rush the dust: If you’re dividing, avoid the temptation to wash all the soil off the roots. Those little mycorrhizal fungi living on the roots are crucial for orchids. Let them do their work!
- A little warmth helps: For stem cuttings, placing them on a gentle heat mat can significantly speed up root development. Not scorching heat, mind you, just a consistent, mild warmth.
- Air is key: While humidity is important, stale, stagnant air is the enemy. Make sure to lightly ventilate your propagation area daily to prevent fungal issues.
Aftercare & Troubleshooting
Once you’ve potted up your divisions or cuttings, the real nurturing begins.
Keep the pots in a bright spot, but avoid direct, harsh sunlight. Water when the top inch of the soil feels dry to the touch. You want consistently moist, but not waterlogged, conditions. Be patient – new root development can take weeks or even months.
The most common sign of trouble is rot, which usually shows up as mushy, discolored stems or roots. This is almost always a sign of overwatering or poor drainage. If you see this, it’s tough, but it’s best to discard affected material to prevent it from spreading.
A Little Patience, A Lot of Joy
Propagating Epipramis palustris is a bit of a dance with nature, and perfection isn’t always the goal. It’s about learning, observing, and gently coaxing life. Don’t be discouraged if your first attempts aren’t perfect. Keep at it, enjoy the process, and soon you’ll be rewarded with your very own patches of these exquisite marsh orchids. Happy gardening!
Resource:
https://identify.plantnet.org/k-world-flora/species/Epipactis%20palustris%20(L.)%20Crantz/data