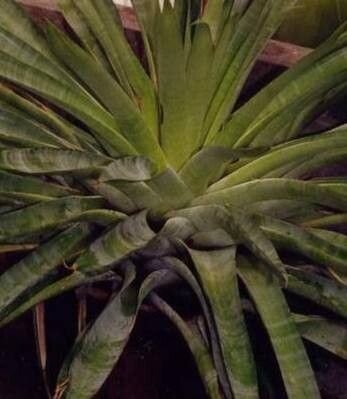
Hello fellow plant enthusiasts! Today, we’re diving into the wonderful world of Alcantarea glaziouana. If you’ve ever seen one of these magnificent bromeliads gracing a garden, you know their appeal is undeniable. With their dramatic, architectural form and often stunning silvery foliage, they truly are showstoppers. And the best part? You can grow your own! Propagating them is incredibly rewarding, giving you the joy of seeing new life emerge from a plant you already cherish. Now, I won’t sugarcoat it – Alcantareas can be a little more of a project than a standard houseplant, but for those willing to put in a bit of effort, the rewards are immense.
The Best Time to Start
For Alcantareas, the absolute best time to think about propagation is when the plant is actively growing. This typically falls in late spring through summer. You’ll want to wait until your mature plant has produced offsets (pups) or is looking robust and ready to put out new energy. Trying to divide or take cuttings when the plant is dormant in winter is a recipe for disappointment; it just won’t have the vigor to establish.
Supplies You’ll Need
Gathering your supplies beforehand makes the whole process smoother. Here’s what I always have on hand:
- Sharp, sterile pruning shears or a clean knife: For making clean cuts.
- A well-draining potting mix: I usually use a blend of cactus/succulent mix, perlite, and a sprinkle of coarse sand. Alcantareas absolutely hate sitting in soggy soil.
- Rooting hormone (optional but recommended): This gives your cuttings a little boost.
- Small pots or trays: For your new little plant babies.
- Watering can with a fine rose: For gentle watering.
- Labels and a marker: To keep track of what you’ve propagated and when!
Propagation Methods
Alcantareas are most commonly propagated through offsets (pups). They naturally produce these little baby plants around their base.
- Identify the Offsets: Look for smaller plants growing directly from the base of your mature Alcantarea. They’ll often have their own tiny leaves.
- Wait for Size: It’s best to wait until the offset is a decent size, at least a quarter to a third the size of the mother plant. This gives it a better chance of survival and less stress on the parent.
- Carefully Remove the Offset: This is where your sharp, sterile shears come in. Gently firm the soil around the base of the offset if needed. Locate where the offset attaches to the mother plant. Make a clean cut as close to the parent as you can without damaging it too much. You want to get as much of the offset’s base as possible, ideally with a little bit of root attached.
- Allow to Callus: This is crucial! After you’ve removed the offset, do not plant it immediately. Place it in a dry, shaded spot for a few days (3-7 days is usually good). This allows the cut end to dry out and form a protective callus. This step is your best defense against rot.
- Planting: Once callused, you can plant your offset. Use your well-draining potting mix in your small pot. Plant the offset just deep enough so it stands upright, burying the callused base slightly. Don’t pack the soil too tightly; you want air circulation.
The “Secret Sauce” (Pro Tips)
- Let the Offset Do Its Thing: When you plant the offset, resist the urge to water it immediately. Wait a week or two. Let it settle in and encourage it to start searching for moisture with its developing roots. When you do water, water gently around the base – avoid getting water trapped in the rosette of the leaves.
- Bottom Heat is Your Friend: If you’re propagating during a cooler period or live in a cooler climate, consider using a heat mat under your pots. Bromeliads love warmth, and consistent bottom heat really encourages root development.
- Don’t Overcrowd: When planting offsets, give them a little breathing room. If the leaves of the offset are constantly touching damp soil, they are more prone to rot.
Aftercare & Troubleshooting
Once your offset is planted and you’ve started a gentle watering schedule, patience is key! You might not see much happening on top for several weeks, but that’s okay. Roots are developing below the surface. You’ll know it’s starting to take hold when you see new leaf growth emerging from the center.
The most common problem you’ll encounter is rot. This usually happens if the plant is kept too wet, especially before it has established roots, or if the cut end didn’t callus properly. Signs of rot include mushy, discolored leaf bases or a strong, unpleasant odor. If you see this, gently remove the affected offset. If it’s beyond saving, compost it and try again with a carefully prepared cutting.
Your Green Thumb Awaits!
Propagating Alcantarea glaziouana might take a little patience and a keen eye for what your plant needs, but I promise, it’s so worth it. Seeing those tiny pups grow into magnificent specimens is a gardener’s dream. So, pick a sunny day, gather your tools, and give it a go. Happy propagating!
Resource:
https://identify.plantnet.org/k-world-flora/species/Alcantarea%20glaziouana%20(Lem.)%20Leme/data