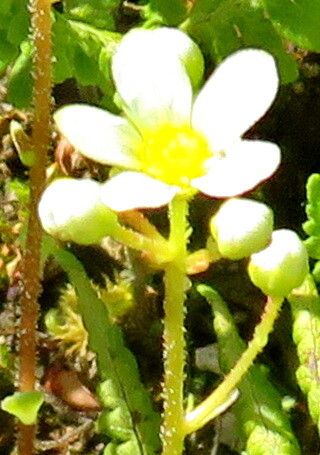
Hello there, fellow garden enthusiasts! It’s so lovely to have you over for a virtual cup of coffee and a chat about a truly delightful plant: Saxifraga conifera. If you’ve ever seen this little beauty, you know why it captures our hearts. Those rosettes of sturdy, often silvery leaves, sprinkled with delicate, star-like flowers, especially in spring – it’s just magical! Propagating them feels like unlocking a little bit of that magic for yourself, and it’s a journey I find incredibly rewarding. Now, are they a walk in the park for absolute beginners? I’d say they’re moderately easy. A little care and attention go a long way, but with these tips, you’ll be a pro in no time.
The Best Time to Start
My absolute favorite time to get my hands dirty with Saxifraga conifera propagation is in early to mid-spring. This is when the plant is actively growing after its winter rest and before the summer heat really kicks in. You’ll find the stems are plump and full of life, making them ideal for taking cuttings. This timing also gives your new little plants plenty of time to establish themselves before the cooler weather arrives.
Supplies You’ll Need
Gathering your tools before you begin is always a smart move. Here’s what I usually have on hand:
- Sharp, clean pruning shears or a sharp knife: For making clean cuts.
- A well-draining potting mix: I like to use a mix of equal parts perlite, coarse sand, and a good quality potting compost. You can also find specialized succulent or cactus mixes that work wonderfully.
- Small pots or seed trays: Clean ones are crucial to prevent disease.
- Rooting hormone (optional but recommended): A little bit of rooting hormone powder or gel can really give your cuttings a boost.
- A spray bottle: For gentle watering.
- Labels and a permanent marker: To keep track of what you’ve planted.
- A tray or saucer: To catch any drainage.
Propagation Methods
Saxifraga conifera is quite obliging and can be propagated in a couple of straightforward ways. Let’s dive in!
Stem Cuttings
This is my go-to method for Saxifraga conifera. It’s efficient and gives you a good success rate.
- Select a healthy plant: Look for a mature plant with a few strong stems.
- Make the cut: Using your clean shears or knife, snip off a stem that is about 3-4 inches long. Try to make the cut just below a leaf node (where a leaf meets the stem).
- Prepare the cutting: Gently remove the lower leaves from the stem, leaving just a few at the top. This prevents them from rotting when you plant it. If you’re using rooting hormone, dip the cut end into the powder or gel now.
- Plant the cutting: Fill your small pots with your well-draining mix. Make a small hole with your finger or a pencil and gently insert the cut end of the stem about an inch deep. Firm the soil gently around it.
- Water lightly: Use your spray bottle to lightly mist the soil surface. We don’t want it soggy, just moist.
- Provide good light: Place your pots in a bright spot, but out of direct, harsh sunlight for the first few weeks.
Division
If your Saxifraga conifera has grown into a dense clump, division is a fantastic way to get new plants and rejuvenate the parent.
- Gently unpot: Carefully remove the entire plant from its pot.
- Loosen the roots: Gently tease apart the root ball with your fingers. You’re looking for natural breaks where you can separate sections of the plant, each with its own roots and several leafy rosettes. If it’s very dense, you might need to use the tip of your knife to help separate them.
- Plant the divisions: Plant each division into its own small pot filled with your prepared potting mix. Make sure the roots are spread out a little.
- Water gently: Water the newly potted divisions thoroughly, allowing excess water to drain away.
The “Secret Sauce” (Pro Tips)
Here are a couple of things I’ve learned over the years that really seem to give my Saxifraga cuttings the best chance:
- Avoid letting leaves touch water: Whether you’re watering from the top or if condensation forms, try to keep the leaves themselves dry, especially the lower ones on cuttings. This is a big deterrent to rot, which is the biggest enemy of succulent-style plants.
- A little bottom heat goes a long way: If you have a heated propagator or even just a warm windowsill, placing your pots on it can significantly speed up root development. It mimics that lovely spring warmth and encourages those roots to get going.
Aftercare & Troubleshooting
Once your cuttings or divisions are planted, patience is key! Keep the soil consistently lightly moist, but never waterlogged. You can check for root development after about 4-6 weeks. Gently tugging on a cutting – if you feel resistance, you’ve got roots! At this point, you can gradually introduce them to more light, and once they’re well-established, you can treat them like your mature plant.
The most common problem you’ll encounter is rot. If you see any mushy, discolored stems or leaves, it’s usually a sign of too much moisture. Act quickly! Try to salvage any healthy portions of the stem, let them callus over for a day or two in a dry spot, and then try re-potting them into fresh, dry soil. Again, good drainage is your best friend here.
A Little Bit of Patience and a Whole Lot of Joy
Propagating Saxifraga conifera is a wonderful way to multiply your collection and share these cheerful plants with friends. Don’t be discouraged if every single cutting doesn’t make it – that’s just part of the gardening adventure! Enjoy the process, take pleasure in watching those tiny new roots emerge, and soon you’ll have a mini-garden of your own Saxifraga gems. Happy propagating!
Resource:
https://identify.plantnet.org/k-world-flora/species/Saxifraga%20conifera%20Coss.%20&%20Durieu/data