Hey there, fellow garden enthusiasts! Today, we’re diving into the wonderful world of propagating Tarenna truncatocalyx. If you’ve ever admired this beauty with its glossy leaves and delicate blooms, you’re in for a treat. There’s something truly special about nurturing a brand new plant from a piece of an existing one.
Why Propagate Tarenna Truncatocalyx?
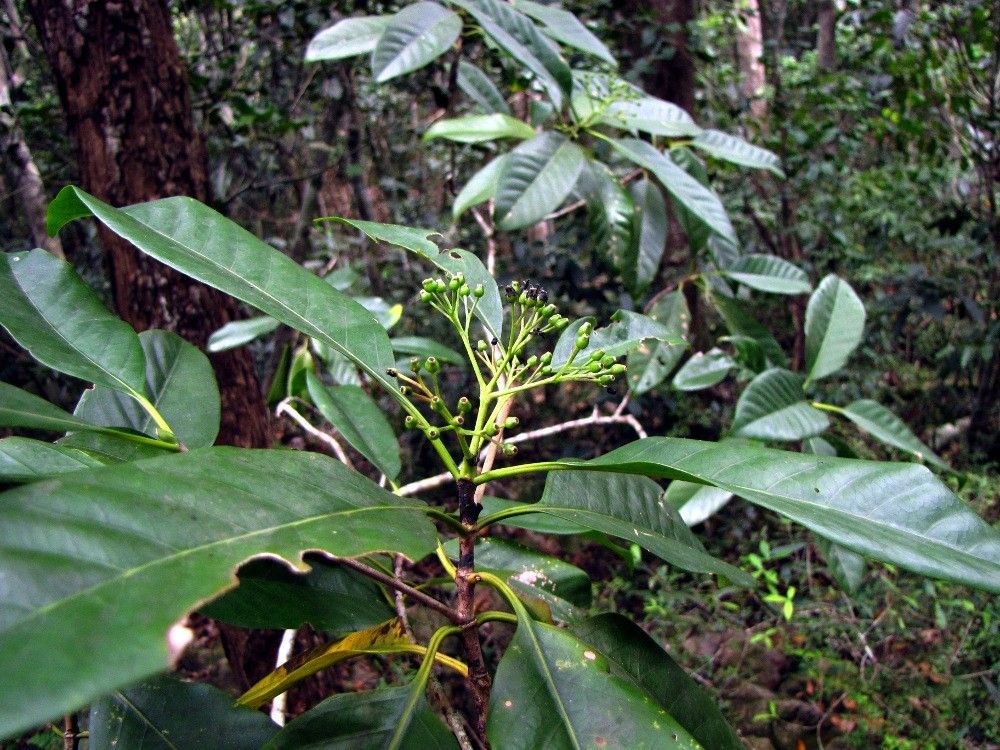
I’ve been working with plants for two decades now, and Tarenna truncatocalyx holds a special place in my heart. Its rich green foliage and often fragrant flowers are a joy. Plus, there’s a deep satisfaction that comes from successfully multiplying your favorite plants. It’s an economical way to expand your collection and share the green love with friends and family. For beginners, I’d say Tarenna truncatocalyx is generally approachable, especially with stem cuttings. It doesn’t tend to be overly fussy, which is always a good sign when you’re starting out!
The Best Time to Start
The absolute sweetest spot for propagating our Tarenna friend is during its active growing season. This typically means spring and summer. When the plant is putting on new growth, it has more energy reserves to dedicate to rooting. It’s also when the stems are usually a bit softer and more pliable, which makes them perfect for taking cuttings. Trying to propagate when the plant is dormant, say in late fall or winter, is much less likely to yield results.
Supplies You’ll Need
Before we get our hands dirty, let’s gather our tools. It’s always better to be prepared!
- Sharp Pruning Shears or a Clean Knife: A clean cut is crucial to prevent disease.
- Rooting Hormone (Optional but Recommended): This really gives your cuttings a boost. I like a gel or powder form.
- Well-Draining Potting Mix: A good starter mix for propagation is key. I usually use a blend of peat moss or coco coir and perlite or coarse sand. About a 50/50 ratio works wonderfully.
- Small Pots or Seedling Trays: Clean pots are a must! I prefer 3-4 inch pots for individual cuttings.
- Clear Plastic Bag or Humidity Dome: This creates a mini greenhouse effect.
- Watering Can with a Fine Rose: To avoid disturbing your precious cuttings.
- Small Labels and a Permanent Marker: Don’t forget to label your beauties!
Propagation Methods: Let’s Get Growing!
The most successful and easiest method for Tarenna truncatocalyx, in my experience, is stem cuttings.
- Select Your Mother Plant: Find a healthy, vigorous Tarenna plant that has plenty of new growth.
- Take Your Cuttings: Using your clean, sharp pruners, take cuttings that are about 4-6 inches long. Look for stems that have leaf nodes (where leaves emerge from the stem). Make your cut just below a leaf node. Try to take several cuttings; not all of them might take, but that’s just part of the process.
- Prepare the Cuttings: Gently remove the lower leaves from the cutting, leaving just the top couple of leaves. This prevents leaves from rotting when they’re in the soil or water. If your leaves are quite large, you can even cut them in half horizontally to reduce water loss.
- Apply Rooting Hormone (If Using): Dip the cut end of the stem into your rooting hormone. Tap off any excess.
- Potting Up: Fill your clean pots with your well-draining potting mix. Make a small hole in the center of the mix with your finger or a pencil.
- Insert the Cuttings: Carefully insert the cut end of each cutting into the prepared hole. Gently firm the soil around the base of the stem.
- Water Lightly: Water the soil thoroughly but gently, so the potting mix is moist but not soggy.
- Create the Humidity Tent: Place the potted cuttings in a location that receives bright, indirect light. Now, either cover the pots with a clear plastic bag, securing it around the rim of the pot with a rubber band, or place them under a humidity dome. Make sure the leaves don’t touch the plastic; if they do, prop up the bag with small stakes.
For water propagation, you can follow steps 1-3. Then, simply place the prepared cuttings in a jar or glass of water, ensuring the leaf nodes are submerged but no leaves are below the waterline. Change the water every few days to keep it fresh.
The “Secret Sauce” (Pro Tips)
After years of trial and error, I’ve picked up a few tricks that can really make a difference!
- Bottom Heat is Your Friend: If you have the space, placing your potted cuttings on a heat mat can significantly speed up root development. It mimics the warmth of spring soil and encourages root formation from below.
- Don’t Be Afraid of a Mist: Once your cuttings are potted, I like to give them a gentle misting with water. This helps to settle the soil around the stem and provides that initial boost of humidity. I’ll continue to mist them every so often until they look established.
- The “Slight Tug” Test: After a few weeks, you can very gently try to tug on a cutting. If you feel resistance, congratulations – you’ve got roots! If it comes out easily, it might not have taken yet, or it might be one of the ones that needs more time.
Aftercare & Troubleshooting
Once you see new growth appearing – that’s your signal that roots have formed!
Once roots are established, slowly acclimate your new plants to drier air by gradually opening up the plastic bag or humidity dome over a week or two. Continue to keep the soil consistently moist but never waterlogged. Once they’re fully accustomed to open air, you can treat them as you would a mature Tarenna truncatocalyx, with bright, indirect light and regular watering.
The most common problem you might encounter is rot. If your cuttings look mushy or blackened, they’ve likely succumbed to fungal issues, often caused by overwatering or poor air circulation. If this happens, remove the affected cutting immediately to prevent it from spreading. If the soil is too wet, try to let it dry out a bit more.
A Heartfelt Closing
Be patient with your cuttings. Gardening is a journey, and propagation is a beautiful lesson in patience and observation. Don’t get discouraged if every single cutting doesn’t make it; that’s perfectly normal. Celebrate the successes, learn from the setbacks, and most importantly, enjoy the rewarding process of bringing new life into your garden. Happy propagating!
Resource: