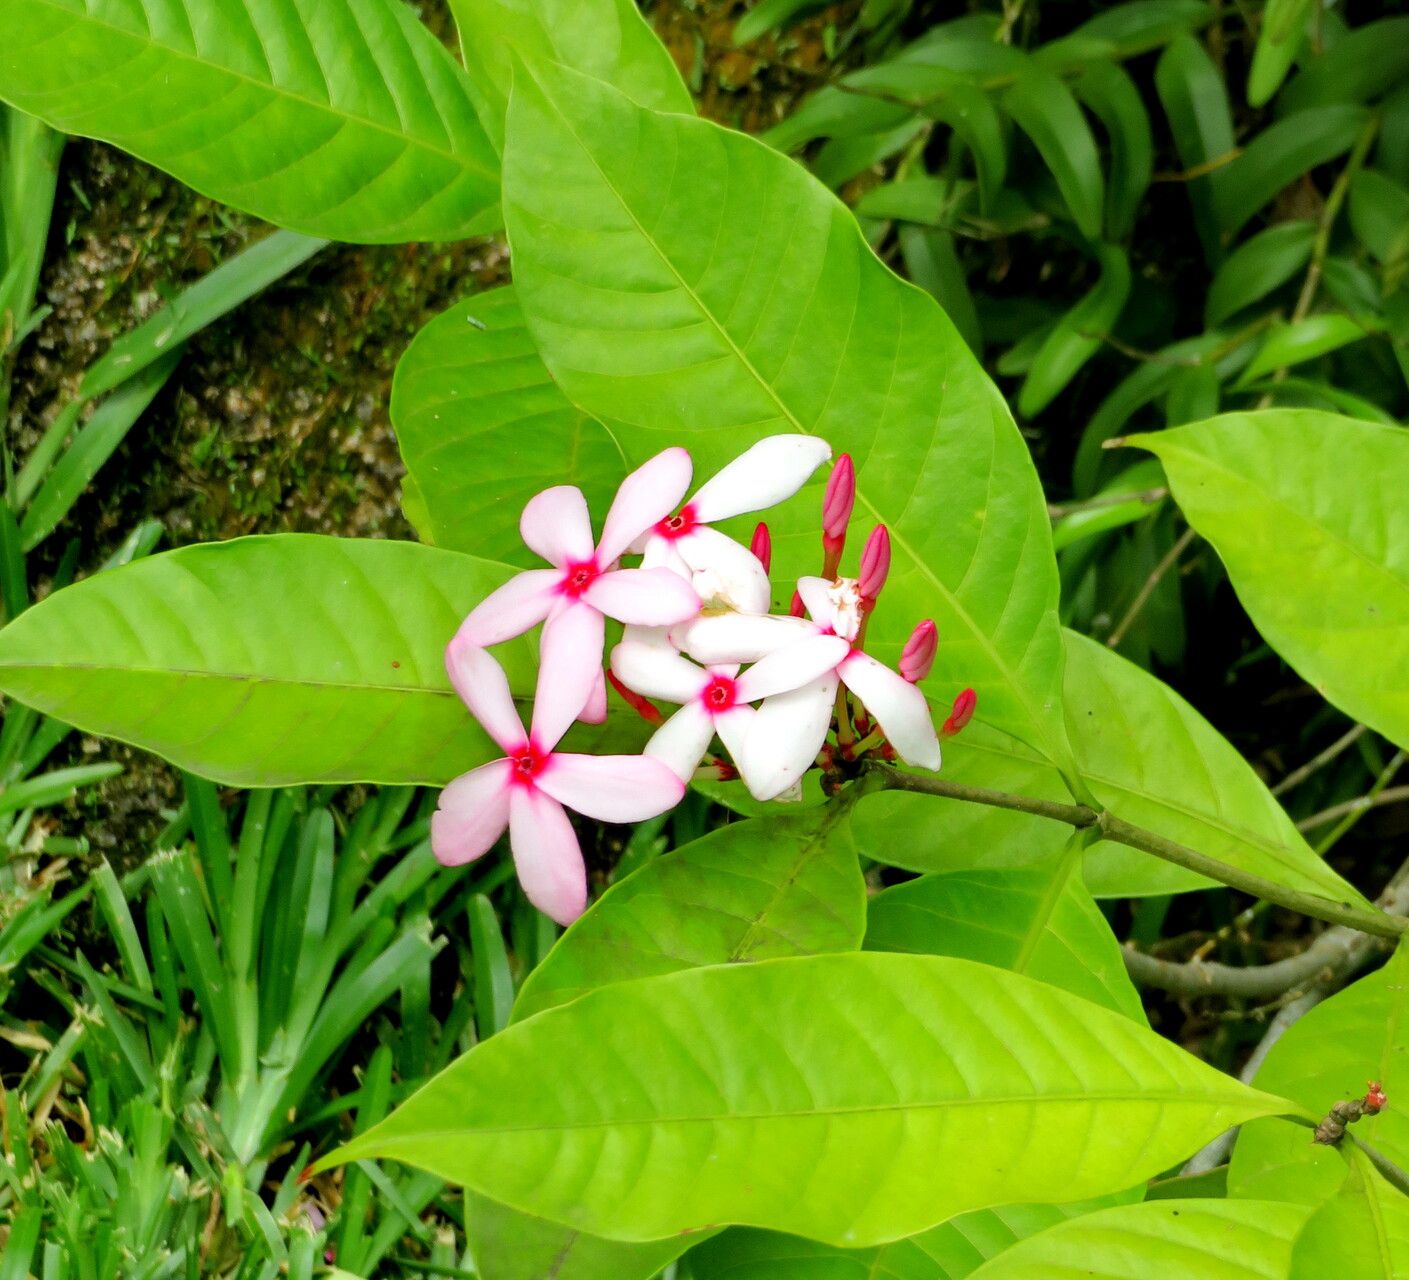
Oh, Kopsia fruticosa! Isn’t she a beauty? Those vibrant, star-shaped flowers, often in shades of pink or white, really light up a garden or a sunny windowsill. For me, growing plants from tiny beginnings is one of the most satisfying parts of this hobby. It’s like holding a little promise, a future bloom, right in your hands. And Kopsia? I’d say she’s a good one for those of you just dipping your toes into propagation. Not too fussy, but she’ll certainly reward your efforts.
The Best Time to Start
When it comes to Kopsia, I find the late spring or early summer is absolutely prime time. This is when the plant is actively growing, sending out new shoots. These young, green stems have the most energy to put into developing roots. Trying to propagate in the dead of winter, when growth slows, can be a bit of a gamble.
Supplies You’ll Need
Before we get our hands dirty, let’s gather our toolkit:
- Sharp Pruning Shears or a Clean Knife: For taking clean, precise cuttings without crushing the stems.
- Seed Starting Mix or a Well-Draining Potting Mix: Something light and airy is key. I like to amend regular potting soil with perlite or coarse sand.
- Small Pots or Trays: Clean and with drainage holes, of course!
- Plastic Bags or a Propagation Dome: To create a humid environment for your cuttings.
- Rooting Hormone (Optional but Recommended): This little powder or gel can give your cuttings a significant boost.
- Watering Can with a Fine Rose: For gentle watering.
- Marker Pen and Labels: So you don’t forget what you’ve planted where!
Propagation Methods
Kopsia is most commonly propagated from stem cuttings. It’s a straightforward process, and I’ve had great success with it.
- Select Your Cuttings: Look for healthy, non-flowering shoots. You want stems that are about 4-6 inches long and have at least a couple of sets of leaves. They should be slightly woody at the base but still flexible.
- Make the Cut: Using your sharp shears, make a clean cut just below a leaf node (where a leaf attaches to the stem). This is where root development tends to be strongest.
- Prepare the Cuttings: Gently remove the lower leaves. This prevents them from rotting when they’re in the soil or water, and it reduces water loss from the cutting itself. Leave just 2-3 sets of leaves at the top.
- Apply Rooting Hormone (If Using): Dip the cut end of the stem into your rooting hormone, tapping off any excess.
- Potting Up: Fill your small pots with your prepared potting mix. Make a small hole in the center with your finger or a pencil.
- Plant the Cuttings: Insert the cut end of each Kopsia cutting into the hole, ensuring the rooting hormone (if used) is in contact with the soil. Gently firm the soil around the base of the cutting.
- Water Gently: Water thoroughly but gently, so you don’t dislodge the cuttings.
- Create Humidity: Cover the pots with a plastic bag (making sure the leaves don’t touch the sides) or place them under a propagation dome. This will create a mini-greenhouse effect.
Water Propagation (Another Option): If you prefer, you can try rooting your cuttings directly in water. Follow steps 1-4, then simply place the prepared cuttings in a jar of clean water, ensuring the leaf nodes are submerged. Crucially, don’t let the leaves touch the water, as this will encourage rot.
The “Secret Sauce” (Pro Tips)
Here are a couple of things I’ve learned over the years that can really help your Kopsia cuttings along:
- Bottom Heat is Your Friend: Kopsia love a bit of warmth to encourage root formation. If you can, place your pots on a heat mat designed for seedlings. This extra warmth from below makes a big difference, especially if your room temperatures are a bit on the cool side.
- Don’t Forget Air Circulation: While humidity is vital, stagnant air can lead to fungal issues. If you’re using a plastic bag, lift it off for about 15-30 minutes each day to allow for some fresh air exchange. This might seem counterintuitive, but it keeps things healthy.
Aftercare & Troubleshooting
Once your cuttings are potted up, keep them in a bright, indirect light location. Avoid direct sun which can scorch the delicate leaves. Keep the soil consistently moist but not soggy. That humidity dome or plastic bag will help maintain the moisture.
You’ll know your Kopsia has rooted when you see new leaf growth or when you gently tug on a cutting and feel resistance. This usually takes anywhere from 4-8 weeks, sometimes a little longer.
The most common problem you’ll encounter is rot. If a cutting turns black and mushy, it’s usually a sign of too much moisture and not enough air circulation. Don’t be discouraged if a few don’t make it – that’s just part of the learning process! Remove any failed cuttings promptly to prevent issues from spreading.
Enjoy the Journey!
Propagating Kopsia fruticosa is a wonderful way to multiply your enjoyment of this lovely plant. Be patient, give them the right conditions, and cheer them on. Soon enough, you’ll have a small army of new Kopsias ready to grace your home or garden. Happy propagating!
Resource:
https://identify.plantnet.org/k-world-flora/species/Kopsia%20fruticosa%20(Roxb.)%20A.DC./data