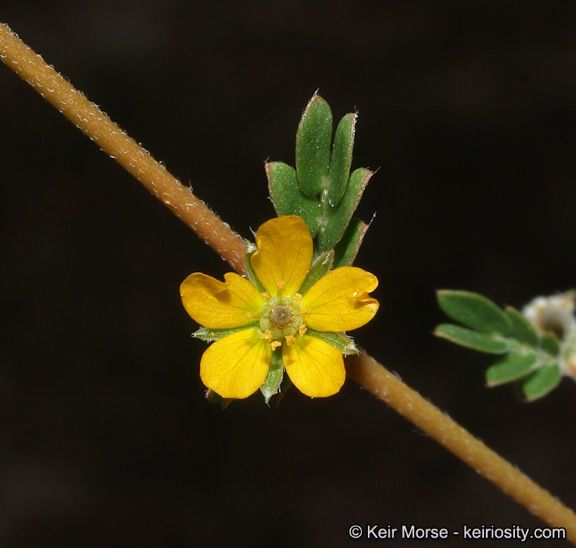
Hey there, fellow garden enthusiasts! Today, we’re diving into the wonderful world of propagating Kallstroemia californica, also known as California Poppy Mallow. I’ve spent years tending to these beauties, and trust me, watching a new plant emerge from a simple clipping is pure magic. If you’re looking for a desert-friendly bloomer that rewards your efforts with cheerful, poppy-like flowers, you’re in for a treat. And the best part? Propagating this plant is surprisingly straightforward, even for those of you just dipping your toes into the gardening pond.
The Best Time to Start
My favorite time to get started with Kallstroemia californica is in late spring or early summer. The days are getting longer and warmer, and the plant is in full swing with its growth. This vigor means cuttings have the best chance of rooting quickly. You can also take cuttings from established plants in mid-spring, just as new growth begins to emerge. Avoid taking cuttings when the plant is stressed from extreme heat or drought.
Supplies You’ll Need
Here’s what you’ll want to have on hand:
- Sharp Pruning Shears or a Clean Knife: For making clean cuts.
- Potting Mix: A well-draining mix is crucial. I like to use a blend of perlite, coarse sand, and a good quality potting soil. About a 50/50 mix of potting soil and perlite works wonders.
- Small Pots or Trays: Clean containers are a must to prevent disease.
- Rooting Hormone (Optional but Recommended): This can give your cuttings a little boost.
- Small Watering Can or Misting Bottle: For gentle watering.
- Plastic Bag or Clear Dome: To create a mini-greenhouse effect.
Propagation Methods
Let’s get our hands dirty! We’ll focus on stem cuttings, which is my go-to for Kallstroemia californica.
Stem Cuttings:
- Select Your Source: Find a healthy, vigorous Kallstroemia californica plant. Look for stems that are not flowering or fruiting, but have plenty of healthy green leaves.
- Make the Cut: Using your clean shears, take tip cuttings that are about 4-6 inches long. Make the cut just below a leaf node (where a leaf attaches to the stem). This is where roots are most likely to form.
- Prepare the Cuttings: Gently remove the lower leaves from the bottom 2-3 inches of the stem. This prevents them from rotting once planted. If you’re using rooting hormone, dip the cut end into it now, tapping off any excess.
- Planting: Fill your small pots with your prepared potting mix. Make a small hole in the center of the soil with your finger or a pencil.
- Insert and Water: Place the prepared cutting into the hole, gently firming the soil around it. Water gently to settle the soil. Don’t let the soil become waterlogged.
- Create a Humid Environment: Cover the pot with a plastic bag or a clear plastic dome. This helps retain moisture around the leaves, which is vital for rooting. Make sure the leaves don’t touch the plastic; if they do, you can prop up the bag with small stakes.
- Placement: Place the pots in a bright spot that receives indirect sunlight. Avoid harsh, direct sun, which can scorch the delicate cuttings.
The “Secret Sauce” (Pro Tips)
Over the years, I’ve learned a few tricks that really make a difference:
- Bottom Heat is Your Friend: If you have an old heating mat that you use for seedlings, pop your pots on it! A little gentle warmth from below can significantly speed up root development. You don’t need it super hot, just a consistent, gentle warmth.
- Don’t Be Afraid of a Little “Oops”: Sometimes, even with the best intentions, a cutting might droop a bit. Don’t discard it immediately! Some of them are just adjusting. If the soil is still moist and the leaves aren’t totally dried out, give it a bit more time and maintain that humidity.
- Check for Roots Discreetly: After about 4-6 weeks, you can gently tug on a cutting. If you feel resistance, that’s a good sign roots are forming! Alternatively, you might see new leaf growth, which is another positive indicator.
Aftercare & Troubleshooting
Once you see signs of rooting – be it new growth or a gentle tug test – it’s time to transition your happy little plant.
Slowly remove the plastic cover over a few days to acclimate the new plant to lower humidity. Continue to water when the top inch of soil feels dry. If your cutting looks a bit sad, make sure it’s getting enough light but not direct sun.
The most common issue you might encounter is rot. This usually happens if the soil is too wet or the air circulation is poor. If you see a cutting turning mushy or black, it’s time to discard it to prevent it from spreading any potential disease to other cuttings. Ensure your soil drains well and your pots have drainage holes!
A Encouraging Closing
Propagating plants is a journey, and with Kallstroemia californica, it’s a journey filled with beautiful blossoms. Be patient with your cuttings; sometimes they take their sweet time. Celebrate the small victories, learn from any setbacks, and most importantly, enjoy the rewarding process of bringing more of these lovely flowers into your garden. Happy propagating!
Resource: