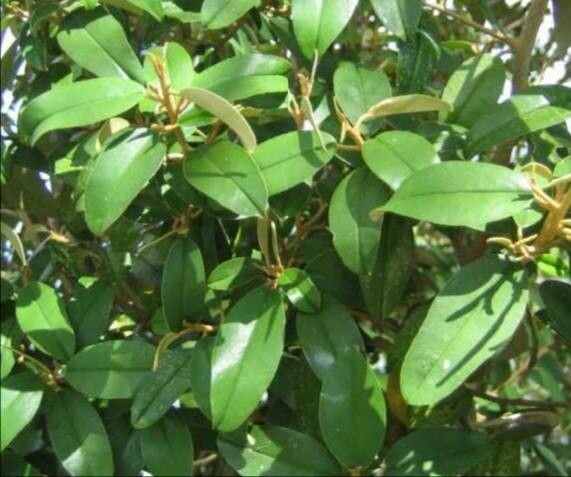
Hello fellow green thumbs! Today, we’re diving into the wonderful world of Morisonia odoratissima, a plant that truly sings in the garden. You might know it by its common name, the fragrant False Mastic tree, and oh, the name doesn’t lie! Its blossoms deliver an intoxicating perfume, especially in the evening, and its glossy leaves bring a touch of the tropics to our landscapes. Propagating it yourself is incredibly rewarding. You get to share this beauty with friends, fill your garden with more of that lovely scent, and frankly, there’s a special kind of magic in creating new life from a single cutting. Good news for us: Morisonia odoratissima is a pretty welcoming plant to propagate, even for those just starting their plant parent journey.
The Best Time to Start
For the highest success rates, aim to take cuttings in the late spring or early summer. This is when the plant is actively growing, which means it’s full of energy and ready to send out new roots. You want to look for stems that are ripe but not woody. These are often called “semi-hardwood” cuttings. Think of a pencil-thick stem that bends slightly without snapping cleanly. Waiting until after the main flush of spring growth has finished is usually your sweet spot.
Supplies You’ll Need
Gathering your tools before you begin will make the whole process smoother. Here’s what I usually have on hand:
- Sharp pruning shears or a clean, sharp knife: For making clean cuts.
- Rooting hormone (powder or gel): This isn’t strictly necessary for Morisonia, but it really boosts your success rate.
- A sterile, well-draining potting mix: I prefer a blend of equal parts peat moss or coco coir, perlite, and coarse sand. This prevents waterlogging.
- Small pots or trays: Clean containers are a must to avoid disease.
- A clear plastic bag or propagation dome: To keep humidity high around your cuttings.
- Labels and a marker: Don’t forget to label your precious babies!
- A spray bottle: For misting.
Propagation Methods: Stem Cuttings
This is my go-to method for Morisonia odoratissima.
- Select your stem: Find those semi-hardwood stems I mentioned earlier. Look for healthy growth, free from pests or damage.
- Make the cut: Using your sharp shears, take a cutting that’s about 6-8 inches long. Make the cut just below a leaf node (where a leaf attaches to the stem). This is where the magic happens, where root development is most likely.
- Prepare the cutting: Gently remove the lower leaves from the cutting, leaving just a few at the top. This reduces water loss and prevents leaves from rotting in the soil. If any leaves are particularly large, you can even cut them in half horizontally to further reduce transpiration.
- Apply rooting hormone: Dip the cut end of the stem into your rooting hormone, tapping off any excess.
- Plant your cutting: Fill your clean pots with your prepared potting mix. Make a hole with your finger or a pencil to avoid rubbing off the rooting hormone. Insert the cut end of the stem into the hole, and gently firm the soil around it. You can usually fit several cuttings into one pot, spaced a few inches apart.
- Water gently: Water the soil thoroughly but allow excess water to drain away.
- Create a humid environment: Cover the pot with a clear plastic bag, making sure the bag doesn’t touch the leaves. You can use stakes to keep the bag tented. Alternatively, place the pot inside a propagation dome. Place the pot in a bright location out of direct sunlight.
The “Secret Sauce” (Pro Tips)
Here are a few things I’ve learned over the years that really make a difference:
- Bottom heat is your friend: If you can, place your pots on a heating mat designed for plants. This warmth encourages root growth from below, giving your cuttings that extra push. It’s like a spa treatment for your plant starts!
- Don’t overwater, but don’t let it dry out: Keep the soil consistently moist but never soggy. It’s a fine line! Stick your finger into the soil about an inch deep. If it feels dry, it’s time to water.
- Gentle misting: Give the leaves of your cuttings a light misting every day or two, especially if you’re not using a plastic bag. This helps keep them hydrated while they’re trying to grow roots.
Aftercare & Troubleshooting
Give your cuttings 6-8 weeks, sometimes even longer, to develop a good root system. You’ll know they’re ready when you gently tug on them, and they resist, or if you see new leaf growth. Once roots have formed, you can transplant them into individual pots. Continue to keep them in bright, indirect light and water them as needed.
The most common sign of trouble is rot. If your cutting turns black and mushy, it’s usually due to too much moisture and poor air circulation. This is where a well-draining mix and not overwatering are crucial. Another sign of failure is if the cutting wilts and never recovers, which can mean it didn’t root and may have dried out. Don’t be discouraged if a few don’t make it; it’s all part of the learning process!
So there you have it! Growing Morisonia odoratissima from cuttings is a wonderfully satisfying endeavor. Be patient, observe your cuttings, and celebrate each little success. Happy propagating, and I can’t wait for you to experience that intoxicating fragrance in your own garden!
Resource: