Hello, fellow garden enthusiasts!
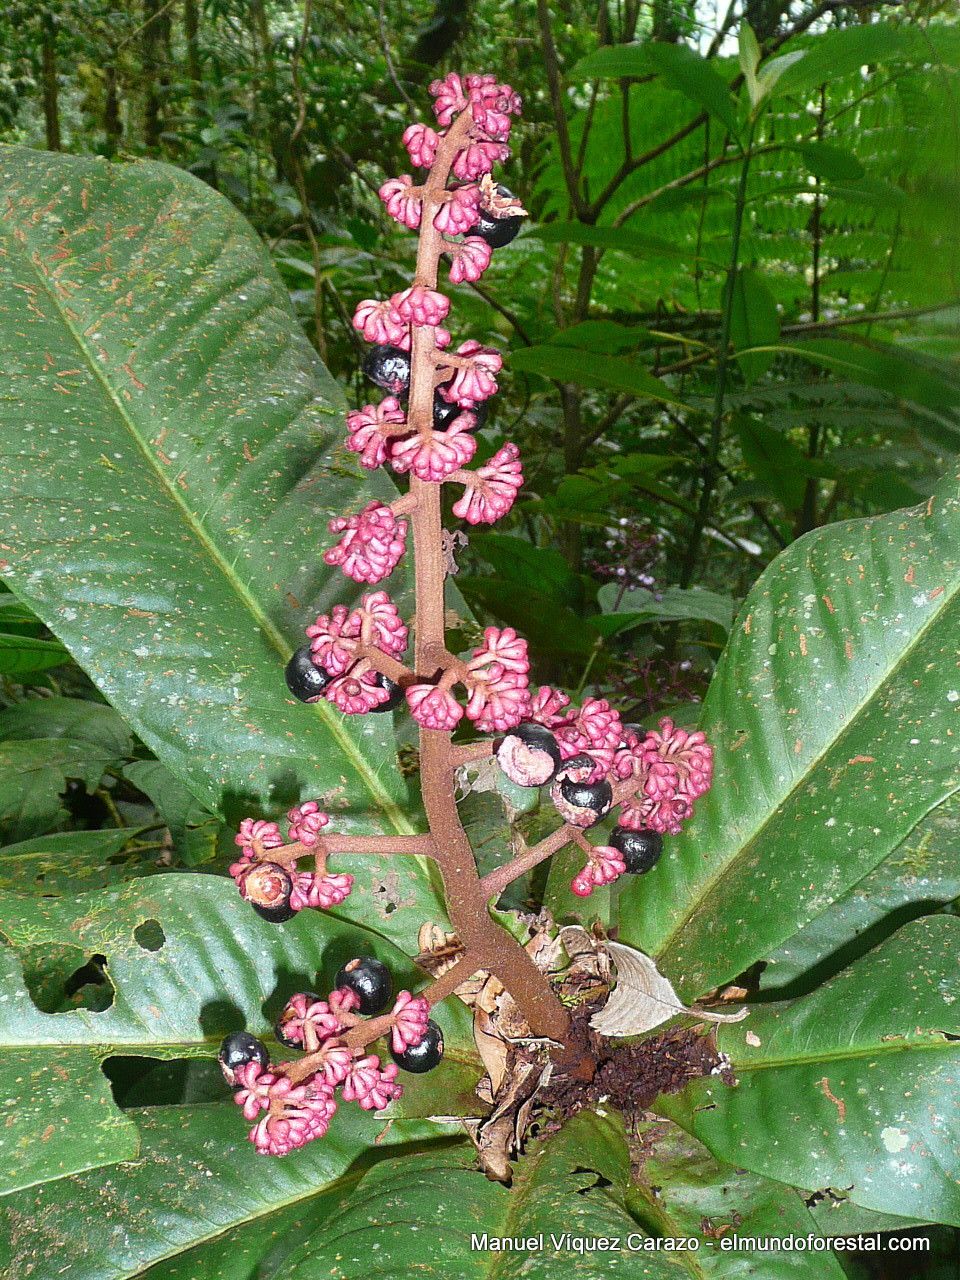
Today, I want to talk about a plant that’s been capturing my attention for years: Ardisia conoidea. This lovely shrub, with its glossy green leaves and clusters of beautiful, often red, berries, brings a touch of elegance to any space, whether it’s a shady corner of your garden or a bright indoor spot. There’s a special kind of joy that comes from coaxing a new plant into existence from a piece of its parent, and Ardisia conoidea is a wonderfully rewarding plant to propagate. For beginners, it’s a good place to start; it’s not overly finicky, which makes the learning process all the more pleasant.
The Best Time to Start
When it comes to Ardisia conoidea, the sweet spot for propagation is late spring to early summer. This is when the plant is actively growing, and the new shoots are likely to have the energy they need to root. Think of it as giving your cuttings the best possible start with nature’s booming energy.
Supplies You’ll Need
Gathering your tools beforehand makes the whole process much smoother. Here’s what I typically have on hand:
- Sharp pruning shears or a clean, sharp knife: For making clean cuts to prevent damage and disease.
- Small pots or seedling trays: Clean pots are a must to avoid introducing any nasties.
- Well-draining potting mix: I like a blend of peat moss, perlite, and a little bit of compost. You want something that won’t hold too much moisture.
- Rooting hormone (optional but recommended): This can give your cuttings a helpful boost.
- Plastic bags or a propagation dome: To create a humid environment.
- Watering can or spray bottle: For gentle watering.
- Labels and a marker: To keep track of your cuttings!
Propagation Methods
There are a couple of ways we can encourage new Ardisia conoidea plants, but I find stem cuttings to be the most reliable.
Stem Cuttings: My Go-To Method
- Select Your Cuttings: Look for healthy, semi-hardwood stems. These are stems that are not brand new and flimsy, but also not old and woody. You’re aiming for stems that snap cleanly when bent slightly.
- Make the Cut: Using your clean shears or knife, take cuttings that are about 4-6 inches long. Make a cut just below a leaf node (the point where a leaf grows from the stem). This is where roots are most likely to form.
- Prepare the Cuttings: Gently remove the lower leaves, leaving only the top two or three leaves intact. If the leaves are very large, you can even cut them in half horizontally to reduce water loss through transpiration.
- Apply Rooting Hormone (Optional): Dip the cut end of the stem into rooting hormone, tapping off any excess.
- Plant Your Cuttings: Fill your clean pots with your well-draining potting mix. Make a small hole in the center with your finger or a pencil. Insert the cut end of the Ardisia conoidea cutting into the hole, ensuring the leaf nodes are below the soil surface. Gently firm the soil around the stem.
- Create a Humid Environment: Water the soil gently. Then, cover the pot with a clear plastic bag or place it under a propagation dome. Make sure the leaves don’t touch the plastic, as this can encourage rot. You can use stakes to prop up the bag if needed.
The “Secret Sauce” (Pro Tips)
Here are a few things I’ve learned over the years that really give your propagation efforts an edge:
- Don’t Drown Your Cuttings: While humidity is crucial, overwatering the soil is the quickest way to kill a cutting. The mix should be consistently moist, but not soggy. Stick your finger in the soil; if it feels wet, wait a bit longer to water.
- Bottom Heat is Your Friend: If you have access to a heating mat, placing your pots on it can significantly speed up root development. The warmth encourages the plant to put energy into its roots. Just be sure the mat is designed for seedling propagation.
- Patience, Patience, Patience: Ardisia conoidea can be a bit deliberate in its rooting process. Don’t be discouraged if you don’t see roots immediately. Keep them in a bright spot (but out of direct sun) and with the right humidity.
Aftercare & Troubleshooting
Once your cuttings have developed a good set of roots – you can gently tug on them, and they’ll offer some resistance, or you might even see roots poking out of the drainage holes – it’s time to give them a little more freedom.
Gradually acclimate them to normal room humidity. You can do this by slowly opening the plastic bag or ventilation on your dome over a week or so. Continue to water them when the top inch of soil feels dry. Keep them in bright, indirect light.
The most common sign of trouble is ** rot**. If your cutting turns black and mushy, it’s likely that it was kept too wet. Try to catch this early. If you see any mold on the soil surface, you can carefully scrape it away or gently water with a dilute solution of hydrogen peroxide (one part hydrogen peroxide to ten parts water).
A Little More Encouragement
Propagating plants is truly a labor of love. It’s a chance to connect with nature on a more intimate level, to learn patience, and to fill your home and garden with beautiful greenery that you nurtured yourself. Don’t get discouraged by setbacks; even experienced gardeners lose cuttings sometimes. Just keep experimenting, observing, and enjoying the process. Happy propagating!
Resource:
https://identify.plantnet.org/k-world-flora/species/Ardisia%20conoidea%20Lundell/data