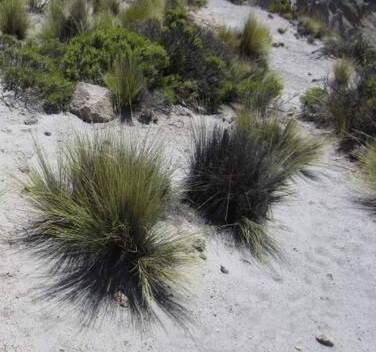
Hello there, fellow plant enthusiasts! It’s your garden guru here, ready to spill the beans on a truly rewarding propagation project: Festuca dolichophylla, also known as California Fescue. This elegant bunchgrass brings such wonderful texture and a soft, flowing beauty to any garden. Its fine, often silvery-blue foliage sways in the breeze, creating a tranquil and naturalistic feel. And let me tell you, successfully growing new Fescues from your existing beauties? Pure gardening joy! Don’t let the fancy name fool you; Festuca dolichophylla is a fantastic choice for beginners looking to dip their toes into propagation.
The Best Time to Start
For Festuca dolichophylla, the absolute best time to get your hands dirty is in the spring, as soon as the plant starts showing fresh, vigorous growth. You can also have some success in early fall, but spring generally offers warmer soil temperatures and longer days, which really give those new plants a boost. Think of it as giving them the best possible head start!
Supplies You’ll Need
Before we dive in, let’s gather our tools. A little preparation goes a long way!
- Sharp Pruning Shears or a Clean Knife: For making clean cuts.
- Well-Draining Potting Mix: A good seed-starting mix or a blend of potting soil with perlite or sand works wonderfully. Avoid anything that stays too soggy.
- Small Pots or Trays: Anything that can hold your new cuttings and has drainage holes.
- Rooting Hormone (Optional but Recommended): Especially helpful for those eager to speed things up. Look for a powder or gel.
- Watering Can with a Fine Rose: For gentle watering.
- Labeling Stakes: To remember what you’ve planted and when!
- A Tray for the Pots: To catch any excess water.
Propagation Methods
Festuca dolichophylla is most easily propagated through division. It’s a straightforward process that gives you multiple plants from one!
Division: The Heart of Fescue Propagation
- Start with a Mature Plant: Choose a healthy, well-established Festuca dolichophylla plant. If it looks a bit tired or has dead patches in the center, that’s a sign it’s ready for a refresh.
- Dig it Up (Carefully!): Gently dig around the base of the plant with your trowel or spade. Loosen the soil and lift the entire clump out. It’s okay if some soil sticks to the roots.
- Clean the Roots: Gently shake off some of the excess soil to get a better look at the root system. You might need to use your fingers or a gentle stream of water.
- The Gentle Pull Apart: This is the key! Look for natural divisions in the root ball. You can often gently pull the root ball apart with your hands. If it’s a bit stubborn, use your clean knife or pruning shears to cut through the root system, ensuring each section has plenty of roots and some leafy shoots. Aim for divisions that are roughly the size you’d buy as a small starter plant.
- Potting Up Your New Friends: Plant each division into its own pot filled with fresh, well-draining potting mix. Make sure the crown of the plant (where the roots meet the foliage) is at soil level.
- Water it In: Water thoroughly after planting to settle the soil around the roots.
The “Secret Sauce” (Pro Tips)
Here are a few little tricks I’ve picked up over the years that can really make a difference.
- Don’t Be Afraid of a Little Roughness: When dividing, it’s okay if some roots break. Fescues are surprisingly tough! Just focus on giving each division decent root mass.
- Give Them a Warm Welcome: While not strictly necessary, placing your newly divided pots in a warm spot, perhaps with some gentle bottom heat (like on a warm windowsill or a heated propagator mat), can really encourage faster root development.
- Hydration is Key, But Not Drowning: After division, your new plants will be stressed. Keep the soil consistently moist but never waterlogged. Overwatering is the quickest way to spell disaster.
Aftercare & Troubleshooting
Once your divided Festuca dolichophylla is happily potted, it’s all about TLC.
- Location: Place your newly potted divisions in a bright location, but out of direct, scorching sun for the first week or two. This helps them acclimate without drying out too quickly.
- Watering: Continue to water regularly, allowing the top inch of soil to dry slightly between waterings. You’ll see new growth emerge as a sign they’re settling in.
- Troubleshooting: The main culprit you’ll face is rot, usually caused by overwatering or poor drainage. If you see leaves turning yellow and mushy, or the soil feels constantly soggy, you might have a rot issue. Sadly, if rot sets in deeply, it’s hard to recover. Prevention is key: always use good drainage and water mindfully. Also, keep an eye out for fungal spots on the leaves; ensure good air circulation to minimize these.
Happy Gardening!
You’ve got this! Propagating Festuca dolichophylla is a simple, yet incredibly satisfying way to expand your garden’s beauty. Be patient, enjoy the process of nurturing these new plants, and before you know it, you’ll have a whole new collection of lovely fescues swaying in your garden. Happy growing!
Resource:
https://identify.plantnet.org/k-world-flora/species/Festuca%20dolichophylla%20J.Presl/data