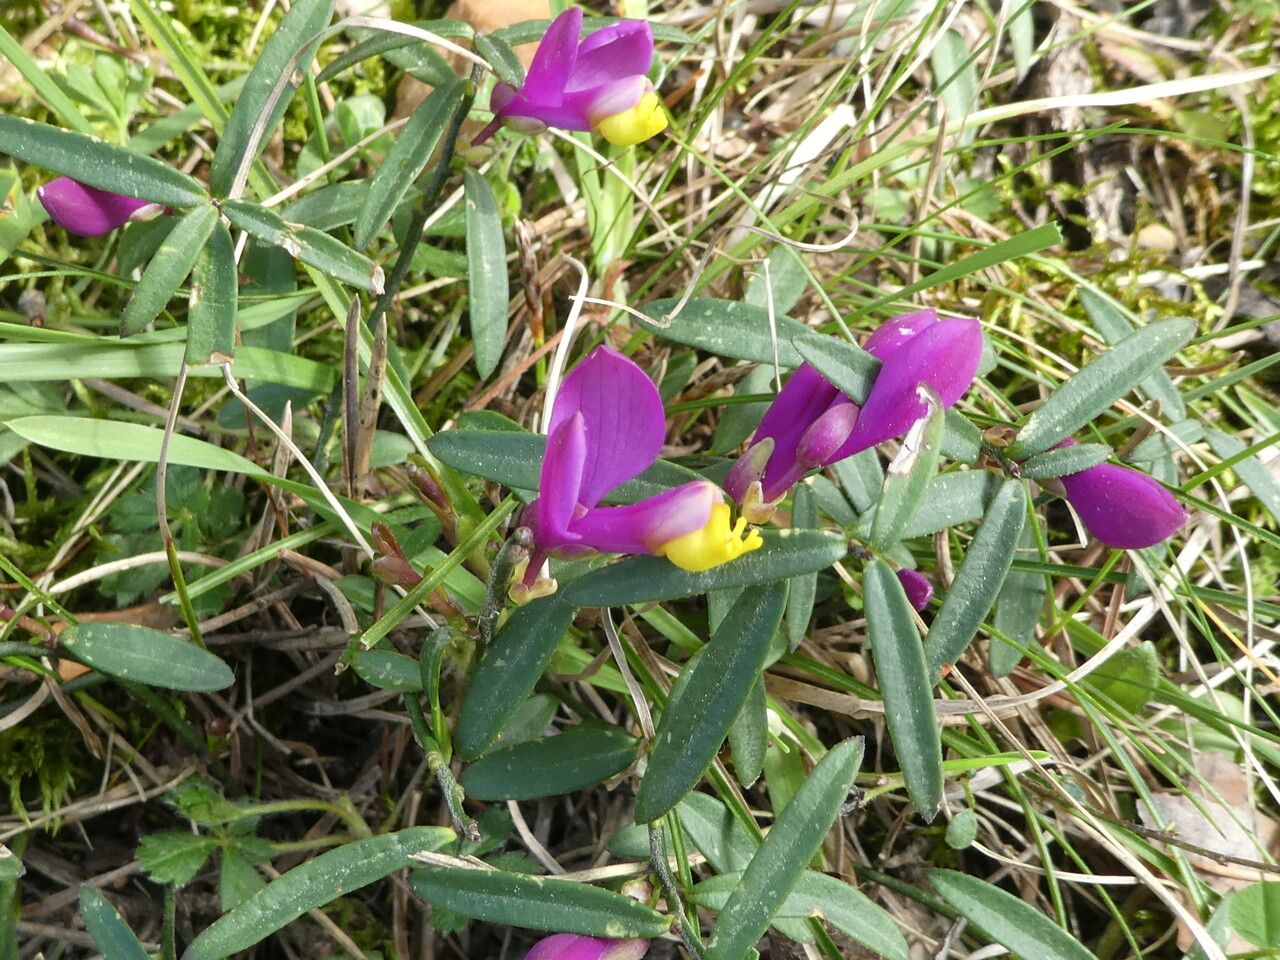
Oh, hello there! So, you’ve fallen in love with Polygaloides vayredae, haven’t you? I don’t blame you one bit. Its delicate, wispy foliage and those charming little flowers are just pure magic. And the best part? You can bring that magic into your own garden, or even share it with friends, by propagating it yourself! It can be a bit of a trickster, this one, so I wouldn’t say it’s the easiest plant for a complete beginner, but with a little patience and a few insider tricks, you’ll be well on your way to having a whole clan of these beauties.
The Best Time to Start
For Polygaloides vayredae, I find that the late spring to early summer is your golden window. This is when the plant is in its active growth phase, meaning it has plenty of energy to put into developing new roots. You want to take cuttings from stems that are still somewhat pliable but have started to firm up – think of them as “softwood” cuttings. Avoid very brand-new, floppy growth, or old, woody stems.
Supplies You’ll Need
Here’s what I always have on hand when I’m ready to propagate:
- Sharp Pruning Shears or a Craft Knife: Clean cuts are crucial!
- Rooting Hormone: A rooting powder or gel, especially beneficial for trickier plants like this one.
- Potting Mix: A light, well-draining mix. I often use a blend of equal parts peat moss or coco coir, perlite, and coarse sand. You can also buy specific propagation mixes.
- Small Pots or Seed Trays: With drainage holes, of course.
- Clear Plastic Bags or a Propagation Dome: To create a humid environment.
- Watering Can with a Fine Rose: For gentle watering.
- Labels and a Marker: To keep track of what’s what!
Propagation Methods
While you might be tempted to try water propagation, for Polygaloides vayredae, I’ve found stem cuttings to be the most reliable method.
- Take Your Cuttings: Using your sterilized shears or knife, make a clean cut just below a leaf node (the point where a leaf attaches to the stem). Each cutting should be about 4-6 inches long and have at least two or three leaf nodes.
- Prepare the Cuttings: Gently remove the lower leaves from the cutting, leaving only a couple at the top. This prevents them from rotting when buried in the soil.
- Dip in Rooting Hormone: Dip the cut end of each stem into your chosen rooting hormone, tapping off any excess. This step is really important for encouraging root formation.
- Plant Your Cuttings: Fill your small pots with your prepared potting mix. Make a small hole in the center with your finger or a pencil. Gently insert the cut end of the stem into the hole, ensuring at least one leaf node is buried. Firm the soil gently around the stem.
- Water and Cover: Water the soil thoroughly until it’s moist but not waterlogged. Then, cover the pot with a clear plastic bag or place it under a propagation dome. This creates a mini-greenhouse to keep humidity high, which is vital for cuttings to root. Place the pots in a bright location, but out of direct sunlight.
The “Secret Sauce” (Pro Tips)
Here are a couple of things I’ve learned over the years that really make a difference with plants like Polygaloides vayredae:
- Bottom Heat is Your Friend: If you have a heating mat designed for propagation, using it can dramatically speed up the rooting process. Those roots need a little encouragement from below!
- Don’t Over-Water: It’s a common mistake, and rot is the enemy. Let the surface of the soil dry out slightly between waterings. You’ll get a feel for it. A gentle poke with your finger is a good test.
Aftercare & Troubleshooting
Once your cuttings have successfully rooted – you’ll know when you see new growth appearing at the top or feel a bit of resistance when you gently tug on the stem – it’s time for a bit more attention. Gradually acclimate your new plants to lower humidity by opening the plastic bag a little each day over a week. Keep them in bright, indirect light and continue to water when the top inch of soil feels dry.
The most common problem you’ll encounter is rot. If you see your cuttings wilting, turning black and mushy, or developing mold, it’s a sign of too much moisture and not enough airflow. Unfortunately, once rot sets in, it’s usually game over for that particular cutting. Prevention is key: ensure excellent drainage and don’t over-water!
A Little Patience Goes a Long Way
Propagating can feel like a waiting game, but I promise you, the reward of nurturing a new plant from just a stem is immense. Be patient, keep a close eye on your little charges, and don’t get discouraged if not every cutting makes it. Each attempt teaches you something new. Happy propagating, and enjoy watching your Polygaloides vayredae family grow!
Resource: