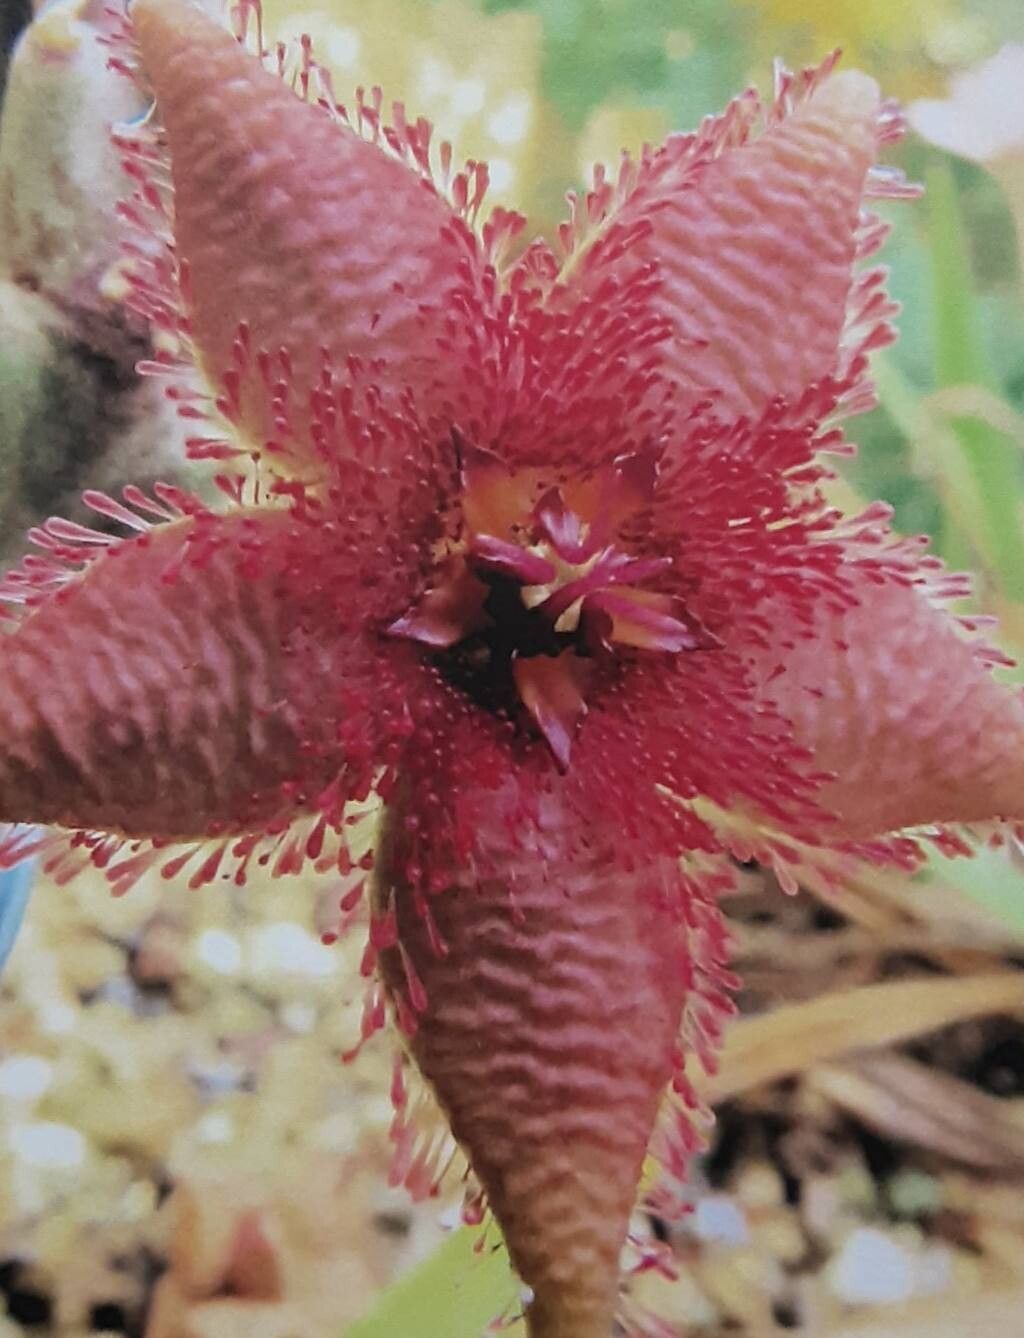
Hello fellow plant lovers! If you’re anything like me, the allure of the Stapelia glanduliflora is hard to resist. Those unique, star-shaped blooms that look like they belong on another planet, often carrying a surprisingly sweet fragrance – it’s a real conversation starter! I’ve spent years growing these fascinating succulents, and trust me, sharing their beauty by propagating them is one of the most satisfying gardening adventures.
Now, you might be wondering if this is a project for seasoned pros only. I’m happy to tell you that Stapelia glanduliflora is surprisingly forgiving when it comes to propagation. I’d say it’s a great plant for beginners looking to step up their succulent game. With a little guidance, you’ll be well on your way to creating new little bloomers.
The Best Time to Start
For the absolute best strike rate, I always recommend starting your propagation efforts in the late spring or early summer. This is when the plant is actively growing, soaking up all that glorious sunshine, and has the energy to put into developing new roots. Trying to propagate during its dormant period can work, but you’ll generally see faster, more robust results when the weather is warm and the days are long.
Supplies You’ll Need
Here’s what you’ll want to have on hand before you get started:
- Sharp, clean pruning shears or a sharp knife: For taking clean cuttings. Sterilize them with rubbing alcohol between cuts to prevent disease.
- Rooting hormone (optional but recommended): This can give your cuttings a helpful boost towards root development.
- Well-draining potting mix: A cactus or succulent mix is perfect. You can also make your own by mixing equal parts potting soil and perlite or coarse sand.
- Small pots or containers: With drainage holes! This is crucial.
- Watering can or spray bottle: For gentle watering.
- Newspaper or a clean surface: To let your cuttings callous.
Propagation Methods
There are a couple of tried-and-true ways to multiply your Stapelia glanduliflora. My personal favorite, and often the easiest, is stem cuttings.
Stem Cuttings: My Go-To Method
- Select your cutting: Look for a healthy, mature stem on your Stapelia. You want a piece that’s at least 4-6 inches long. Use your sharp shears or knife to make a clean cut just above a node (where a leaf or branch emerges).
- Let it callous: This is a super important step to prevent rot. Gently remove any lower leaves and place your cutting on a piece of newspaper or a clean, dry surface in a bright spot, out of direct sun. You need to let the cut end dry out and form a protective callus. This can take anywhere from a few days to a week, depending on humidity. You’ll know it’s ready when the end feels dry and not at all sticky.
- Apply rooting hormone (if using): Once calloused, dip the cut end into your rooting hormone powder or gel. Tap off any excess.
- Planting: Fill your small pot with your well-draining potting mix. Make a small hole in the center with your finger or a pencil.
- Insert the cutting: Gently insert the calloused, hormonized end of the cutting into the hole, ensuring it’s deep enough to stand on its own. You might need to use a small stake or prop it up for a day or two until it settles.
- Initial Watering: Wait a day or two after planting to water. This gives the calloused surface another chance to adapt to its new environment. Then, water lightly, just enough to moisten the soil. Don’t soak it!
Water Propagation (A Fun Alternative)
While I prefer the soil method for Stapelia, you can try water propagation for a visual treat.
- Take and callous your cutting as described above.
- Place in water: Find a clean jar or glass and fill it with water. Crucially, make sure that no part of the stem is submerged, only the calloused end. You can use pebbles, a small piece of cardboard with a hole, or even a specialized propagation vessel to keep the cutting elevated.
- Change water regularly: Refresh the water every few days to keep it clean and oxygenated.
- Watch for roots: You’ll start to see tiny white roots emerge from the cut end. Once they are about an inch long, you can carefully transplant them into your well-draining potting mix, following steps 5 and 6 from the stem cutting method.
The “Secret Sauce” (Pro Tips)
Here are a few things I’ve learned over the years that really make a difference:
- Don’t rush the rooting hormone application: Make sure that cutting is fully calloused before dipping. If you’re not sure, give it an extra day. The risk of rot is much higher if it’s not properly sealed.
- Bottom heat is your friend: If you’re propagating in a cooler environment or if the natural warmth isn’t quite there, placing your pots on a gentle heating mat designed for plants can significantly speed up root development. You want the soil to be warm, not hot.
- Patience with watering: This is honestly the hardest part for many of us! Resist the urge to overwater. Let the soil dry out almost completely between waterings. Young cuttings are very susceptible to root rot if their soil stays soggy.
Aftercare & Troubleshooting
Once you see signs of new growth or feel resistance when gently tugging on your cutting (indicating roots!), it’s time to adjust your watering. Continue to water sparingly, letting the soil dry between waterings. Gradually introduce your new plant to brighter light, but avoid direct, scorching sun initially. Acclimate it slowly.
The most common issue you’ll encounter is rot. If your cutting turns mushy and black, it’s likely rotted. Unfortunately, there’s usually no coming back from that. If you see slight mushiness at the base, you can try to cut away the rotten part with a sterilized tool and re-callous and re-pot the healthy section. Prevention through proper callousing and well-draining soil is key!
A Encouraging Closing
Propagating Stapelia glanduliflora is a wonderful way to share its unique charm and expand your collection. Don’t be discouraged if your first attempt doesn’t go perfectly. Gardening is a journey of learning and observation. Be patient with your new cuttings, give them the right conditions, and celebrate every little sign of growth. Happy propagating!
Resource:
https://identify.plantnet.org/k-world-flora/species/Stapelia%20glanduliflora%20Masson/data