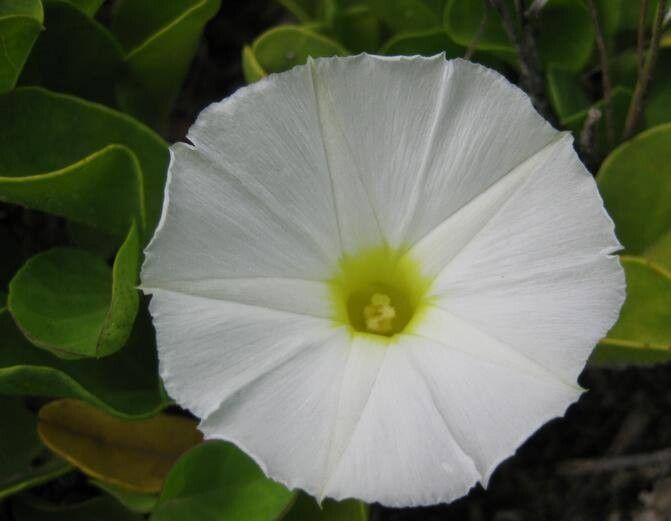
Well hello there, fellow plant lover! I’m so excited to talk to you today about a plant that truly captures the wild beauty of our coastlines: Ipomoea imperati, or as some lovingly call it, beach morning glory. Its delicate, pale flowers are a delightful surprise, and seeing it sprawl and thrive brings such joy. If you’ve ever admired this plant and wished you had more of it gracing your garden, you’re in for a treat. Propagating Ipomoea imperati is a really rewarding experience, and honestly, I find it to be quite forgiving, making it a lovely project for even those just starting their propagation journey.
The Best Time to Start
For the absolute best success, I like to get my propagation projects going in the late spring or early summer. This is when the plant is actively growing and has plenty of energy to put into forming new roots. You’ll want to select healthy, vigorous stems that aren’t flowering or just finished flowering. Think of it as borrowing a healthy piece of a thriving plant, rather than taking from one that’s stressed.
Supplies You’ll Need
Gathering your supplies beforehand makes the whole process much smoother. Here’s what I always have on hand:
- Sharp, clean pruning shears or a sharp knife: Essential for making clean cuts.
- Rooting hormone (optional but recommended): Helps give cuttings a “boost” in rooting.
- Small pots or seed trays: For potting up your cuttings.
- Well-draining potting mix: A good quality potting mix, or I often use a blend of peat moss, perlite, and a bit of sand.
- Watering can with a fine rose: For gentle watering.
- Clear plastic bags or a propagation dome: To create a humid environment.
- Labels and a marker: To keep track of what you’ve propagated and when.
Propagation Methods
Ipomoea imperati is a wonderfully amenable plant, and we can have great luck with a couple of different methods.
Stem Cuttings
This is likely my go-to method for Ipomoea imperati.
- Select Your Cuttings: Look for healthy, non-woody stems that are at least 4-6 inches long. You want to find stems that have good leaf coverage.
- Make the Cut: Using your clean shears or knife, make a clean cut just below a leaf node. A leaf node is where a leaf attaches to the stem. This is where the magic of rooting happens.
- Prepare the Cutting: Gently remove the lower leaves from the cutting. You want to expose at least one or two leaf nodes that will be below the soil line. If your cutting has large leaves, I often like to pinch or cut them in half to reduce water loss.
- Apply Rooting Hormone (Optional): Dip the cut end of the stem into your rooting hormone powder or gel. Tap off any excess.
- Plant Your Cuttings: Fill your small pots with your well-draining potting mix. Make a small hole in the center with your finger or a pencil. Insert the cut end of the stem into the hole, ensuring the leaf nodes you cleared are below the surface. Gently firm the soil around the stem.
- Water Gently: Water the soil thoroughly but gently. You don’t want to disturb the cutting.
- Create Humidity: Place a clear plastic bag over the pot, securing it loosely around the rim, or use a propagation dome. This creates a mini-greenhouse effect, keeping the humidity high, which is crucial for cuttings.
- Place in Bright, Indirect Light: Find a spot that receives bright, indirect sunlight. Avoid direct sun, which can scorch the delicate cuttings.
Water Propagation
Sometimes, I find that Ipomoea imperati can easily root in water.
- Prepare Your Cuttings: Follow steps 1-3 from the stem cutting method.
- Place in Water: Put the prepared cuttings into a jar or vase filled with fresh water.
- Ensure Leaves Stay Dry: This is key! Make sure no leaves are submerged in the water. They will rot quickly if they are.
- Change Water Regularly: Change the water every few days to keep it fresh and prevent bacterial growth.
- Place in Bright, Indirect Light: Similar to stem cuttings, place your water-propagated cuttings in a location with bright, indirect light.
- Pot Up When Rooted: Once you see about an inch or two of roots developing, it’s time to carefully transfer them to pots filled with your well-draining potting mix.
The “Secret Sauce” (Pro Tips)
Over the years, I’ve learned a few little tricks that can really boost your propagation success.
- My favorite trick, especially for Ipomoea imperati, is to use a little bottom heat. If you have a heated propagator mat, that’s fantastic! If not, placing your pots on top of a gently warm appliance (like a refrigerator or a router, but not hot!) can provide just enough warmth to encourage root formation from underneath.
- When you’re making your stem cuttings, always take more than you think you’ll need. Nature isn’t always cooperative, and it’s much better to have a few extra cuttings to choose from if some don’t make it. Plus, the more you have, the more plants you can share!
- Don’t be afraid to gently tug on a cutting after a few weeks. If you feel a slight resistance, that’s a good sign that roots are forming! It’s a much better indicator than just waiting for visible growth from the top.
Aftercare & Troubleshooting
Once you see signs of new leaf growth, that’s your cue that roots have likely formed!
- Gradually Acclimate: If you’ve been using a plastic bag or dome, slowly start to remove it over a few days. Open it up for a few hours, then a bit longer the next day, and so on. This helps the new plant adjust to normal humidity levels.
- Watering: Continue to water keeping the soil consistently moist but not soggy. You’ll learn to feel the weight of the pot to know when it needs a drink.
- Fertilizing: Once the new plant is established and growing well, you can start feeding it with a diluted liquid fertilizer every few weeks during the growing season.
The most common issue you’ll face is rot. If your cutting looks mushy, smells off, or has a black, slimy appearance, it’s likely rotted. This is usually caused by too much moisture and not enough air circulation. If you catch it early, you might be able to salvage a healthy part of the stem, but often, it’s best to discard it and start fresh.
A Encouraging Closing
Propagating plants is a wonderful way to connect with nature and expand your garden without spending a fortune. Be patient with your Ipomoea imperati cuttings. Sometimes they take their sweet time, and that’s perfectly okay. Enjoy the process, learn from each attempt, and before you know it, you’ll have a whole family of these gorgeous beach morning glories to admire! Happy propagating!
Resource:
https://identify.plantnet.org/k-world-flora/species/Ipomoea%20imperati%20(Vahl)%20Griseb./data