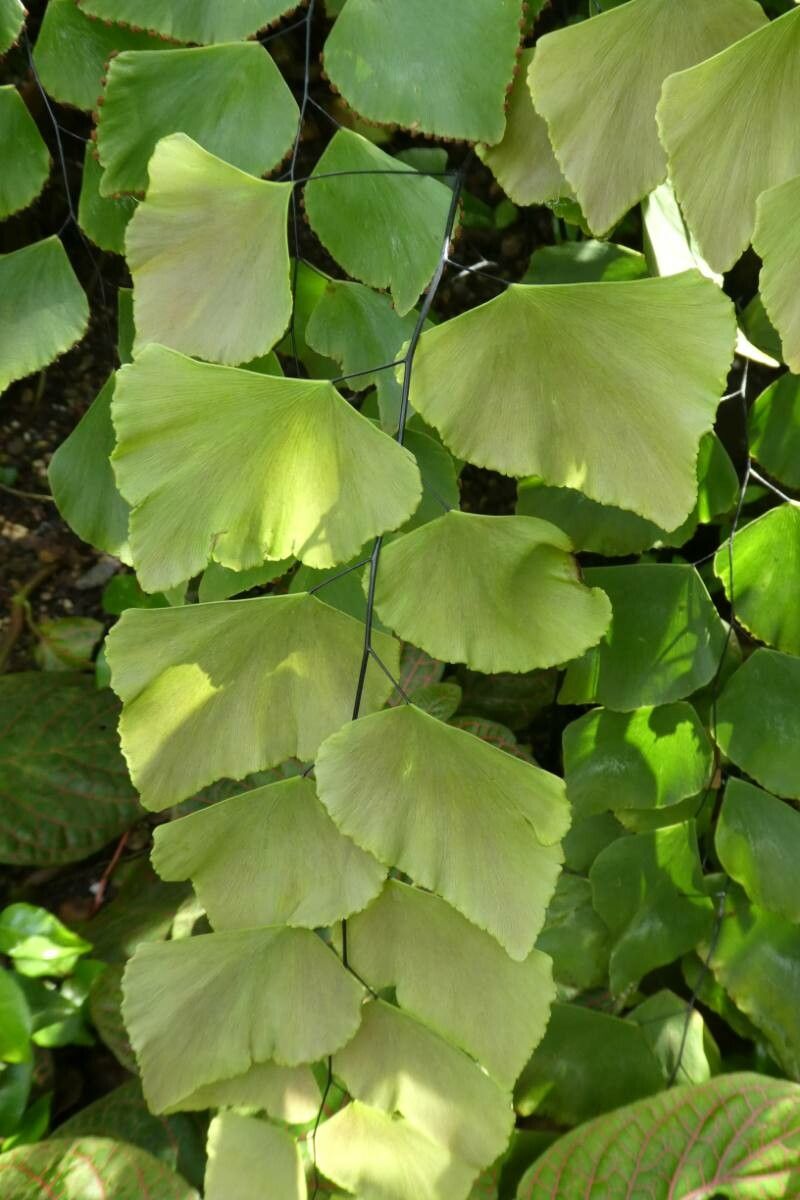
Hello, plant pals! Today, I want to chat about one of my absolute favorite ferns: Adiantum peruvianum, often called the Peruvian Maidenhair Fern. If you’ve ever seen its lush, cascading fronds, with those delicate, fan-shaped leaflets, you know how enchanting this plant is. It brings a touch of the tropics right into your home, and there’s something incredibly satisfying about creating new life from an existing treasure.
Now, about starting out. If you’re new to the plant parent game, propagating Adiantum peruvianum might feel a little bit like a gentle challenge. It’s not the absolute easiest to start from scratch, but with a bit of care and attention, it’s absolutely doable and so rewarding. Trust me, that first tiny new frond unfurling from your propagated cutting is pure magic!
The Best Time to Start
The spring is your green light for propagating this beauty. When your established fern is really starting to wake up after its winter snooze and pushing out new growth, that’s when it has the most energy. Aim for late spring or early summer, after the initial burst of growth has matured slightly. This gives your cuttings the best shot at strong establishment.
Supplies You’ll Need
Let’s get our toolkit ready! Here’s what I like to have on hand:
- Sharp, clean pruning shears or a sharp knife: For precise cuts.
- Well-draining potting mix: A good blend for ferns is key. I often use a mix of peat moss, perlite, and a bit of orchid bark. You want it to hold moisture but not get waterlogged.
- Small pots or propagation trays: With drainage holes, of course!
- Clear plastic bags or a propagation dome: To create a humid environment.
- Rooting hormone (optional but helpful): For an extra boost.
- Spray bottle: For misting.
- Perlite or vermiculite (optional): To add to your potting mix for even better drainage and aeration.
Propagation Methods
There are a couple of ways we can go about this, and division is often my go-to for this particular fern.
Division
This is where you split an existing, healthy plant into smaller sections, each with its own roots and shoots.
- Gently remove the parent plant from its pot. Tip it on its side and give the pot a firm tap to loosen it.
- Inspect the root ball. Look for natural divisions. You’re looking for sections where roots are clearly separate and have a healthy-looking shoot or two.
- Carefully tease apart the sections. You can use your fingers for this, or a clean knife if the roots are very dense. Be patient! The goal is to get a plantlet with a good amount of roots and at least one or two fronds.
- Prepare your new pots. Fill them with your fresh, damp potting mix.
- Plant your divisions. Place each division into its own pot, ensuring the roots are spread out and covered with soil. Gently firm the soil around them.
- Water gently. Water thoroughly but carefully, so you don’t disturb the young roots.
Stem Cuttings
While less common for Maidenhairs, you can try stem cuttings if you have a particularly vigorous plant.
- Identify a healthy, mature stem. Look for a stem that has a few sets of fully unfurled leaflets (pinnae) but isn’t too old or woody.
- Make a clean cut. Using your sharp shears, cut the stem just below a leaf node (where a leaflet joins the main stem). Try to get a cutting that’s about 4-6 inches long.
- Remove the lower leaflets. Gently pluck off the leaflets from the bottom half of the cutting. This encourages root formation and prevents them from rotting in the soil.
- Dip in rooting hormone (optional). Moisten the cut end and dip it into your rooting hormone powder. Tap off any excess.
- Pot it up. Insert the cut end into a pot filled with your damp propagation mix. Make a little hole with your finger or a pencil first to avoid rubbing off the hormone.
- Cover and mist. Water gently and then cover the entire pot with a clear plastic bag or place it under a propagation dome. Mist the inside of the bag or dome to create humidity.
The “Secret Sauce” (Pro Tips)
Here are a few little tricks that have really helped me over the years:
- Don’t let those delicate leaflets touch the water (if attempting water propagation, which is rare for this type, but a general fern tip!). For division or cuttings in soil, this means ensuring good air circulation and preventing any leaves from sitting on soggy soil. It’s a surefire way to invite rot.
- Bottom heat is your friend. Ferns love warmth! Placing your pots on a seedling heat mat can significantly speed up root development. It mimics the cozy, warm conditions they love. Imagine a toasty warm bed for your new roots!
- Mist religiously, but don’t drown. That high humidity is crucial for Maidenhairs. I like to mist the cuttings or divisions daily, especially those under cover. However, the soil itself should be consistently moist, not waterlogged. Feel it with your finger – it should feel like a wrung-out sponge.
Aftercare & Troubleshooting
Once you start seeing tiny new fronds emerging, congratulations! You’ve got a new plant in the making.
- Gradually acclimate. Once your new fern has a few healthy fronds and looks like it’s actively growing, you can start to slowly remove the plastic cover or ventilation over a week or two. This helps it adjust to your home’s humidity levels.
- Keep it consistently moist. Continue to water when the top inch of soil feels dry.
- Bright, indirect light. Find a spot that gets plenty of bright, filtered light, but avoid direct sun, which can scorch those new, tender fronds.
The most common hiccup you might encounter is rot. If your cutting or division starts to turn black and mushy, it’s usually a sign of too much moisture and not enough air circulation. Unfortunately, there’s not much you can do once this sets in. The key is prevention: good drainage, not overwatering, and that crucial humidity. Another sign of unhappiness is crisping, which means it’s too dry, or not growing at all, which can be due to insufficient light or warmth.
Happy Growing!
Propagating Adiantum peruvianum is a journey of patience and observation. Don’t get discouraged if your first attempt isn’t a runaway success. Each plant and each cutting has its own little personality. Keep trying, pay attention to its needs, and enjoy the quiet miracle of coaxing new life from your cherished plants. Happy gardening!
Resource:
https://identify.plantnet.org/k-world-flora/species/Adiantum%20peruvianum%20Klotzsch/data