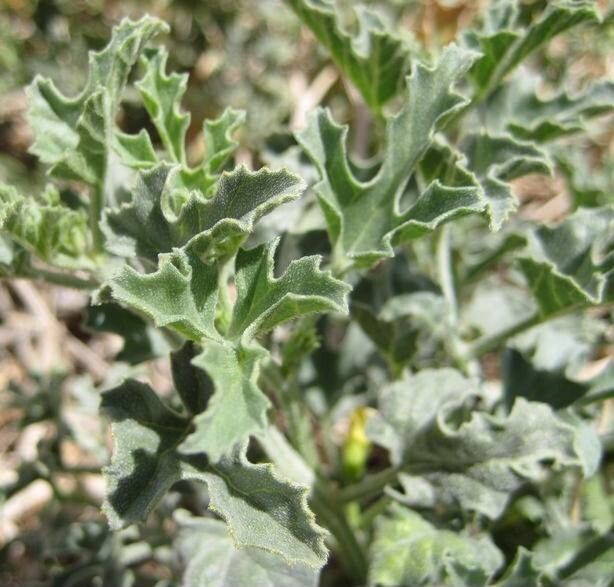
Hello fellow plant lovers! Today, we’re diving into the wonderful world of Citrullus ecirrhosus, often called the Tarbush. I’ve spent many years tending to this unique vine, and let me tell you, watching a new Tarbush sprout from a tiny cutting is incredibly satisfying. Its intricate foliage and the promise of its eventual fruit make it a real showstopper in any garden. For beginners, I’d say it’s a moderately easy plant to propagate once you get the hang of a few key things. Don’t let that deter you – with a little patience, you’ll be rewarded with new plants in no time!
The Best Time to Start
For the highest success rate, late spring to early summer is your golden window. This is when the plant is actively growing, and the energy reserves are high. You’ll want to take cuttings from healthy, mature stems that have started to firm up a bit – not the brand-new, super-soft shoots. Think of it as choosing a well-established teenager, not a brand-new baby!
Supplies You’ll Need
Here’s what you’ll want to have on hand before you get started:
- Sharp Pruning Shears or a Clean Knife: For making clean cuts.
- Rooting Hormone (optional but recommended): This helps encourage faster root development.
- Well-Draining Potting Mix: A good blend of potting soil, perlite, and a little bit of coarse sand works wonders.
- Small Pots or Seedling Trays: Clean ones are crucial to prevent disease.
- Plastic Bags or a Propagation Dome: To create a humid environment.
- Watering Can with a Fine Rose: For gentle watering.
- Labels: So you don’t forget what you planted where!
Propagation Methods
We’ll focus on the most reliable method for the Tarbush: stem cuttings.
- Take Your Cuttings: Get your clean shears ready. Look for healthy stems that are about 4-6 inches long. Make your cut just below a leaf node. This is where the roots are most likely to form. Remove the lower leaves, leaving just a couple of sets at the top.
- Prepare the Cutting: If you’re using rooting hormone, dip the cut end into the powder, tapping off any excess. Then, gently poke a hole in your potting mix with your finger or a pencil.
- Plant the Cutting: Insert the cut end of the stem into the prepared hole in your pot. Gently firm the soil around the stem to ensure good contact.
- Create a Humid Environment: Water the soil lightly. Then, cover the pot with a clear plastic bag or place it under a propagation dome. This traps moisture, which is essential for the cuttings to root. Make sure the leaves aren’t touching the plastic, if possible. You can use small stakes to prop it up.
The “Secret Sauce” (Pro Tips)
Here are a couple of things I’ve learned over the years that make a big difference:
- Bottom Heat is Your Friend: If you have a heat mat designed for seedlings, place your pots on it. This gentle warmth encourages root development from below, giving your cuttings an extra boost. It mimics the warmth of the soil in summer.
- Don’t Overwater! This is a common mistake. You want the soil to be consistently moist, but not soggy. Soggy soil leads to rot, and nobody wants that. Check the soil moisture with your finger; if the top inch feels dry, it’s time to water.
- Air Circulation is Key (Once Rooted): Once you start seeing new growth, it’s important to gradually introduce your new plant to regular air. Open the plastic bag or propagation dome for a few hours each day, slowly increasing the time until it’s fully acclimated. This prevents shock.
Aftercare & Troubleshooting
Once you see signs of new growth – tiny leaves unfurling or a little tug on the cutting when you gently pull – congratulations, you’ve got roots! Continue to keep the soil consistently moist and the humidity high for another week or two. Then, gradually acclimatize your new Tarbush to normal garden humidity.
The most common issue you’ll encounter is rot. If you notice your cutting turning black and mushy, it’s likely due to too much moisture and not enough airflow. Unfortunately, there’s usually not much you can do to save a rotting cutting, so your best bet is to discard it and try again with a fresh cutting and a slightly drier soil mix. Another sign of trouble is no new growth at all. This could mean it’s not getting enough light, or the temperature is too cool.
A Bit of Encouragement
Propagating plants is a journey, and sometimes things don’t work out on the first try. Don’t get discouraged! Each attempt teaches you something new. Be patient, enjoy the process of nurturing these new little lives, and before you know it, you’ll have a beautiful Tarbush vine all your own. Happy propagating!
Resource:
https://identify.plantnet.org/k-world-flora/species/Citrullus%20ecirrhosus%20Cogn./data