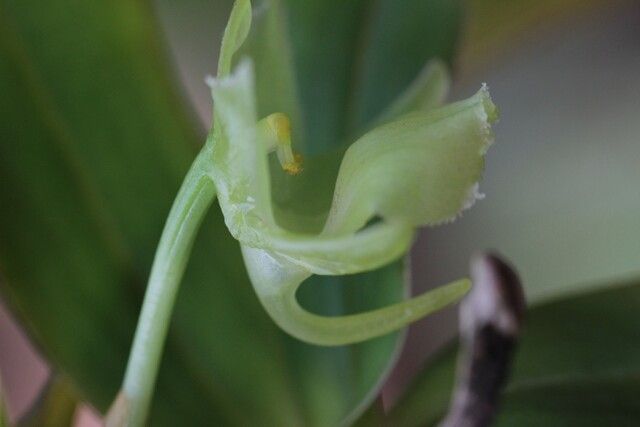
Hello fellow plant lovers! It’s so wonderful to connect with you today. For years, I’ve been captivated by the delicate beauty of Rhipidoglossum kamerunense. Its graceful, upright growth and the subtle magic of its blooms just draw you in. And let me tell you, the joy of successfully growing a new Rhipidoglossum from a piece of your existing plant is truly something special. It’s a little bit of horticultural magic you can share. Now, if you’re brand new to plant propagation, this particular gem might be a little bit of a challenge. It’s not the most forgiving plant out there, but with a bit of careful attention, you’ll find it surprisingly rewarding. Don’t let that deter you – think of it as a wonderful learning opportunity!
The Best Time to Start
When I’m looking to propagate my Rhipidoglossum kamerunense, I always aim for the spring or early summer. This is when the plant is actively growing, full of vigor, and has the energy to push out new roots. You want to work with a healthy, established plant that’s showing good signs of life. Avoid trying to propagate during the plant’s dormancy or when it’s stressed.
Supplies You’ll Need
Here’s what you’ll want to have on hand before you get started:
- Sharp, sterile pruning shears or a clean knife: For making clean cuts and preventing disease.
- Rooting hormone (optional but recommended): A good quality rooting powder or gel can give your cuttings a significant boost.
- A well-draining propagation mix: I personally love a blend of perlite and fine orchid bark, about a 50/50 ratio. This ensures plenty of aeration and prevents soggy conditions. Some people also use a sphagnum moss blend.
- Small pots or seedling trays: Choose containers with drainage holes.
- A clear plastic bag or humidity dome: To maintain a humid environment for your cuttings.
- Plastic labels and a permanent marker: To keep track of your propagation attempts!
- A shallow tray for bottom watering (optional): This is a gentle way to water.
Propagation Methods: Bringing New Life Forth
For Rhipidoglossum kamerunense, I’ve had the most success with stem cuttings. This method is straightforward and allows you to get multiple new plants from a single parent.
Here’s how I do it:
- Identify a healthy stem: Look for a mature stem on your plant that has at least two nodes (those little bumps where a leaf attaches to the stem).
- Make a clean cut: Using your sterile shears, make a cut just below a node. The goal is to get a cutting that’s about 3-6 inches long.
- Remove lower leaves: Gently peel off any leaves from the bottom node. This prevents them from rotting in the soil or water. You want the node itself to be exposed.
- Apply rooting hormone (if using): Dip the cut end of your stem cutting into the rooting hormone, tapping off any excess.
- Plant your cutting: Gently insert the cut end into your prepared propagation mix. Make sure at least one node is buried in the soil. Firm the mix gently around the stem to provide support.
- Create a humid environment: Lightly water the soil. Then, cover the pot with a clear plastic bag, propping it up with a skewer or two so it doesn’t touch the leaves. Alternatively, use a humidity dome. Place your pot in a warm spot with bright, indirect light.
The “Secret Sauce” (Pro Tips)
As I’ve tinkered in my garden with Rhipidoglossums over the years, I’ve picked up a few tricks that really seem to make a difference.
- Don’t let the leaves touch the soil: This is crucial! If the leaves of your cutting are sitting in the damp soil, they’re much more prone to rot. If your cutting is a bit leggy, you can sometimes rest the stem over the edge of the pot and just bury the node.
- Bottom heat is your friend: These tropical beauties absolutely love a little warmth from below. Placing your propagation tray on a heat mat designed for plants can dramatically speed up root development. Just be sure to check the mat’s temperature; you don’t want it too hot.
- Patience is paramount (and so is air circulation): While you want high humidity, you also don’t want stagnant air. Every few days, I’ll lift the plastic bag or pop off the dome for a few minutes of fresh air exchange. This helps prevent fungal issues that can plague cuttings.
Aftercare & Troubleshooting
Once your cuttings have happily rooted – you’ll often see new leaf growth or feel a gentle tug when you lightly pull on the stem – it’s time to transition them. You can start to gradually decrease the humidity over a week or two. Keep the soil consistently moist, but not soggy, and continue to provide bright, indirect light.
Now, what if things go wrong? The most common issue you’ll face is rot. If you notice your cutting turning mushy, blackening, or emitting a foul odor, it’s likely rotting. This is usually a sign of too much moisture and poor air circulation. If you catch it early, you can try to salvage a healthy section of the stem and restart, ensuring drier conditions and better airflow. Yellowing leaves can also be a sign of stress or too much direct sun. Don’t panic; adjust your conditions and keep an eye on it.
A Little Encouraging Word
Propagating plants is a journey, not a race. There will be successes, and there will be learning experiences. Embrace the process, enjoy watching those tiny roots develop, and celebrate every new little Rhipidoglossum you create. Happy propagating!
Resource: