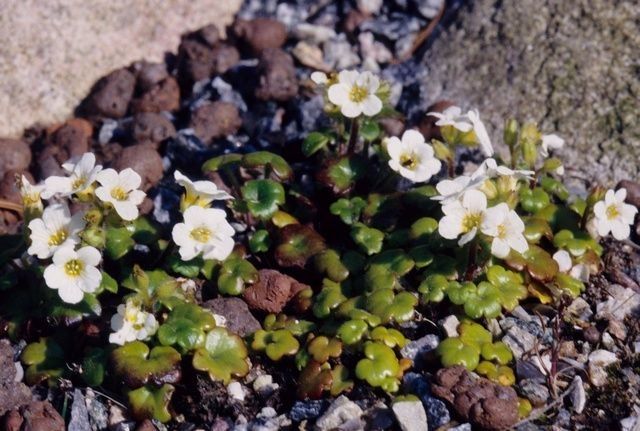
Oh, hello there, fellow garden enthusiasts! Today, I want to chat about a rather delightful plant that’s captured a little piece of my heart over the years: Romanzoffia tracyi. If you’re looking for a plant that adds a touch of woodland charm and a delicate, almost ethereal beauty to your shady nooks, this is certainly one to consider. Its graceful foliage and lovely, subtle blooms are a real treat.
Now, as for propagating it – is it a walk in the park or a bit of a challenge? I’d say for the absolute beginner, it might require a tad more attention than, say, a succulent. But stick with me, and by the end of this, you’ll feel confident giving it a go. The reward of seeing a brand new Romanzoffia tracyi unfurl its leaves, all thanks to your touch, is truly something special.
The Best Time to Start
For Romanzoffia tracyi, the sweet spot for propagation is generally in the late spring or early summer. This is when the plant is actively growing and has robust energy reserves to put into developing new roots. You’re looking for healthy, new growth that hasn’t yet become too woody. Think of it as trying to catch the plant when it’s feeling its most vigorous and optimistic!
Supplies You’ll Need
Gathering your tools before you begin always makes the process smoother, doesn’t it? Here’s what I find handy:
- Sharp, clean pruning shears or a sharp knife: Crucial for making clean cuts that heal well.
- Well-draining potting mix: A good blend of peat moss or coco coir, perlite, and a bit of compost works wonderfully. I often use a mix specifically for houseplants or seed starting.
- Small pots or seedling trays: Clean containers are a must to prevent disease.
- Rooting hormone (optional but recommended): This can give your cuttings a helpful boost. Look for a powder or gel specifically for stem cuttings.
- Plastic bag or propagation dome: To create a humid environment for your cuttings.
- Watering can with a fine rose or a spray bottle: Gentle watering is key.
- Labels or plant tags: Never underestimate the power of labeling!
Propagation Methods
Romanzoffia tracyi is most commonly and successfully propagated through stem cuttings and division. Let’s dive into how to do each.
Stem Cuttings
This is my go-to method for getting more of these beauties!
- Select your cuttings: Look for healthy, non-flowering stems that are at least 4-6 inches long. Gently pinch one off where it meets a larger stem or use your clean shears to make a clean cut just below a leaf node. A leaf node is where a leaf attaches to the stem; this is where roots are most likely to form.
- Prepare the cuttings: Remove the lower leaves from the bottom half of the stem. This prevents them from rotting when buried in the soil. If your cutting is particularly long, you can leave the top 2-3 sets of leaves.
- Apply rooting hormone (optional): Dip the cut end of the stem into your rooting hormone. Tap off any excess.
- Plant the cuttings: Fill your small pots with your prepared potting mix. Make a small hole in the center of the soil with your finger or a pencil. Carefully insert the prepared cutting into the hole, ensuring the leaf nodes are beneath the soil surface. Gently firm the soil around the stem.
- Water gently: Water the soil thoroughly until it’s evenly moist, but not waterlogged.
- Create humidity: Cover the pot loosely with a plastic bag secured with a rubber band, or place it under a propagation dome. This traps moisture and creates the humid environment cuttings crave. Ensure the leaves don’t touch the plastic bag.
- Place in bright, indirect light: Find a warm spot that receives plenty of bright, indirect sunlight. Avoid direct sun, which can scorch the delicate cuttings.
Division
If you have a mature Romanzoffia tracyi that’s looking a bit crowded or you simply want more plants, division is a great option.
- Gently remove the plant from its pot: Turn the pot on its side and carefully slide the plant out. If it’s stuck, you might need to run a knife around the edge of the pot.
- Loosen the root ball: Gently shake off as much of the old soil as you can. You’ll want to be able to see the roots clearly.
- Identify natural divisions: Look for clumps or sections of the plant that have their own root system. You can often see where one plant ends and another begins.
- Separate the divisions: Using your hands, or a clean, sharp knife if the roots are tough, gently pull or cut the plant into smaller sections. Each division should have at least one or two healthy shoots and a good amount of root material.
- Pot up the divisions: Plant each division into its own pot filled with your well-draining potting mix, just as you would transplant any other plant. Ensure the roots are spread out and the crown of the plant is at soil level.
- Water thoroughly: Water each pot well after planting.
The “Secret Sauce” (Pro Tips)
After years of growing, you learn a few little tricks that can make all the difference. Here are a couple of things I’ve found really helpful with Romanzoffia tracyi:
- Bottom heat is your friend: For stem cuttings, placing the pots on a gentle seedling heat mat can significantly speed up root development. It mimics the warmth of spring soil and encourages those roots to wake up and grow. Just be sure your heat mat isn’t too hot – a gentle warmth is all you need.
- Don’t be afraid to mist, but avoid soggy feet: While humidity is vital for cuttings, standing water is the enemy. I like to mist the leaves and soil surface lightly once a day, especially if they’re not under a dome. However, if you see water pooling at the bottom of the pot, you’ve watered too much. Ensure your pots have drainage holes!
Aftercare & Troubleshooting
Once your cuttings show signs of rooting – you might see new leaf growth or feel a gentle tug when you lightly pull on the stem – it’s time for a little adjustment. Gradually remove the plastic bag or propagation dome over a week or so. This helps the new plant acclimatize to normal humidity levels. Continue to water when the top inch of soil feels dry.
Root rot is the most common issue you’ll encounter. Signs of rot include stems turning black and mushy, or leaves wilting and yellowing despite moist soil. If you suspect rot, act quickly. Remove the affected cutting, trim away any black or mushy parts with a clean knife, and try repotting the healthy portion in fresh, dry soil. Sometimes, unfortunately, it’s a lesson learned!
A Little Patience Goes a Long Way
Propagating plants is a wonderful way to connect with nature and expand your garden. Romanzoffia tracyi might take a little time to establish, but the process itself is so rewarding. Be patient, observe your new babies closely, and don’t be discouraged if you have a few failures along the way. Each attempt teaches you something new. Happy growing!
Resource:
https://identify.plantnet.org/k-world-flora/species/Romanzoffia%20tracyi%20Jeps./data