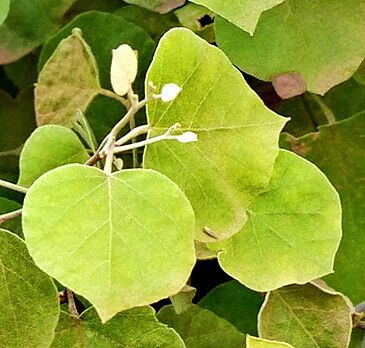
Hey there, fellow garden enthusiasts! I’m so excited to talk to you today about a truly special plant: Morisonia tweedieana. You might know it by other names, but its elegant, almost fern-like foliage and fascinating, almost alien-looking fruit are what really capture my heart. Growing one or even a few from scratch is incredibly satisfying. It’s not the absolute easiest plant out there for a complete novice, but with a little patience and a few of my tried-and-true methods, you’ll be well on your way to success.
The Best Time to Start
Generally, I find that late spring through summer is your golden window for propagating Morisonia tweedieana. This is when the plant is actively growing, pushing out new energy, and has plenty of sap flow. Starting around May or June gives your cuttings ample time to establish before the cooler, darker days of autumn arrive.
Supplies You’ll Need
To get your propagation station ready, here’s what you should gather:
- Sharp pruning shears or a clean, sharp knife: For making clean cuts.
- Rooting hormone (optional but recommended): Look for one formulated for stem cuttings.
- Small pots or propagating trays: Clean and with drainage holes.
- Well-draining potting mix: I like a blend of equal parts perlite, peat moss, and a good quality potting soil. Some growers even swear by a mix of just perlite and coco coir!
- Clear plastic bags or a propagation dome: To create a humid environment.
- Watering can or spray bottle: For gentle watering.
- Small stakes or skewers (optional): To support cuttings within bags.
Propagation Methods
Let’s dive into how we’ll bring these beauties to life!
Stem Cuttings
This is my go-to method for Morisonia tweedieana.
- Select healthy stem sections: Look for new, but not too soft, growth from your mature plant. You want stems that are about 4-6 inches long and have at least two to three sets of leaves.
- Make the cut: Using your clean shears or knife, make a clean cut just below a leaf node. This is the point where a leaf meets the stem, and it’s where new roots are most likely to form.
- Prepare the cutting: Gently remove the lower leaves, leaving only the top two or three leaves intact. If your remaining leaves are very large, you can even cut them in half horizontally to reduce water loss.
- Apply rooting hormone (if using): Dip the cut end of the stem into your rooting hormone powder, tapping off any excess.
- Plant the cutting: Fill your pots or trays with your prepared potting mix. Make a small hole with a finger or skewer and insert the bottom half of your cutting, ensuring the nodes where you removed the leaves are below the soil surface. Gently firm the soil around the stem.
- Water gently: Water thoroughly until the soil is evenly moist.
Water Propagation (with a caveat)
While some plants thrive in water, Morisonia tweedieana can be a bit fussier. I generally prefer soil, but if you’re keen to try, here’s how:
- Prepare the cutting: Follow steps 1-3 from the stem cutting method.
- Place in water: Put the cutting in a clean jar or glass of room-temperature water. Crucially, ensure that no leaves are submerged in the water. Submerged leaves will rot, which is your biggest enemy here.
- Change water regularly: Change the water every few days to keep it fresh and oxygenated.
- Observe for roots: It might take a few weeks to see tiny white roots emerging. Once you have roots about an inch long, you’ll need to carefully transplant them into soil. This transition can be stressful, so be ready with that well-draining mix.
The “Secret Sauce” (Pro Tips)
Here are a couple of things I’ve learned over the years that can really boost your success:
- The Power of Bottom Heat: Morisonia tweedieana absolutely loves a little warmth from below. If you can, place your pots on a gentle heated propagator mat. This encourages root development and significantly speeds up the rooting process. It makes a world of difference!
- Don’t Disturb Too Soon: Resist the urge to tug at your cuttings to “check for roots.” That can break delicate new root hairs. Instead, look for new leaf growth, which is a sure sign that your cutting has rooted and is happy. If you’re really curious and have them in clear pots, you might see roots peeking through the drainage holes.
Aftercare & Troubleshooting
Once you see those lovely new roots appearing, it’s time for gentle care.
- Transitioning to pots: If you propagated in a tray, it’s time to move your rooted cuttings into individual small pots. Use that same well-draining mix.
- Humidity is key: Continue to keep your new plants in a humid environment for a few weeks after potting. The plastic bag or dome can stay on, but open it for a few hours each day to allow for air circulation and prevent fungal issues. Gradually acclimate them to normal room humidity.
- Watering: Water when the top inch of soil feels dry. Avoid overwatering, which is the most common cause of failure.
- Signs of trouble: The biggest red flag is mushy, black stems, usually at the soil line. This is rot, and it’s often caused by too much moisture and poor air circulation. If you see this, it’s usually too late to save that particular cutting. Another sign is a cutting that wilts and never recovers – this could mean it didn’t root or it’s not getting enough light.
A Little Patience Goes a Long Way
Propagating Morisonia tweedieana is a journey. There will be times when some cuttings don’t make it, and that’s perfectly okay. Don’t get discouraged! Celebrate the successes, learn from the challenges, and most importantly, enjoy the process of nurturing new life. Happy growing!
Resource: