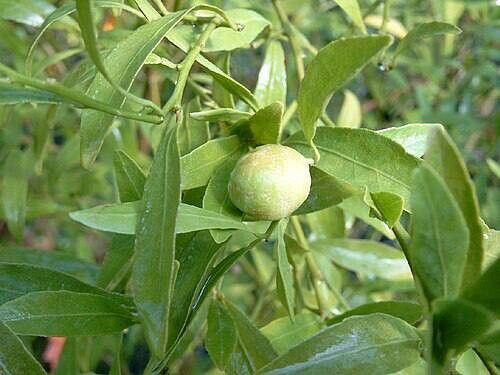
Hello fellow garden enthusiasts! You know, there’s a certain magic in coaxing a new plant to life from just a snippet of the old. And when it comes to the delightful tartness of Citrus glauca, also known as the native Australian lime, that magic feels even more special. These little gems, with their glossy leaves and zesty fruit, are a fantastic addition to any garden, especially in warmer climates. Propagating them can feel a little daunting at first, but I’m here to share what I’ve learned over the years to make it a rewarding journey. Don’t worry, it’s quite achievable, even for those just starting to explore the world of plant propagation!
The Best Time to Start
My experience tells me the late spring through summer is your sweet spot for propagating Citrus glauca. This is when the plant is in its active growth phase, meaning it has plenty of energy to put into developing new roots. You’ll want to take cuttings from healthy, firm, but not woody, stems. Think of a pencil’s thickness – that’s usually perfect. Avoid anything too soft or too old and woody.
Supplies You’ll Need
Before we get our hands dirty, let’s gather your toolkit:
- Sharp Pruning Shears or a Clean Knife: For taking precise cuttings. Sterilize them, please!
- Rooting Hormone: A powdered or liquid form to encourage root development.
- Well-Draining Potting Mix: I find a blend of potting soil, perlite, and a bit of sand works wonders. You want it to drain freely!
- Small Pots or Trays: With drainage holes, of course.
- Clear Plastic Bag or Humidity Dome: To create a mini greenhouse effect.
- Watering Can with a Fine Rose: For gentle watering.
- Optional: Bottom Heat Mat: This can significantly speed up root formation.
Propagation Methods
We’ll focus on stem cuttings, which is my go-to for Citrus glauca.
- Take Your Cuttings: With your sterilized shears, select a healthy branch and take cuttings about 4-6 inches long. Make each cut at a 45-degree angle just below a leaf node (the point where a leaf grows from the stem).
- Prepare the Cuttings: Gently remove the lower leaves from your cuttings, leaving just two or three at the very top. This prevents them from rotting in the soil and directs the plant’s energy to root formation.
- Apply Rooting Hormone: Dip the cut end of each stem into your rooting hormone, making sure it’s well-coated. Tap off any excess.
- Plant Your Cuttings: Fill your small pots with your prepared potting mix. Make a hole in the center with your finger or a pencil, and carefully insert the cut end of the stem. Firm the soil gently around it.
- Water and Cover: Water the soil thoroughly but gently. Then, cover the pot with a clear plastic bag, securing it around the rim with a rubber band, or place it under a humidity dome. This traps moisture, mimicking the humid conditions the cuttings need.
The “Secret Sauce” (Pro Tips)
Here are a few things I’ve learned that can really tip the scales in your favor:
- Don’t Let Leaves Touch the Water: If you happen to be trying water propagation (sometimes works, but soil is more reliable for citrus), make sure precisely no leaves are submerged. Rot happens fast! Sticking to soil cuttings with good drainage is usually a safer bet for citrus.
- Bottom Heat is Your Friend: Citrus glauca really thrives with a bit of gentle warmth from below. Placing your pots on a bottom heat mat set to around 70-75°F (21-24°C) can encourage root development significantly faster. It’s like giving them a warm hug!
- Patience is Not Just a Virtue, It’s a Strategy: Don’t be tempted to pull your cuttings out too soon to check for roots. You could damage the delicate new growth. Leave them be for several weeks.
Aftercare & Troubleshooting
Once your cuttings are happily rooted (you might see new leaf growth, which is a great sign!), it’s time to think about their next chapter.
- Gradual Acclimation: Slowly start to introduce them to normal air. Loosen the plastic bag a little for a few days, then fully remove it.
- Watering: Water when the top inch of soil feels dry. Avoid letting them sit in waterlogged soil – this is a recipe for root rot.
- Light: Gradually move them to a bright spot with indirect sunlight. Avoid harsh, direct sun initially.
Now, about troubleshooting. The most common villain here is rot. If your cuttings turn mushy or black, sadly, it’s usually a sign of too much moisture and not enough air circulation. This is where good drainage and that humidity dome come in handy. If you see wilting that doesn’t perk up after watering, and the stem feels limp, it might be too dry, or the cutting simply didn’t take. Don’t get discouraged! Every cutting is a learning experience.
A Heartening Wrap-Up
So there you have it! Propagating Citrus glauca is a journey of patience and observation. Trust your instincts, enjoy the process of nurturing these tiny new lives, and before you know it, you’ll have your very own little citrus grove. Happy gardening!
Resource:
https://identify.plantnet.org/k-world-flora/species/Citrus%20glauca%20(Lindl.)%20Burkill/data