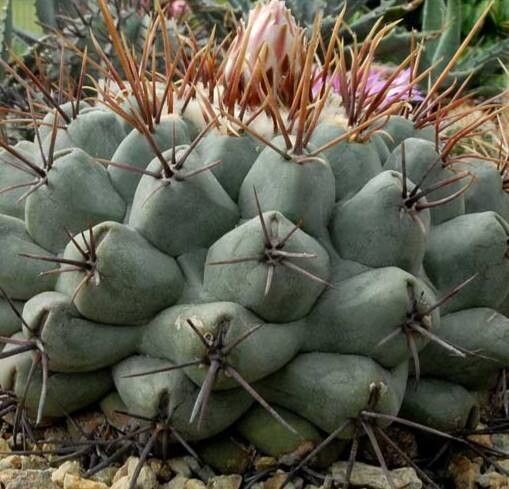
Hey there, fellow plant lovers! Today, we’re diving into the wonderful world of propagating Eriosyce paucicostata. If you’ve ever admired the architectural beauty of these South American cacti, with their ribbed bodies and charming flowers, you’re not alone. Watching a tiny cutting transform into a robust new plant is one of the most satisfying parts of gardening, in my book. As for Eriosyce paucicostata, well, it’s not quite a beginner-friendly “stick it in water and watch it go” kind of plant, but with a little patience and the right approach, you’ll find it to be a truly rewarding challenge.
The Best Time to Start
Spring is definitely your best bet for giving propagation a go with Eriosyce paucicostata. Think about when the plant is actively growing, putting on new energy. That’s when it’ll be most receptive to taking root. So, once the days start getting longer and warmer, and your cactus is showing signs of new life, that’s your cue. Aim for when the plant is healthy and free from any stress or pests.
Supplies You’ll Need
Before we get our hands dirty, let’s gather our tools:
- Sharp, clean pruning shears or a very sharp knife: For taking your cuttings. Sterilize them with rubbing alcohol before and after use!
- Rooting hormone (optional but recommended): This can give your cuttings a nice little boost to encourage root development.
- Cactus or succulent potting mix: A well-draining mix is absolutely crucial. I like a blend of coarse sand, perlite, and a small amount of peat moss. For a good DIY, try 2 parts potting soil, 1 part perlite, 1 part coarse sand.
- Small pots or seed trays: Clean and with drainage holes, of course.
- Gravel or small stones: For the bottom of pots if you’re worried about drainage.
- Spray bottle: For misting.
Propagation Methods
Eriosyce paucicostata is best propagated from offsets or stem cuttings. Let’s break that down:
Propagating from Offsets (Pups):
This is probably the easiest way to go. You’ll see little baby cacti, called offsets or pups, growing from the base of the mother plant.
- Wait for them to grow: Let the pups get a decent size, ideally at least an inch or two tall, before you try to separate them. The larger they are, the better their chance of survival.
- Gently separate: Use your clean knife or shears to carefully cut the offset away from the mother plant. Try to get a clean cut right at the base. If a tiny bit of the mother plant’s tissue is attached to the offset, that’s even better.
- Callus over: This is a super important step for cacti. Place the offset in a cool, dry, well-ventilated spot for at least a week, maybe even two. You want the cut end to dry up and form a protective callus. This prevents rot.
- Planting: Once callused, gently plant the offset into your cactus mix. Don’t bury it too deep, just enough to keep it stable.
Propagating from Stem Cuttings:
This is a bit more involved but can also be very successful.
- Take the cutting: Choose a healthy stem or a prominent rib section from your Eriosyce paucicostata. Use your clean, sharp knife or shears to make a clean cut.
- Allow to callus: Just like with offsets, you must let the cut end callus over. This can take 1-3 weeks, depending on humidity and temperature. Be patient!
- Rooting Hormone (Optional): Once callused, you can dip the cut end into rooting hormone, tapping off any excess.
- Planting: Gently insert the callused end into your cactus mix. You want it to be stable, so don’t be afraid to push it in a little.
The “Secret Sauce” (Pro Tips)
Now, for a couple of little tricks I’ve picked up over the years that can really make a difference:
- Don’t water immediately after planting: With both offsets and cuttings, resist the urge to water right away. Wait at least a week, maybe even longer for cuttings that seemed a bit soft when you planted them. This gives any tiny nicks from planting a chance to dry and further prevents rot.
- Bottom heat is your friend: If you have a propagation mat or can place your pots on a slightly warm surface (think near a sunny window that gets a little heat from below), it can dramatically speed up root development. Cacti love a bit of warmth from the ground up!
Aftercare & Troubleshooting
Once you’ve planted your new bairns, give them space. Keep them in a bright spot, but out of direct, harsh sun for the first few weeks.
Watering: When you do water, do it sparingly. Let the soil dry out completely between waterings. A good technique for new propagations is to water from the bottom – place the pot in a tray of water and let it soak up what it needs for about 30 minutes, then let any excess drain away.
Signs of Success: You’ll know your plant is rooting when it starts to feel a little firm and resistant when gently tugged. You might also see tiny new growth appearing at the tip. Hooray!
Common Issues:
- Rot: This is the big bogeyman for cacti propagation. If your cutting or offset starts to look mushy, discolored, or develops black spots, it’s likely rot. Act fast! You might be able to salvage it by cutting away the rotten part (if any is left) and letting the healthy part callus over again.
- Shriveling: If your cutting is shriveling and not showing any signs of rooting, it could be too dry, or it hasn’t established roots yet. Try a very light misting or a slightly more frequent (but still allowed-to-dry-out) watering schedule.
A Encouraging Closing
Propagating Eriosyce paucicostata is a journey, and like any good journey, it requires a bit of patience. Don’t be discouraged if your first attempt doesn’t yield instant results. Each cactus is a little bit different, and the environment plays a role. Just keep observing, keep trying, and most importantly, enjoy the process of nurturing new life. Happy propagating!
Resource: