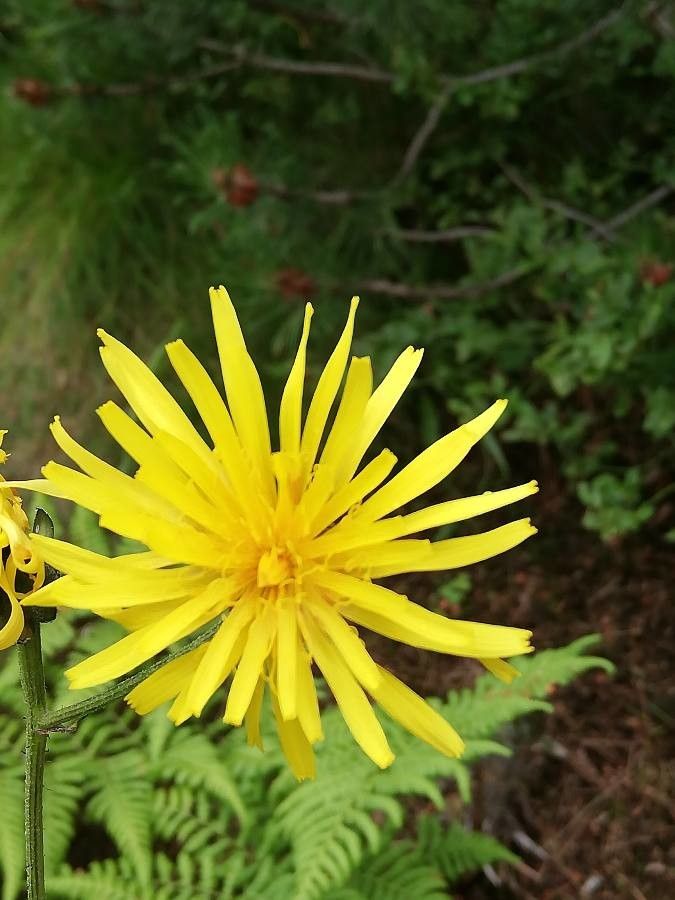
Oh, Crepis sibirica! If you’re looking for a plant that brings a cheerful, informal elegance to the garden, you’ve found a winner. Its nodding, dandelion-like blooms in shades of yellow and orange are just delightful, and they have a way of self-seeding gently, creating little pockets of sunshine year after year. Propagating it yourself feels like a little bit of gardening magic, and I’m thrilled to share how I do it. For those new to plant propagation, Crepis sibirica is generally quite forgiving, making it a wonderful one to try your hand at.
The Best Time to Start
My absolute favorite time to get busy with propagating Crepis sibirica is in late spring to early summer. This is when the plant is actively growing, full of energy, and has plenty of suitable material to work with. You can also have good luck with late summer cuttings if you have a particularly long growing season. Waiting until after the initial flush of spring bloom is often ideal, as the plant has put on some good growth by then.
Supplies You’ll Need
Gathering your tools beforehand makes the process so much smoother. Here’s what I usually have on hand:
- Sharp, clean pruning shears or a small knife: Essential for making clean cuts.
- Seed-starting mix or a well-draining potting mix: I often use a blend of peat moss, perlite, and a little compost. Avoid heavy, compacted soils.
- Small pots or trays: Clean ones are a must to prevent disease. Yogurt cups with drainage holes poked in work in a pinch!
- Rooting hormone (optional but helpful): A little encouragement for those new roots is always a good idea.
- Watering can with a fine rose: Gentle watering is key.
- A clear plastic bag or propagator lid: To keep humidity levels up.
- Labels and a pen: So you remember what you planted where!
Propagation Methods
Crepis sibirica is wonderfully versatile. I find the easiest and most successful methods are through division and stem cuttings.
Division
This is my go-to for established plants. It’s like giving your Crepis a little spa treatment.
- Dig it up gently. In late spring, before it gets too hot, carefully dig around the base of your mature plant. You want to lift the entire root ball.
- Inspect the root system. You’ll likely see that the plant has formed several crowns.
- Gently separate. Use your hands, or if it’s really snug, a clean trowel or knife, to carefully pull or cut the root ball into sections. Each section should have some roots and at least one visible growing point (a small bud or sprout). Don’t be afraid if a few of the finer roots break; it’s part of the process.
- Pot them up. Plant each division into its own pot filled with your chosen potting mix. Water them in well.
- Keep them happy. Place the newly divided plants in a partially shaded spot for a week or two until they show signs of new growth, then gradually introduce them to more sun.
Stem Cuttings
This method is perfect for creating new plants from actively growing stems.
- Select your stems. Look for healthy, non-flowering stems that are about 4-6 inches long. Take them in the morning when the plant is most hydrated.
- Make the cut. Using your sharp pruners or knife, make a clean cut just below a leaf node (where a leaf joins the stem). This is where roots are most likely to form.
- Prepare the cutting. Remove the lower leaves from the cutting, leaving just a couple at the very top. This prevents them from rotting in the soil.
- Apply rooting hormone. If you’re using it, dip the cut end of the stem into the rooting hormone, tapping off any excess.
- Plant the cutting. Make a small hole in your pot of well-draining mix and gently insert the end of the cutting. Firm the soil gently around it. You can typically fit 2-3 cuttings per small pot.
- Mist and cover. Lightly mist the cuttings and the soil. Then, cover the pot with a clear plastic bag or a propagator lid to create a humid environment.
- Place them wisely. Put the pot in a bright spot, but out of direct, hot sun.
The “Secret Sauce” (Pro Tips)
Here are a few little tricks I’ve picked up over the years that seem to make all the difference:
- Bottom Heat is Your Friend for Cuttings: For stem cuttings, if you have a heat mat designed for seedlings, placing your pots on top of it can significantly speed up root formation. It mimics the warmth of spring soil beautifully.
- Never Let Leaves Touch the Water (for any method): Whether you’re misting your cuttings or watering divisions, ensure that the leaves don’t sit in water for extended periods. This is a fast track to rot. Good air circulation is also vital.
- Don’t Over-Pot: It’s tempting to put a small cutting in a big pot, but resist! Too much soil means too much moisture, which can lead to rot. Smaller pots are actually better for encouraging root growth initially.
Aftercare & Troubleshooting
Once your Crepis sibirica cuttings or divisions have developed roots (you’ll see them peeking out of the drainage holes or feel some gentle resistance when you tug lightly on the stem), it’s time for a bit more regular care.
- Gradual Light Adjustment: Slowly introduce your new plants to more light. Over a week or so, move them from their shaded spot to a brighter location.
- Regular Watering: Water when the top inch of soil feels dry to the touch. Again, avoid waterlogging.
- Transplanting: Once your new plants are a decent size, with a good root system, you can transplant them to larger pots or directly into the garden.
- Watch for Rot: The most common sign of failure is rot. If your cuttings turn mushy and black, or if a division looks wilted and unhealthy despite proper watering, it’s likely suffering from too much moisture and poor air circulation. Sometimes, you can save a cutting by taking a fresh piece from higher up the stem and trying again with better drainage.
A Little Patience Goes a Long Way!
Propagating plants is such a rewarding way to connect with nature and fill your garden with beauty. Crepis sibirica is a delightful plant to grow, and the process of creating new life from an existing one is incredibly satisfying. Don’t get discouraged if your first attempt isn’t perfect; gardening is all about learning and enjoying the journey. Happy propagating!
Resource:
https://identify.plantnet.org/k-world-flora/species/Crepis%20sibirica%20L./data