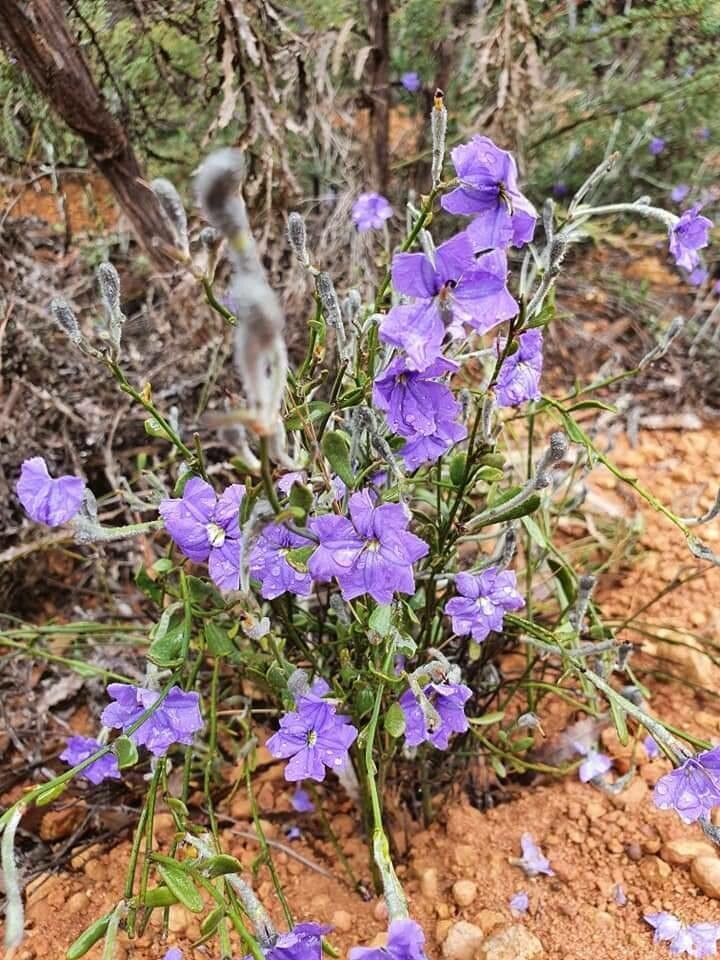
Oh, Dampiera purpurea! If you’ve ever seen this beauty gracing a garden, you know what I mean. That delightful cascade of soft, fuzzy leaves and those sweet little purple flowers – it’s just utterly charming. And the best part? You can easily grow more of these treasures yourself. It’s incredibly rewarding to watch a tiny piece of a parent plant transform into its own little world. For those of you just starting out on your propagation journey, I’d say Dampiera purpurea is a pretty forgiving plant, which makes it a wonderful choice to practice your skills.
The Best Time to Start
When I’m looking to propagate Dampiera purpurea, I always aim for spring or early summer. This is when the plant is actively growing and has plenty of energy reserves. You’ll find that cuttings taken at this time are more vigorous and much more likely to root quickly. Think of it like this: the plant is bursting with life, and it’s happy to share that energy. Avoid taking cuttings when the plant is stressed, like during extreme heat or if it’s just finished flowering.
Supplies You’ll Need
Gathering your tools beforehand really makes the process smoother. Here’s what I usually have on hand:
- Sharp pruning shears or a clean, sharp knife: For making clean cuts.
- Rooting hormone (optional but highly recommended): I prefer a powder, but liquid works too.
- Potting mix: A well-draining mix is key. I like to use a blend of perlite and peat moss or coco coir. You can also buy specific seed starting or propagation mixes.
- Small pots or propagation trays: Clean, with drainage holes!
- Plastic bags or a clear plastic dome: To create a humid environment.
- Water mister: For keeping things moist.
Propagation Methods
Let’s get our hands dirty with a couple of reliable methods for Dampiera purpurea.
Stem Cuttings
This is my go-to method for Dampiera.
- Select healthy stems: Look for non-flowering stems that are about 4-6 inches long. You want stems that are firm but not woody.
- Make the cut: Using your clean shears or knife, make a clean cut just below a leaf node (the point where a leaf attaches to the stem). This is where the roots will most likely form.
- Prepare the cutting: Gently remove the lower leaves, leaving just a couple of leaves at the top. This reduces water loss and prevents leaves from rotting in the soil.
- Apply rooting hormone: If you’re using it, dip the cut end of the stem into the rooting hormone, tapping off any excess.
- Insert into potting mix: Make a small hole in your potting mix with a pencil or your finger, and then gently insert the cutting. Firm the soil around the base to ensure good contact.
- Water gently: Water lightly to settle the soil.
- Create humidity: Cover the pot or tray with a plastic bag or a clear dome. Make sure the leaves don’t touch the plastic if possible.
- Place in bright, indirect light: Find a spot that’s warm and gets plenty of light, but no direct sun.
Water Propagation
This is a super fun and visual way to propagate!
- Take cuttings: Follow steps 1-3 from the stem cutting method.
- Place in water: Fill a clean jar or glass with fresh water. Place your cuttings in the water, ensuring the leaf nodes are submerged but the leaves themselves are not.
- Change the water regularly: Every couple of days, change out the water to keep it fresh and prevent rot.
- Location: Place the jar in bright, indirect light, just like with the stem cuttings.
- Watch for roots: You’ll start to see tiny roots emerging from the nodes. Once the roots are about an inch long, it’s time to pot them up into soil.
The “Secret Sauce” (Pro Tips)
Here are a few things I’ve learned over the years that really make a difference:
- The magic of bottom heat: If you have a heat mat designed for propagations, use it! Bottom heat can significantly speed up root development, giving your cuttings that extra push they need. Just place your pots on the warm mat.
- Don’t overcrowd: When you’re starting a bunch of cuttings, give them a little space. Good air circulation is crucial for preventing fungal diseases and rot, especially when they’re all huddled together under plastic.
- The gentle misting dance: Instead of drenching the soil every time, get yourself a good mister. Regular, light misting keeps the humidity high without waterlogging the cuttings, which is a common mistake.
Aftercare & Troubleshooting
Once you see those little roots beginning to peek out – hooray! It’s time for them to become independent little plants.
- Potting up: When the roots are well-established (think an inch or two long for water cuttings, or you gently tug on a cutting and feel resistance), it’s time to move them into their own small pots with your well-draining potting mix.
- Acclimatization: For the first week or so after potting, gradually reduce the humidity. You can start by taking off the plastic bag for a few hours each day, then leave it off entirely. This helps them adjust to normal room conditions.
- Watering: Water them thoroughly after potting, then let the top inch of soil dry out between waterings. Dampiera likes to be moist, but not soggy.
- Common issues: The biggest enemy of cuttings is rot. If you see your cuttings turning mushy, black, or developing fuzzy gray mold, it’s usually a sign of too much moisture and not enough air circulation. It’s a good idea to discard any affected cuttings to prevent it from spreading. If the leaves turn yellow and limp, it could be a sign of insufficient light or too much direct sun.
A Gentle Encouragement
Propagating plants is a journey, not a race. There will be times when things don’t go perfectly, and that’s okay! Every gardener has experienced a few failures. Patience is your best friend here. Enjoy the process of nurturing these tiny new lives, and before you know it, you’ll have a whole collection of your own beautiful Dampiera purpurea. Happy growing!
Resource:
https://identify.plantnet.org/k-world-flora/species/Dampiera%20purpurea%20R.Br./data