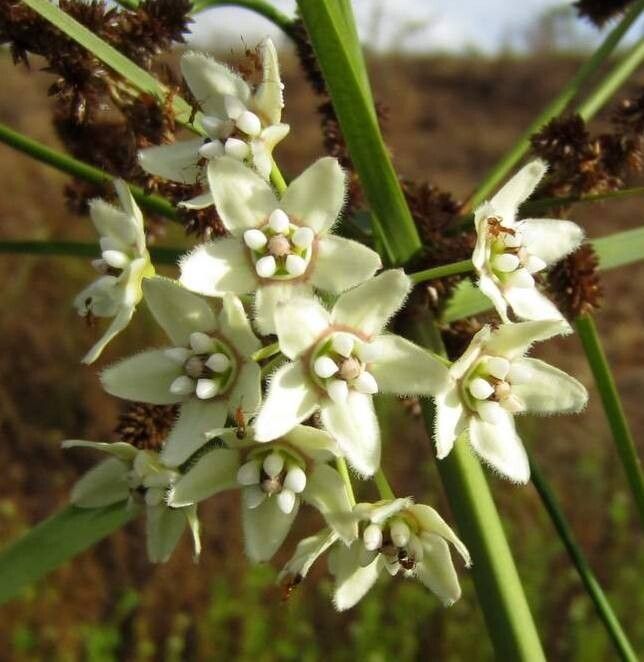
Oh, hello there! Come on in, pull up a chair. I’ve got a fresh pot of coffee brewing, and I’m just itching to chat about one of my favorite unique plants: Funastrum clausum. If you’re anything like me, you’ve probably been captivated by its delicate, almost ethereal beauty. The way its leaves cascade, often with a lovely silvery sheen, makes it a real showstopper in hanging baskets or cascading over a wall. And the best part? Growing more of these beauties is totally doable! It’s a wonderfully rewarding process, and honestly, it’s not as intimidating as you might think. I’d say it’s moderately easy, even for those who are just starting their plant propagation journey.
The Best Time to Start
When it comes to Funastrum clausum, timing is key to setting yourself up for success. I’ve found that the absolute best time to take cuttings is during its active growing season, which typically falls in late spring to early summer. This is when the plant has plenty of energy to put into developing new roots. You want to be taking cuttings from healthy, vigorous stems that are neither too soft and new nor too woody and old. Think of it as a nice, firm, mature stem – that’s your sweet spot.
Supplies You’ll Need
Before we get our hands dirty, let’s gather our supplies. Having everything ready makes the process so much smoother.
- Sharp Pruning Shears or a Clean Knife: For making clean cuts.
- Rooting Hormone (Optional but Recommended): A little boost can speed things up. Look for one specifically formulated for stem cuttings.
- Well-Draining Potting Mix: I like a blend of standard potting soil with perlite or coarse sand. A cactus and succulent mix also works beautifully.
- Small Pots or Containers: About 3-4 inches in diameter are perfect for little cuttings. Make sure they have drainage holes!
- Watering Can or Mister: For gentle watering.
- Plastic Bag or Humidity Dome: To create a mini greenhouse effect.
Propagation Methods
Now, let’s get to the fun part – making new plants! For Funastrum clausum, stem cuttings are my go-to method.
Stem Cuttings:
- Select Your Stem: Find a healthy stem that’s about 4-6 inches long. It should have at least a few sets of leaves.
- Make the Cut: Using your clean shears or knife, make a cut just below a leaf node. This is a swollen joint on the stem where new roots are most likely to form.
- Prepare the Cutting: Gently remove the leaves from the bottom half of the stem. You want to expose the nodes. If the remaining leaves are very large, you can even consider cutting them in half to reduce water loss.
- Apply Rooting Hormone (Optional): Dip the cut end of the stem into your rooting hormone, tapping off any excess.
- Plant Your Cutting: Fill your small pots with your well-draining soil mix. Make a small hole in the center with your finger or a pencil. Gently insert the cut end of the stem into the hole, ensuring the nodes are buried. Firm the soil gently around the stem.
- Water Gently: Water the soil thoroughly but gently. You don’t want to dislodge your cutting.
- Create a Humid Environment: Cover the pot with a plastic bag or place it under a humidity dome. This is crucial for preventing the cuttings from drying out. Make sure the bag doesn’t touch the leaves if possible. Place the pot in a warm spot with bright, indirect light.
The “Secret Sauce” (Pro Tips)
Over the years, I’ve picked up a few little tricks that can really make a difference.
- Don’t let the leaves touch the water! This is especially true if you’re trying water propagation (which I find a bit trickier for Funastrum than soil), but it applies to cuttings in soil too. If leaves are touching the soil surface, they can start to rot. Snip them off or ensure they’re above the soil line.
- Bottom heat is your friend! If you can, place your pots on a heat mat designed for seedlings. This gentle warmth from below encourages root development like nothing else. It mimics the soil temperature they’d experience in their ideal growing season.
- The “Scratch Test”: After a few weeks, you can gently scratch the very tip of the stem with your fingernail. If you see green underneath, it’s still alive. If it’s brown and dry, it’s likely not going to make it.
Aftercare & Troubleshooting
Once your cuttings have shown signs of rooting – usually tiny white nubs peeking out from the drainage holes, or new growth at the top – it’s time for a little tender loving care transition.
- Introduce Gradually: Once roots are established, you can gradually remove the plastic bag or humidity dome over a few days to acclimate your new plant to normal humidity levels.
- Watering: Continue to water when the top inch of soil feels dry. Don’t let it sit in soggy soil, as this is the fastest way to invite problems.
- Light: Keep your new plant in bright, indirect light. As it gets bigger, you can slowly introduce it to more direct sunlight if that’s where you plan to keep it.
The most common issue you might face is rot. This usually happens if the soil is too wet and not draining well, or if you don’t have enough air circulation. If you see a cutting turning black or mushy, unfortunately, it’s likely a goner. Don’t be discouraged! It happens to the best of us. Just discard the rotted cutting and try again with fresh material and slightly adjusted conditions.
A Encouraging Closing
Taking cuttings and nurturing them into new life is such a magical part of gardening. It takes a bit of patience, a dash of experimentation, and a whole lot of love. But trust me, that feeling when you see those first tiny roots or a new shoot emerge is incredibly satisfying. So, dive in, give it a try, and most importantly, enjoy the journey. Happy propagating!
Resource:
https://identify.plantnet.org/k-world-flora/species/Funastrum%20clausum%20(Jacq.)%20Schltr./data