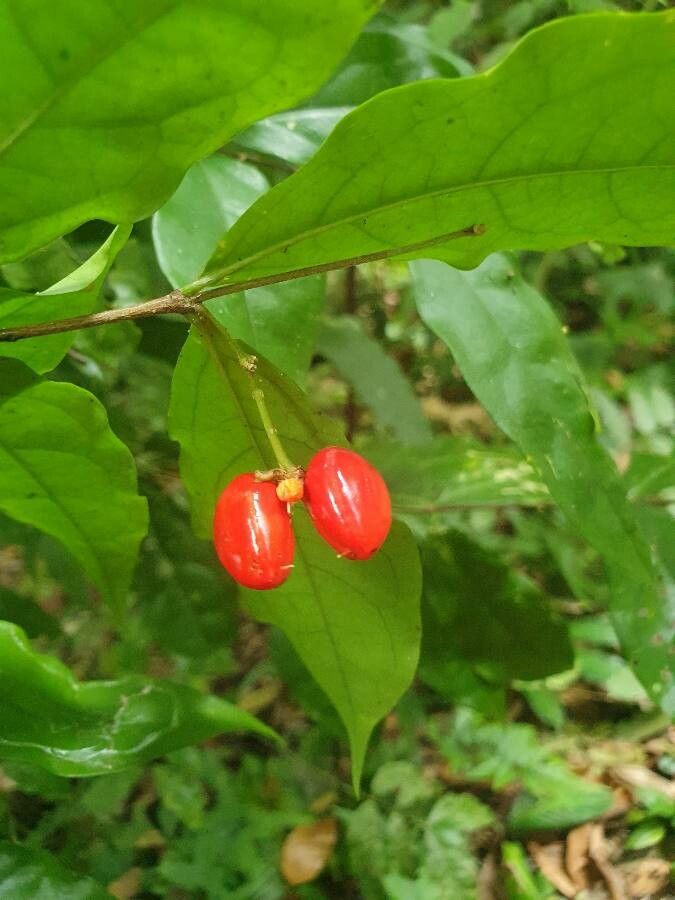
Hey there, fellow garden enthusiasts! Grab a cup of tea, because today we’re diving into something truly special: Bunchosia grayumii, or as some fondly call it, the “Plum Tree.” If you’ve ever seen one of these beauties laden with its reddish-purple, cherry-like fruits, you’ll know why it’s captured my heart – and my garden soil – for years. The fruit is surprisingly delicious, with a flavor that hints at plum and a touch of tartness. Plus, the glossy, evergreen leaves make it a stunning specimen year-round.
Propagating your own Bunchosia grayumii is incredibly rewarding. It’s a way to share this joy with friends, fill out your landscape, or simply experience the magic of nurturing new life from a piece of an existing plant. Now, I won’t lie and say it’s as simple as whipping up a batch of cookies. Bunchosia can be a tad particular, especially for absolute beginners. But with a little patience and the right approach, it’s absolutely achievable.
The Best Time to Start
For the highest chance of success, I always recommend propagating Bunchosia grayumii from semi-hardwood cuttings during its active growing season. Think late spring through early fall. This is when the plant has plenty of energy, and the stems have started to firm up but aren’t fully mature and woody. Starting cuttings now means they have a good amount of time to develop roots before winter sets in.
Supplies You’ll Need
Here’s what you’ll want to have on hand before you begin:
- Sharp, clean pruning shears or a sharp knife: Essential for making clean cuts.
- Potting mix: A well-draining mix is key. I like a blend of equal parts perlite and peat moss or a good quality seed-starting mix.
- Small pots or propagation trays: Clean containers with drainage holes.
- Rooting hormone: A powder or gel form can significantly boost root development.
- Plastic bag or propagation dome: To create a humid environment.
- Watering can with a fine rose: For gentle watering.
- (Optional) Bottom heat mat: This can really speed things up, especially in cooler conditions.
Propagation Methods
The most reliable method for Bunchosia grayumii is through stem cuttings. Here’s how I do it:
- Take the Cuttings: Select healthy, vigorous stems that are about pencil-thick and 6-8 inches long. Look for stems that have developed hardening in the last few months. Using your clean shears, make a cut just below a leaf node (where a leaf grows from the stem). Remove the lower leaves, leaving just 2-4 leaves at the top to reduce water loss.
- Prepare the Cuttings: Dip the cut end into your rooting hormone, tapping off any excess. This little bit of help can make a big difference.
- Plant the Cuttings: Fill your pots with your prepared potting mix. Make a hole with a pencil or your finger and insert the hormone-dipped end of the cutting, firming the soil gently around it. Water thoroughly but gently.
- Create Humidity: Cover the pot with a clear plastic bag or place it under a propagation dome. You want to create a mini greenhouse effect to keep the leaves from drying out. Make sure the leaves don’t touch the plastic.
- Location, Location, Location: Place the pots in a bright spot that receives indirect sunlight. Avoid direct sun, which can scorch the young cuttings. If you have a bottom heat mat, place the pots on it now – it’s a game-changer!
The “Secret Sauce” (Pro Tips)
Here are a few things I’ve learned over the years that make a difference:
- Don’t Overwater: This is crucial! While you want the soil to stay consistently moist, soggy soil is a fast track to rot. Let the surface of the soil dry out slightly between waterings.
- Bottom Heat is Your Friend: As I mentioned, a gentle bottom heat (around 70-75°F or 21-24°C) can really encourage root formation. It mimics the warmth of spring soil and speeds up the whole process.
- Patience, Young Grasshopper: Bunchosia can be a slow starter. Don’t get discouraged if you don’t see new growth for several weeks, or even a couple of months. Gently tugging on a cutting after 6-8 weeks is a good way to check for resistance, indicating root development.
Aftercare & Troubleshooting
Once you see signs of new growth (tiny leaves emerging at the top!), it’s a good sign your cuttings are rooting. Begin to gradually acclimate them to normal humidity by opening the plastic bag a little more each day over a week or two. Continue to keep them in bright, indirect light and water when the top inch of soil feels dry.
The most common problem you might encounter is rot. If your cutting turns mushy, black, or starts to fall apart, it’s likely rotted. This is usually due to too much moisture and poor air circulation. Don’t despair! Just discard the rotted cutting and try again, paying closer attention to watering and humidity.
A Closing Thought
Propagating Bunchosia grayumii might take a little finesse, but the thrill of watching those first roots develop and then seeing a brand new plant unfurl its leaves is absolutely worth it. Be patient, observe your cuttings closely, and don’t be afraid to experiment. Happy propagating, and may your new Plum Trees bring you joy and delicious fruit for years to come!
Resource:
https://identify.plantnet.org/k-world-flora/species/Bunchosia%20grayumii%20W.R.Anderson/data