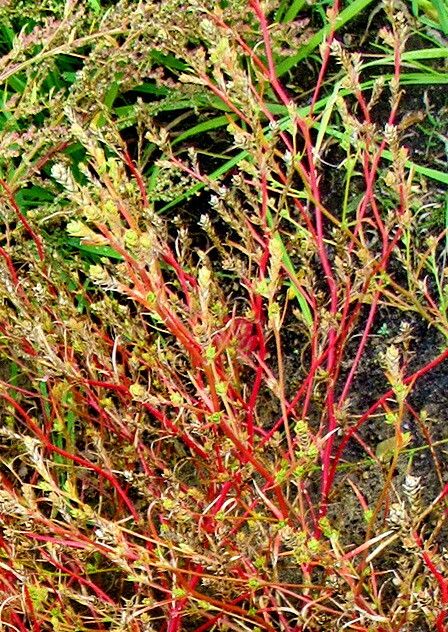
Hello there, fellow garden enthusiasts! It’s wonderful to connect with you. Today, we’re diving into the delightful world of Corispermum hyssopifolium, often called the hyssop-leaved bugseed. For me, this plant is a breath of fresh air in the garden. Its airy, fine-textured foliage creates a lovely backdrop, and it has this subtle, almost architectural presence that I find quite captivating. Plus, the tiny, subtle blooms are a magnet for beneficial insects. Propagating it yourself is incredibly rewarding – it’s like giving the gift of more beauty to your garden, or sharing it with friends. Now, as for beginners, I’d say Corispermum hyssopifolium is a pretty approachable plant to start with, especially if you’re willing to be a bit patient.
The Best Time to Start
When it comes to giving your Corispermum hyssopifolium cuttings the best chance, timing is everything. I always find that the late spring to early summer is your sweet spot. This is when the plant is in active growth, and its stems are full of vigor. You want to take cuttings from stems that are semi-hardened – meaning they’re not brand new and floppy, but also not woody and tough. Think of it as that perfect stage where they have a little bit of give but are starting to feel firm.
Supplies You’ll Need
Gathering your tools before you begin makes the whole process so much smoother. Here’s what I usually have on hand:
- Sharp pruners or a clean razor blade: For taking clean cuts.
- A small trowel or dibber: To make holes in the potting mix.
- Small pots or seed trays: Clean ones are crucial to prevent disease.
- A well-draining potting mix: I like to use a mix of equal parts perlite and a good quality potting soil. You can also add a bit of coarse sand.
- Rooting hormone (optional but recommended): A powdered or liquid hormone can significantly speed up root development.
- A clear plastic bag or humidity dome: To create a mini-greenhouse effect.
- Watering can or spray bottle: For gentle watering.
Propagation Methods
Corispermum hyssopifolium is quite forgiving, and I’ve had success with a couple of different methods.
Stem Cuttings: My Go-To
This is usually my preferred way to multiply my bugseed.
- Take your cuttings: In late spring or early summer, select healthy, non-flowering stems. Using your sharp pruners or razor blade, take cuttings that are about 4-6 inches long. Make your cut just below a leaf node (where a leaf attaches to the stem).
- Prepare the cuttings: Gently remove the lower leaves from the cutting, leaving only the top few leaves. This helps prevent them from rotting in the soil and reduces water loss.
- Apply rooting hormone (optional): If you’re using rooting hormone, dip the cut end of each stem into the powder or liquid, tapping off any excess.
- Pot them up: Fill your clean pots with your prepared potting mix. Use your dibber or trowel to create a small hole for each cutting. Gently insert the cut end of the cutting into the hole.
- Water gently: Water the soil thoroughly but gently. You don’t want to dislodge the cuttings.
- Create a humid environment: Cover the pots with a clear plastic bag or a humidity dome. Make sure the leaves aren’t touching the plastic if possible. Place the pots in a bright spot, but out of direct sunlight.
Water Propagation (A Watcher’s Delight)
If you’re a visual gardener who likes to see things happening, water propagation can be very satisfying.
- Prepare the cuttings: Similar to stem cuttings, take 4-6 inch cuttings from healthy stems, making the cut below a leaf node. Remove the lower leaves.
- Place in water: Fill a small jar or glass with clean water. Ensure no leaves are submerged in the water. Any leaves below the water line are prone to rot.
- Find a good spot: Place the jar in a bright location, away from direct sun.
- Change the water regularly: Change the water every few days to keep it fresh and prevent bacterial growth. You’ll be able to watch as little white roots begin to emerge from the leaf nodes.
The “Secret Sauce” (Pro Tips)
Over the years, I’ve learned a few little tricks that seem to make a big difference:
- Bottom Heat is Your Friend: For stem cuttings, I’ve found that a heat mat placed beneath the pots can dramatically speed up root formation. The warmth encourages a more vigorous root system.
- Don’t Overwater! This is probably the most common mistake. Cuttings have no roots yet, so they can’t absorb much water. Keep the soil consistently moist but not waterlogged. If you see condensation building up excessively inside your humidity dome, it’s a sign it might be a bit too wet – give it some air.
- Be Patient with Air Circulation: While humidity is good, stagnant air can lead to fungal issues. If you’re using a plastic bag, open it for a few minutes each day to allow for some air exchange. This is especially important once you start seeing some signs of new growth.
Aftercare & Troubleshooting
Once you see new leaf growth emerging from your cuttings, that’s a fantastic sign that roots have formed!
- Acclimatization: Slowly introduce your new plants to drier air by gradually opening the plastic bag or humidity dome over a week or so.
- Repotting: Once they have a decent root system, you can transplant them into their own pots with a good potting mix.
- Watering: Water them as you would a mature plant, letting the top inch of soil dry out between waterings.
Now, what if things don’t go as planned? The most common issues are rot and no root development.
- Rot: This is almost always a sign of too much moisture and/or not enough air circulation. If you see a cutting looking mushy or blackening, it’s best to discard it to prevent it from affecting others. Make sure your soil drains well and you’re not watering too frequently.
- No Root Development: This can happen for several reasons. The cutting might have been too old or too young, the conditions might not have been right (too cold, too dry, or not enough light), or simply, sometimes cuttings just don’t strike. Don’t despair! Just try again with fresh cuttings from a healthy plant.
A Gentle Encouragement
Gardening is a journey, and propagation is a beautiful part of that journey. It teaches us patience and observation. Don’t be discouraged if your first few attempts aren’t perfect. Each time you try, you learn something new. Enjoy the process of nurturing these tiny beginnings, and soon you’ll have a garden positively brimming with Corispermum hyssopifolium. Happy propagating!
Resource:
https://identify.plantnet.org/k-world-flora/species/Corispermum%20hyssopifolium%20L./data