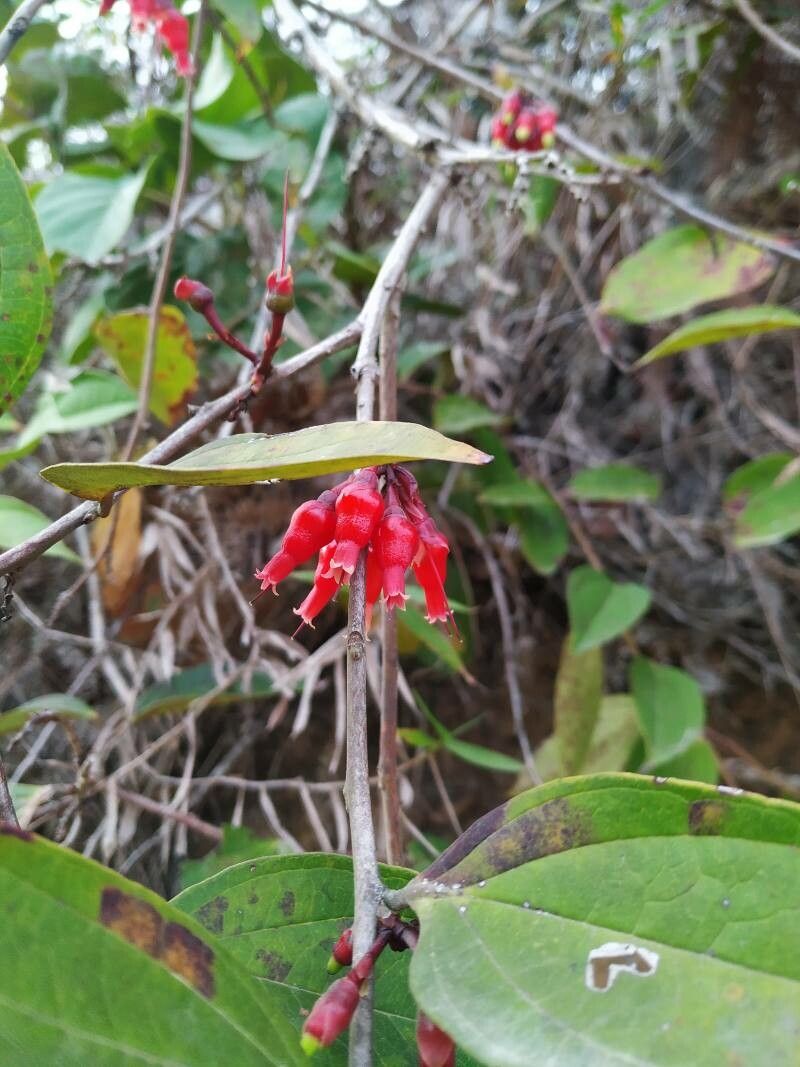
Hey there, fellow plant lovers! Let’s talk about a real gem for your collection: Cavendishia nitida. If you’re dreaming of a plant that offers beautiful, glossy foliage and dainty, bell-shaped flowers that just beg to be admired, this is your gal. Plus, growing your own from cuttings? That’s a special kind of joy, a little victory you can hold in your hands. Now, I won’t lie, Cavendishia nitida can be a tad more particular than your average pothos. For absolute beginners, it might present a little challenge, but don’t let that deter you! With a little care and a touch of patience, you’ll be a pro in no time.
The Best Time to Start
For the highest success rate with Cavendishia nitida, spring is your best bet. Think of it as the plant’s natural awakening. As the days get longer and warmer, and new growth starts to emerge, your cuttings will have the best energy reserves to root and establish themselves. You can also take cuttings in early summer, but try to avoid the intense heat of midsummer or the chilly stillness of winter.
Supplies You’ll Need
Gathering your toolkit is half the battle. Here’s what you’ll want to have on hand:
- Sharp Pruning Shears or a Clean Knife: For making clean cuts.
- Rooting Hormone (Optional but Recommended): A little dip can give your cuttings a significant boost. I like powder forms for ease of use.
- Potting Mix: A well-draining blend is crucial. I usually mix equal parts peat moss or coco coir with perlite or coarse sand. A bit of orchid bark can also be lovely.
- Small Pots or Seedling Trays: With drainage holes, of course!
- Clear Plastic Bags or a Propagator Dome: To create a humid environment.
- Water: For watering and misting.
- A Spray Bottle: For gentle misting.
Propagation Methods
My favorite way to multiply Cavendishia nitida is through stem cuttings. It’s straightforward and gives you the most bang for your buck.
- Select Your Cuttings: Look for healthy, non-flowering stems on your parent plant. You want stems that are firm but not woody. Aim for cuttings that are 4-6 inches long and have at least 2-3 leaf nodes (the little bumps where leaves grow).
- Make the Cut: Using your sharp shears or knife, make a clean cut just below a leaf node. This is where the magic of root development often begins.
- Prepare the Cutting: Gently remove the lower leaves from the cutting, leaving just 1-2 sets of leaves at the top. This prevents leaves from rotting when buried in the soil.
- Dip in Rooting Hormone (If Using): Lightly moisten the cut end of your stem, then dip it into the rooting hormone powder. Tap off any excess – you want a light coating.
- Plant Your Cuttings: Fill your small pots with your well-draining potting mix. Make a small hole in the center of the soil with your finger or a pencil. Gently insert the cut end of your Cavendishia cutting into the hole, ensuring at least one leaf node is buried. Firm the soil gently around the stem.
- Water Gently: Water the soil thoroughly, but avoid making it soggy. You want it moist, not waterlogged.
- Create Humidity: This is key! Place a clear plastic bag over the pot, supported by stakes or a similar method so it doesn’t touch the leaves, or use a propagator dome. This traps moisture and mimics the humid environment your cutting craves. Place the pot in a bright spot, but out of direct sunlight.
The “Secret Sauce”
Here are a couple of little tricks I’ve learned over the years that really make a difference:
- Bottom Heat is Your Friend: While not always essential, placing your pots on a gentle heat mat can significantly speed up root formation. It mimics the warmth of spring soil and gives those roots a little nudge to get going. Just make sure the mat isn’t too hot – think lukewarm bathwater temperature.
- Don’t Rush the Mist: While we want humidity, try to avoid letting the leaves of your cuttings sit in stagnant water within the humidity dome. A gentle misting of the soil every few days, or when it starts to look dry, is usually enough. If you see condensation building up too much, lift the bag or dome for a few hours to allow some airflow.
Aftercare & Troubleshooting
Once your Cavendishia nitida cuttings have developed roots – you’ll know when you gently tug on a cutting and feel resistance, or see new growth emerging – it’s time to ease them out of their humid cocoon.
Start by gradually increasing ventilation. For the first week, lift the plastic bag or propagator lid for a few hours each day. After that, you can remove it completely. Continue to water when the top inch of soil feels dry. Your new baby plant will appreciate being kept in bright, indirect light.
Now, keep an eye out for potential problems. The most common issue is rot. If your cuttings start to look mushy, yellow, or black, it’s a sign of too much moisture. Sadly, if rot sets in, it’s often too late. To prevent this, always ensure your soil is well-draining and don’t overwater. If you notice any signs of fungus gnats, it also points to consistently damp soil.
A Little Patience Goes a Long Way
Propagating plants is a journey, and Cavendishia nitida might require a bit of your nurturing attention. Don’t get discouraged if your first attempt isn’t a runaway success. Each cutting you take is a chance to learn and refine your technique. Enjoy the process of watching new life emerge. Happy propagating!
Resource:
https://identify.plantnet.org/k-world-flora/species/Cavendishia%20nitida%20(Kunth)%20A.C.Sm./data