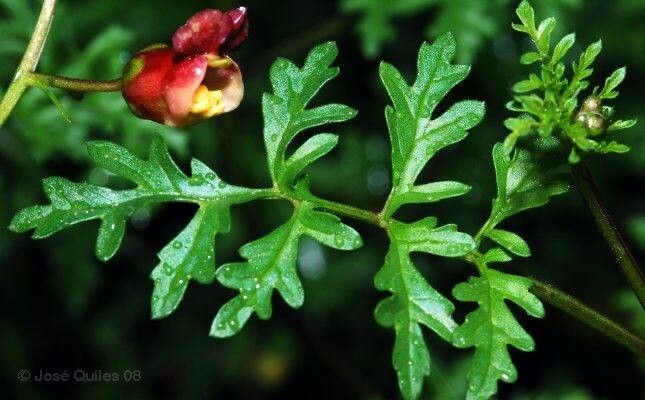
Hello there, green-thumbed friends! Today, we’re diving into the wonderful world of Scrophularia tanacetifolia, also known as Corsican mint or golden figwort. This delightful plant, with its lovely foliage and charming little flowers, is a real gem in the garden. Its architectural form and subtle beauty make it a favorite for many, and the satisfaction of creating more of this beauty from your existing plants is truly something special.
Now, I know what you might be thinking – is this a difficult plant to propagate? For Scrophularia tanacetifolia, I’d say it’s quite approachable, even for those just starting out on their propagation journey. With a little patience and a few key steps, you’ll be well on your way to a whole new collection.
The Best Time to Start
When it comes to getting the most bang for your buck with Scrophularia tanacetifolia propagation, late spring to early summer is your golden window. This is when the plant is actively growing, pushing out new, healthy shoots that are perfect for taking cuttings. You can also have some success with divisions in early spring as the plant just begins to wake up.
Supplies You’ll Need
To set yourself up for success, gather these simple tools:
- Sharp pruning shears or a clean knife: For making precise cuts.
- Rooting hormone (optional but recommended): This can give your cuttings a little boost.
- Small pots or trays: For housing your cuttings or divisions.
- Well-draining potting mix: A good seed-starting mix or a blend of potting soil with perlite works beautifully.
- A spray bottle: For misting.
- Clear plastic bags or a propagation dome: To create a humid environment.
- Labels and a marker: To keep track of your efforts!
Propagation Methods
Scrophularia tanacetifolia is happy to oblige with a few different propagation methods. I find two to be particularly effective.
Stem Cuttings
This is my go-to method for Scrophularia tanacetifolia.
- Take Your Cuttings: In late spring or early summer, select healthy, non-flowering stems. Using your sharp shears, make a cut just below a leaf node (where the leaf attaches to the stem). Aim for cuttings that are about 4-6 inches long. Remove the lower leaves, leaving just a few at the top.
- Prepare for Rooting: If you’re using rooting hormone, dip the cut end of the stem into it. Gently tap off any excess.
- Pot Them Up: Fill your small pots or trays with your prepared potting mix. Make a little hole in the center with your finger or a pencil.
- Plant Your Cuttings: Insert the cut end of each stem into the hole, ensuring the leaves at the top aren’t buried. Gently firm the soil around the base.
- Provide Humidity: Water the soil lightly and then cover the pot or tray with a clear plastic bag or propagation dome. This creates a humid environment, which is crucial for cuttings to root.
- Find a Spot: Place your pots in a bright location that receives indirect sunlight. Avoid direct sun, which can scorch the cuttings.
Division
This method is best done in early spring.
- Gently Excavate: Carefully dig up the parent plant. You want to expose its root system.
- Separate the Roots: Look for natural divisions in the root ball. You can often gently pull apart sections of the plant. If they’re a bit stubborn, use your clean knife to carefully divide them. Ensure each division has healthy roots and at least a few shoots.
- Replant Promptly: Pot your divisions into your well-draining soil mix, planting them at the same depth they were originally growing. Water them in well.
The “Secret Sauce” (Pro Tips)
Here are a couple of things I’ve learned over the years that really make a difference:
- Don’t let leaves sit on damp soil: When you’re potting up stem cuttings, make sure none of the remaining leaves are touching the soil surface. This can encourage rot, and we want happy roots, not mushy leaves!
- Bottom heat is your friend: If you’re serious about propagation, investing in a small seedling heat mat can dramatically speed up root formation, especially for stem cuttings. It mimics the warmth of spring soil and gives your cuttings that extra nudge.
Aftercare & Troubleshooting
Once your cuttings have roots, it’s time to transition them. You’ll know they’re rooting when you see new growth emerging or when they resist a gentle tug.
- Acclimatize: Gradually remove the plastic bag or dome over a few days to let the young plants adjust to normal humidity.
- Water Wisely: Water when the top inch of soil feels dry. Avoid overwatering, as this is the most common cause of failure.
- Fertilize Gently: Once they’re established and showing good growth, you can start feeding them with a diluted liquid fertilizer.
Troubleshooting: The most common issue you’ll face is rot. If your cutting turns black or mushy, it’s likely succumbed to rot. This is usually due to too much moisture and not enough air circulation. Don’t be discouraged if a few don’t make it; it’s all part of the learning process!
A Encouraging Closing
Growing plants from cuttings or divisions is one of the most rewarding aspects of gardening. It’s a testament to nature’s resilience and your own nurturing touch. Be patient with your Scrophularia tanacetifolia, give them the right conditions, and they’ll surprise you with their willingness to grow. Happy propagating, and enjoy the beautiful results!
Resource:
https://identify.plantnet.org/k-world-flora/species/Scrophularia%20tanacetifolia%20Willd./data