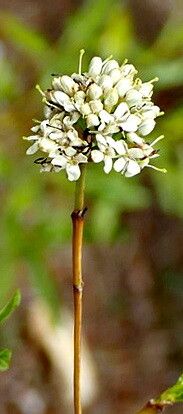
Oh, hello there! Come on in, grab a mug. Let’s talk about a plant that’s been catching my eye lately: the Pavetta opulina. If you’re anything like me, you’re drawn to its delicate, star-shaped white flowers and that lovely evergreen foliage. They just have a way of looking so elegant, don’t they? And the best part? You can create more of these beauties yourself! Propagating Pavetta opulina is a truly rewarding experience, a chance to watch new life unfold right before your eyes. Now, is it a breeze for absolute beginners? Honestly, I’d say it requires a little patience and attention, but with these tips, you’ll be well on your way to success.
The Best Time to Start
From my own experience, the sweet spot for propagating Pavetta opulina is during its active growing season. Think late spring through mid-summer. This is when the plant is full of vigor, producing lots of new, healthy growth. Cuttings taken during this time are more likely to root successfully because they have abundant energy reserves to draw upon. Waiting until the plant is really putting on a show with new shoots is your best bet.
Supplies You’ll Need
Gathering your tools beforehand makes the whole process much smoother. Here’s what I usually have on hand:
- Sharp, clean pruning shears or a sharp knife: For making clean cuts.
- Rooting hormone powder or gel: This isn’t strictly essential for all plants, but for something like a Pavetta, it really gives those cuttings a good head start.
- Potting mix: A light, well-draining mix is crucial. I often use a blend of peat moss, perlite, and a bit of compost. You can also buy specific seed starting or propagation mixes.
- Small pots or containers: Clean ones, of course! Yogurt cups with drainage holes poked in work in a pinch.
- Plastic bags or a clear plastic dome: To create a humid environment.
- Watering can with a fine rose: For gentle watering.
- Labels or plant tags: To keep track of what you’ve planted.
Propagation Methods
While you might hear about different ways, for Pavetta opulina, stem cuttings are my go-to. They’re reliable and give you a good chance of success.
- Take Your Cuttings: Find a healthy, non-flowering stem on your mother plant. Look for stems that are firm but not woody – pencil-thick is ideal. Using your clean shears, make a cut just below a leaf node. A leaf node is where a leaf attaches to the stem; this is where roots are most likely to form. Aim for cuttings that are about 4-6 inches long.
- Prepare the Cuttings: Gently remove the leaves from the bottom half of the cutting. You want to expose at least two leaf nodes that will be below the soil line. If you have very large leaves at the top, you can pinch off about half of them to reduce water loss.
- Apply Rooting Hormone: Dip the cut end of each stem into your rooting hormone powder or gel. Tap off any excess. This little step really encourages root development.
- Plant Your Cuttings: Fill your small pots with your prepared, moist potting mix. Make a small hole in the center with your finger or a pencil. Insert the hormone-coated end of the cutting into the hole, making sure the leaf nodes are below the surface of the soil. Gently firm the soil around the cutting.
- Create a Humid Environment: Water the soil gently so it’s moist but not waterlogged. Then, cover the pot with a clear plastic bag or a plastic dome. This traps moisture and creates the humid mini-greenhouse your cuttings need to root. Make sure the leaves don’t touch the plastic if possible.
- Provide Warmth and Light: Place your pots in a warm spot with bright, indirect light. Avoid direct sunlight, which can scorch the delicate cuttings.
The “Secret Sauce” (Pro Tips)
Here are a couple of things I’ve learned over the years that really make a difference:
- Bottom Heat is Your Friend: If you can, place your pots on a heated seed-starting mat. This provides gentle warmth to the base of the cuttings, encouraging root growth from below without overheating the foliage. It’s a game-changer, especially if your spot isn’t naturally very warm.
- Don’t Overwater! This is critical. Soggy soil is the fastest way to invite rot. The plastic cover will help keep the moisture in, so you’ll likely only need to water sparingly. Check the soil moisture by gently touching it. If it feels dry an inch down, give it a light watering.
Aftercare & Troubleshooting
Once you start to see new growth on your cuttings – tiny leaves unfurling – that’s a good sign that roots are forming! You can gently tug on a cutting. If you feel resistance, roots have likely developed.
Once they’re well-rooted (usually after 4-8 weeks, sometimes longer), it’s time to acclimate them to normal conditions. Gradually remove the plastic cover over a week, allowing them to get used to less humidity. Continue to water consistently but let the soil dry slightly between waterings.
Most common issues? That dreaded rot. If a cutting turns black and mushy, it’s usually a sign of too much moisture. Unfortunately, a rotten cutting is a lost cause. The best way to prevent this is good drainage and avoiding overwatering. If you see mold on the soil surface, increase ventilation slightly but keep the humidity up.
A Little Patience Goes a Long Way
Don’t be discouraged if not every single cutting takes! Gardening is always a learning process, and some plants are just more determined than others. Keep trying, keep observing, and most importantly, enjoy the journey of nurturing new life. Happy propagating!
Resource:
https://identify.plantnet.org/k-world-flora/species/Pavetta%20opulina%20(G.Forst.)%20DC./data