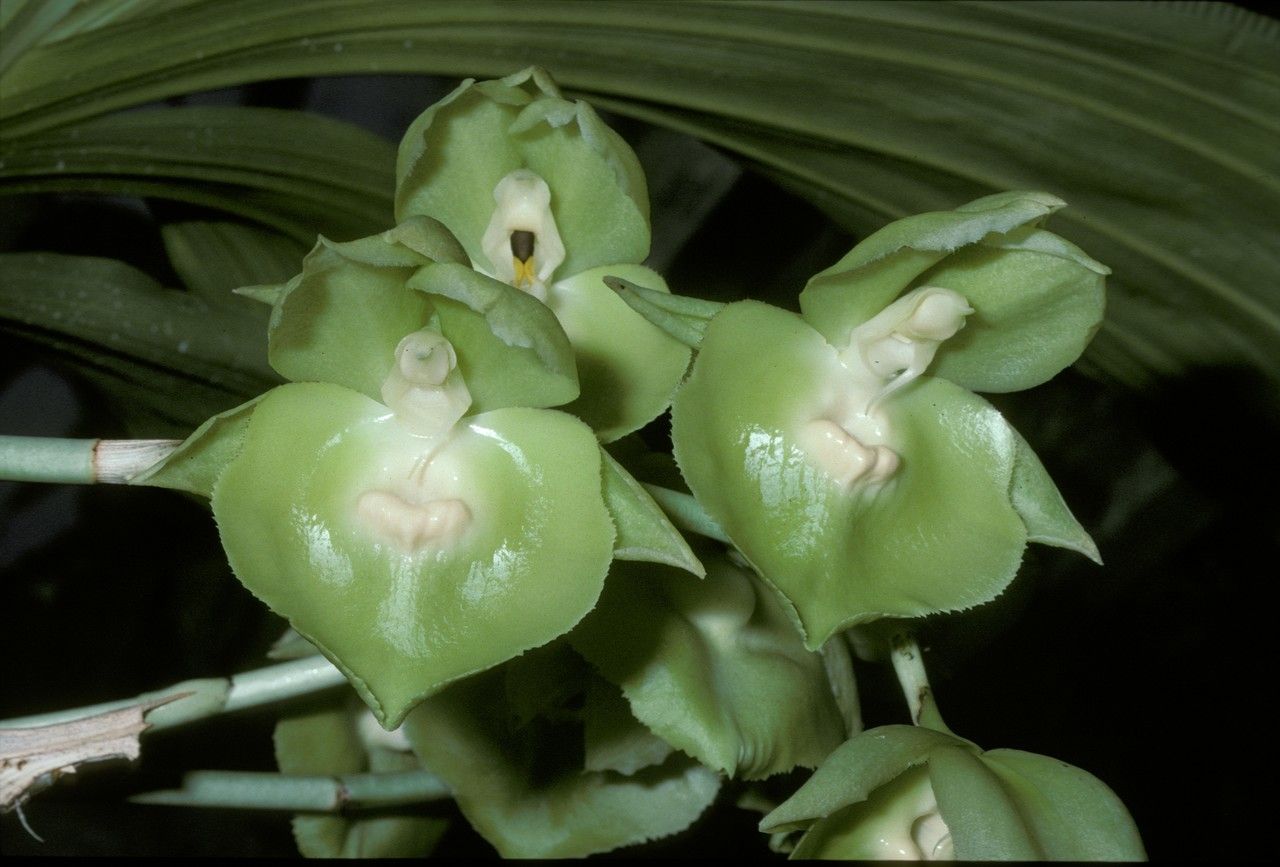
Hey there, fellow plant lovers! I’m so excited to share a little bit about a truly fascinating orchid: Catasetum expansum. If you’ve ever seen these beauties, you know they have this incredible, almost alien-like charm. Their unique flower structures and vigorous growth make them a real showstopper in any collection. And the best part? Growing them from a division or cutting is incredibly rewarding. It’s like unlocking a little bit of orchid magic right in your own home. Now, while Catasetum orchids can sometimes seem a bit intimidating, propagating them isn’t as difficult as you might think. With a little patience and the right approach, you can definitely succeed.
The Best Time to Start
Timing is everything when it comes to giving your new orchid babies the best start. For Catasetum expansum, I find the late spring or early summer is usually the sweet spot. This is when the plant is actively growing after its rest period and has a good store of energy. You’ll see new growths emerging, which is the perfect time to take divisions or cuttings. Trying to propagate when the plant is dormant is a recipe for disappointment.
Supplies You’ll Need
You don’t need a whole lot of fancy equipment, just the right tools for the job. Here’s what I usually have on hand:
- Sharp, sterilized pruning shears or a clean knife: For making clean cuts. Sterilize with rubbing alcohol between cuts to prevent disease.
- Orchid Bark Mix: A good quality, well-draining mix is crucial. I like a blend with medium-to-large bark chunks, some perlite, and a bit of charcoal.
- New Pots or Net Pots: Small ones are fine for divisions initially.
- Rooting Hormone (Optional but Recommended): Especially for stem cuttings. Powder or liquid works.
- Sphagnum Moss: For added humidity or lining pots.
- Watering Can with a Fine Rose or a Spray Bottle: For gentle watering.
Propagation Methods
Catasetum expansum is most commonly and successfully propagated through a few methods.
Division (The Most Reliable)
This is my go-to for Catasetum orchids. It’s straightforward and usually yields great results because you’re essentially taking a mature or semi-mature pseudobulb with roots.
- Assess Your Plant: Look for a mature plant that has produced significant new growths or pseudobulbs. You want to divide a section that has at least one healthy pseudobulb and a good root system, along with a new growth if possible.
- Remove from Pot: Gently slide the orchid out of its current pot. If it’s stuck, you might need to use a knife to loosen the edges.
- Clean the Roots: Carefully tease away the old potting mix from the roots. This helps you see exactly where to make your cuts and identify healthy root sections.
- Make the Cut: Using your sterilized shears or knife, make a clean cut to separate the division from the mother plant. Aim to keep as many healthy roots attached to the division as possible. Ensure each division has at least one healthy pseudobulb and a reasonable root system.
- Examine and Trim: Check the roots. Trim away any dead or mushy ones.
- Potting Up: Place the division in its new, clean pot. Add your well-draining orchid bark mix. Make sure the pseudobulb is sitting on top of the mix, not buried. New roots will emerge from the base as it grows. Don’t pack the mix too tightly.
Stem Cuttings (For the Adventurous)
This method is a bit more advanced and might take longer to establish roots, but it can be very successful with the right care.
- Select a Healthy Stem: Look for a mature pseudobulb that has developed a new shoot or growth from its base, or a healthy stem that has multiple nodes (the little bumps where leaves emerge).
- Make the Cut: Using your sterilized shears, cut below a node. Try to get a piece with at least two or three nodes. If you’re taking a cutting from a stem that has recently flowered, it’s a good candidate.
- Prepare the Cutting: Remove any lower leaves if they’re going to be submerged in water or soil.
- Rooting Hormone: Dip the cut end of the stem into your rooting hormone. Tap off any excess.
- Planting: You have two main options here:
- In Moss: Moisten some sphagnum moss and place the cutting in it, ensuring the nodes are covered. Place this in a small pot.
- In Bark: Plant the cutting into a pot with orchid bark mix, again making sure the nodes are in contact with the medium.
The “Secret Sauce” (Pro Tips)
Here are a few things I’ve learned over the years that really make a difference:
- Let it Heal: After you divide or take a cutting, let the cut ends air dry for a day or two before potting. This helps to callus over the wound and prevent rot. This is especially important after division.
- Don’t Water Log: Newly divided or cut Catasetum orchids are very susceptible to rot. Water sparingly until you see signs of new growth or roots. I usually just mist the media lightly or water very gently just around the base.
- Bottom Heat is Your Friend: For stem cuttings, placing the pot on a heat mat set to a gentle, consistent warmth (around 70-75°F or 21-24°C) can significantly speed up root development. It mimics the warmth of tropical conditions.
Aftercare & Troubleshooting
Once your new division or cutting has been potted, it needs a bit of TLC to thrive.
- Light: Place your new plant in bright, indirect light. Avoid harsh, direct sun, which can scorch young leaves.
- Humidity: Catasetums appreciate good humidity. If you’re in a dry environment, consider placing the pot on a pebble tray filled with water (ensure the pot isn’t sitting in the water) or using a humidifier.
- Watering: As I mentioned, be conservative with watering until you see signs of new growth or roots. Check the potting medium; if it feels dry, it’s time for a light watering. New roots often appear as tiny, greenish or whitish nubs emerging from the base.
- Troubleshooting: The most common issue you’ll face is rot. This usually shows up as a mushy, blackening pseudobulb or stem. If you see this, try to cut away the affected part with your sterilized tool, apply some fungicide, and let the area dry thoroughly. Wrinkled pseudobulbs can indicate under-watering, but don’t panic too much, especially if it’s still developing roots.
A Little Patience Goes a Long Way
Propagating any plant, especially an orchid, is a journey. Some will take off right away, while others might need a bit more encouragement. The key is to stay observant, be patient, and celebrate every little sign of success. Enjoy the process of nurturing these new life forms, and soon you’ll have a whole new generation of beautiful Catasetum expansum to admire. Happy growing!
Resource:
https://identify.plantnet.org/k-world-flora/species/Catasetum%20expansum%20Rchb.f./data