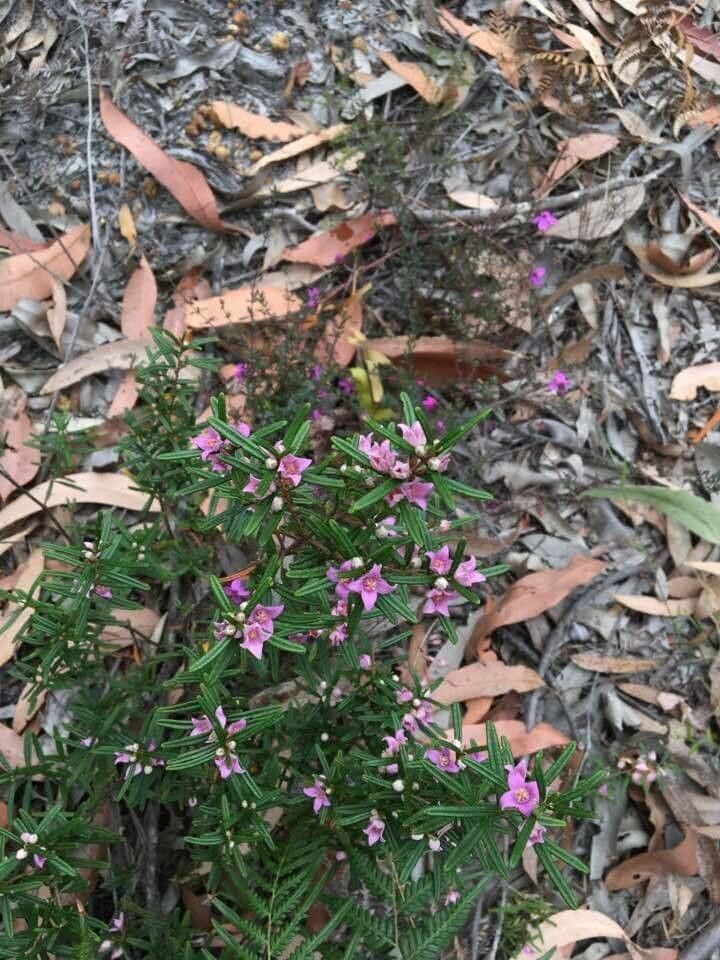
Oh, Boronia rosmarinifolia! What a delightful plant. Those delicate, starry pink flowers set against the rosemary-like foliage are just a dream come true in any garden. If you’ve ever been captivated by its charm, then you know how wonderfully rewarding it is to bring more of these beauties into your world. Propagating Boronia rosmarinifolia can be a bit of a venture, and I wouldn’t necessarily label it a beginner’s walk in the park, but with a little patience and these tips, you’ll be well on your way.
The Best Time to Start
For Boronia rosmarinifolia, late spring to early summer is your golden window. You’re looking for new, yet slightly hardened growth. Think of it as the plant’s energetic teenage phase – not too soft and floppy, but not woody and stiff either. This is when cuttings are most likely to root successfully.
Supplies You’ll Need
Gathering your supplies makes the whole process so much smoother. Here’s what I like to have on hand:
- Sharp pruning shears or a clean, sharp knife: Sterilize them with rubbing alcohol before you start.
- A good quality potting mix: I recommend a fast-draining blend. A mix of equal parts perlite and coarse sand is fantastic, or you can use a commercial “seed starting” or “cactus and succulent” mix.
- Rooting hormone: A powder or gel will do. It’s not strictly essential for every plant, but Boronia can be a little shy with roots, so it’s a good insurance policy.
- Small pots or trays: Clean ones, of course!
- A plastic bag or propagator lid: To create a humid environment.
- A spray bottle: For misting.
- Labeling sticks: You’ll thank me later for remembering what’s what!
Propagation Methods
While you might see Boronia propagated by seed, I find stem cuttings to be the most reliable and rewarding method for this particular plant.
Taking Stem Cuttings:
- Select your parent plant: Choose a healthy, vigorous Boronia that’s free from pests or diseases.
- Make the cut: Using your sterilized shears, take cuttings from the new, semi-hardened growth. Aim for pieces about 10-15 cm (4-6 inches) long. Make the cut just below a leaf node – that’s the point where a leaf joins the stem.
- Prepare the cuttings: Gently remove the lower leaves from the cutting, leaving about 2-3 leaves at the top. This reduces water loss and prevents leaves from rotting in the soil.
- Apply rooting hormone: Dip the cut end of the stem into your rooting hormone, tapping off any excess.
- Pot them up: Fill your clean pots or trays with your prepared, well-draining potting mix. Make a small hole in the center of the soil with a pencil or your finger.
- Insert the cuttings: Carefully place the hormone-dipped end of the cutting into the hole, and gently firm the soil around it. Don’t pack it too tightly.
- Water gently: Water the soil well, but avoid waterlogging. Mist the leaves of the cuttings lightly.
The “Secret Sauce” (Pro Tips)
Here are a couple of things I’ve learned over the years that really give Boronia cuttings a boost:
- Bottom heat is your friend: Boronia cuttings absolutely love a bit of warmth from below. Placing your pots on a heated propagator mat can significantly speed up root development and increase your success rate. It mimics the lovely warm soil they’d find in their natural habitat.
- The humidity tent is vital: Once your cuttings are in their pots, pop them into a plastic bag or cover them with a propagator lid. This creates a mini-greenhouse effect, keeping the humidity high. This is crucial because the cuttings don’t have roots yet to take up water, so you need to prevent them from drying out. However, open the tent daily for a few minutes to allow for air circulation and prevent fungal issues.
Aftercare & Troubleshooting
Once you’ve got your cuttings potted up, the real waiting game begins. Keep them in a bright, indirect light location. Avoid direct sun, which can scorch those tender leaves. Continue to mist them occasionally and ensure the soil stays consistently moist but not soggy.
You’ll know your cuttings are rooting when you see new leaf growth or feel a slight resistance when you gently tug on the stem. This can take anywhere from 4 weeks to a couple of months. Be patient!
The most common issue you’ll face is rot. If you see stems turning black and mushy, it’s usually a sign of too much moisture and not enough air circulation. Unfortunately, these cuttings are usually lost. This is why a fast-draining mix and careful watering are so important.
A Encouraging Closing
Bringing new life into your garden is such a joy, and watching those tiny Boronia cuttings take hold is a special kind of magic. Don’t be discouraged if your first attempts aren’t a complete success – gardening is a journey of learning. Just keep trying, enjoy the process, and soon you’ll be surrounded by the sweet perfume of your very own Boronia rosmarinifolia. Happy propagating!
Resource: