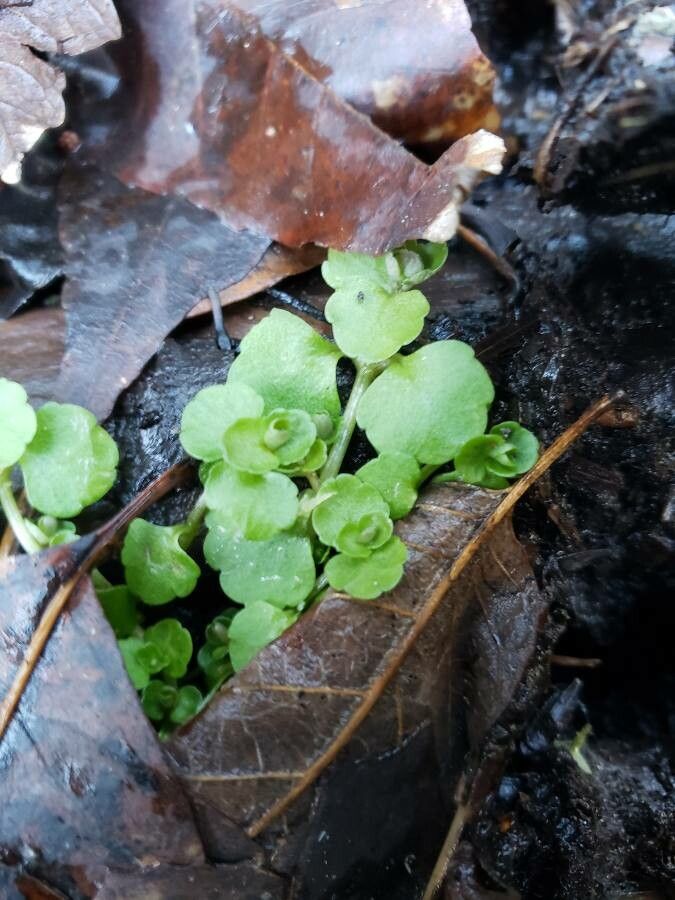
Hello fellow garden enthusiasts! Today, we’re going to chat about a little beauty I absolutely adore: Chrysosplenium americanum, often called American golden saxifrage. This charming groundcover is a real gem for shady, moist spots in the garden. Its low-growing habit and delicate, bright green leaves add a lovely texture, especially in those damp nooks where other plants struggle.
Now, why propagate this little wonder? Well, it’s incredibly rewarding to see those tiny cuttings take root and grow into new plants. It’s also a fantastic way to fill out a large shady area or share its charm with friends. And for those of you just dipping your toes into the world of plant propagation, I’m happy to say that Chrysosplenium americanum is quite forgiving! Beginners will find it a delightful and accessible plant to practice on.
The Best Time to Start
For the highest success rate, the sweet spot for propagating Chrysosplenium americanum is generally late spring to early summer. This is when the plant is actively growing and has plenty of energy to put into developing new roots. You can also have success with divisions a bit later in the season, but for cuttings, aim for that vibrant growth period.
Supplies You’ll Need
Gathering your supplies beforehand makes the whole process much smoother. Here’s what you’ll want to have on hand:
- Sharp pruning shears or a clean utility knife: For making neat cuts.
- Small pots or trays: With drainage holes, of course!
- A good quality potting mix: I prefer a mix that is well-draining but retains a bit of moisture. A blend of peat moss, perlite, and a touch of compost works beautifully. You can also add some horticultural grit.
- Rooting hormone (optional but helpful): Especially if you’re new to propagation, this can give your cuttings a helpful boost.
- Watering can or spray bottle: For gentle watering.
- Plastic bags or clear plastic covers: To create a mini-greenhouse effect.
Propagation Methods
Let’s dig into the ways we can multiply our lovely golden saxifrage!
Stem Cuttings
This is my go-to method for Chrysosplenium americanum. It’s straightforward and generally yields excellent results.
- Take your cuttings: On a healthy, non-flowering stem, make a clean cut just below a leaf node (where a leaf attaches to the stem). You want cuttings that are about 3-4 inches long. Remove the lower leaves, leaving just a few at the top.
- Dip in rooting hormone (optional): If you’re using rooting hormone, lightly dip the cut end into the powder. Tap off any excess.
- Plant the cuttings: Fill your small pots with your prepared potting mix. Make a small hole with your finger or a pencil. Insert the cutting, ensuring the leaf nodes you removed are below the soil surface (this is where roots will form). Gently firm the soil around the cutting.
- Water gently: Water the soil thoroughly but gently. You want it moist, not waterlogged.
- Create a humid environment: Cover the pot loosely with a plastic bag or a clear plastic dome. This will help retain moisture. You can secure the bag with a rubber band around the pot.
- Place in bright, indirect light: Find a spot that gets plenty of bright, indirect light but no direct sun. This will scorch those delicate new cuttings!
Division
If you have an established patch of Chrysosplenium americanum, division is a fantastic way to propagate and also refresh your existing plants.
- Gently excavate: In the spring or early fall (when the plant isn’t stressed by heat or extreme cold), carefully dig up a clump of the golden saxifrage. You don’t need to lift the whole plant if you only want to divide a portion.
- Separate the sections: Gently pull the clump apart into smaller sections. Each section should have roots and some leafy growth. If the roots are matted, you can use a clean trowel or even your fingers to tease them apart.
- Replant immediately: Water your new divisions and replant them in their new homes or in pots as described for cuttings. Ensure they are kept consistently moist.
The “Secret Sauce” (Pro Tips)
Here are a few little tricks I’ve picked up over the years that can make a big difference:
- Keep it humid, but allow airflow: While that plastic cover is great for retaining moisture, it’s also a breeding ground for fungal diseases if air can’t circulate. Every day or two, lift the bag for a few minutes to let fresh air in. This prevents rot from setting in.
- Bottom heat is your friend (for cuttings): If you’re serious about cuttings and want to speed things up, consider placing your pots on a heated propagation mat. This gentle warmth encourages root development from below, which is incredibly effective.
- Don’t be tempted to overwater: I know it’s tempting to keep things soaking wet, especially with groundcovers that love moisture. However, consistently soggy soil can lead to rot. Aim for evenly moist, not waterlogged. Feel the soil; if the top inch feels dry, it’s time to water.
Aftercare & Troubleshooting
Once you see new growth emerging from your cuttings, or your divisions are settled, it’s time for attentive aftercare.
- Gradual acclimatization: Once roots are well-established (tug gently on a cutting – if there’s resistance, it’s rooted!), gradually remove the plastic cover over a week or so. This helps the new plant get used to the ambient humidity.
- Continue consistent moisture: Keep the soil consistently moist, especially during the first few months. Remember, Chrysosplenium americanum thrives in damp conditions.
- Transplant when ready: When your new plants have developed a good root system and are showing vigorous growth, you can transplant them into their permanent garden spots (if you propagated them in pots) or into larger containers.
Troubleshooting is part of the gardening journey! The most common issue you might encounter is rot, which usually means the cuttings or divisions are sitting in too much moisture with not enough airflow. If a cutting turns yellow and mushy, it’s likely succumbed to rot. Unfortunately, there’s not much you can do once rot sets in on a cutting, but you can often save a division by removing any rotted parts and replanting in fresh, well-draining soil. Another sign of failure is if the cutting simply shrivels up and turns brown – this often means it didn’t get enough moisture initially or was exposed to too much direct sun.
A Encouraging Closing
Propagating plants is a magical process, and Chrysosplenium americanum is a wonderful subject to start with. Be patient with your new greens; they have their own timeline. Enjoy the quiet satisfaction of watching them grow, and don’t be disheartened if a few don’t make it. Every gardener has their successes and their learning experiences! Happy propagating!
Resource: