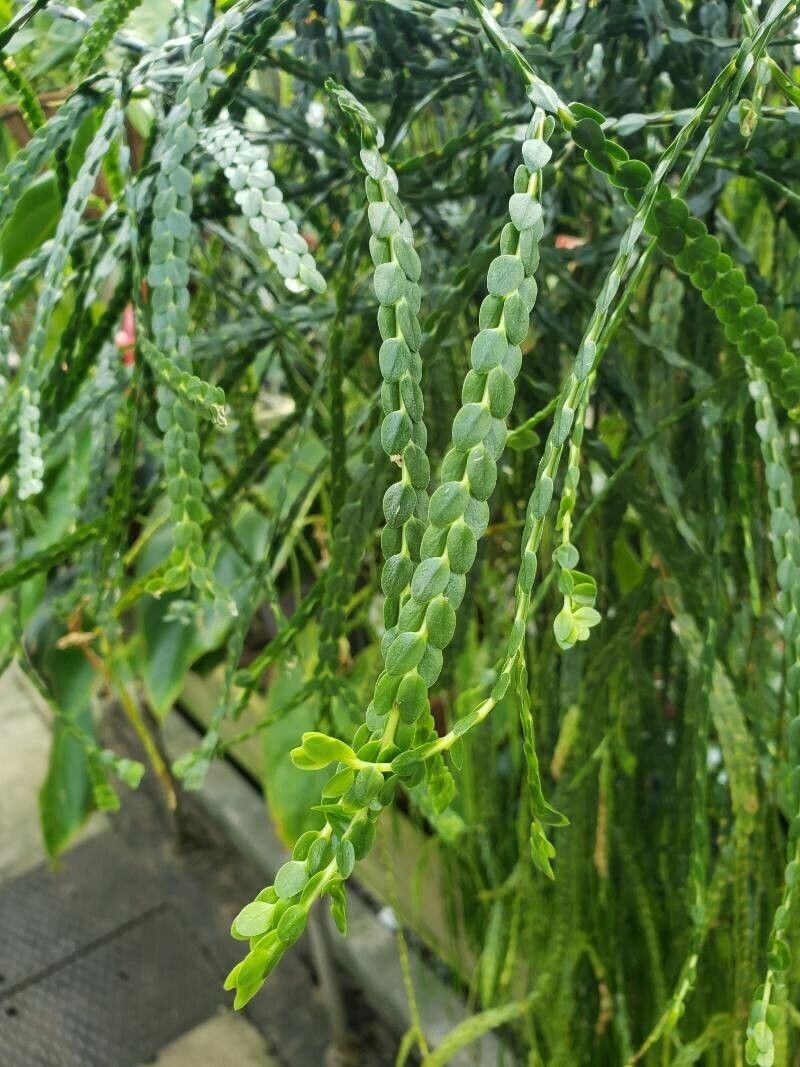
Hey there, fellow plant lovers! Today, we’re diving into the wonderful world of a truly unique plant: Huperzia nummulariifolia. You might know them as clubmosses or ground pines, and this particular species, with its charming, coin-like leaves, is just delightful. Propagating them yourself is incredibly satisfying, like coaxing a whole new little world of green into existence. Now, I won’t lie, Huperzia can be a touch finicky compared to your average pothos. It’s definitely a project that rewards patience and a bit of close observation, so if you’re a complete beginner, maybe start with something a little simpler first. But if you’re ready for a rewarding challenge, let’s get our hands dirty!
The Best Time to Start
For Huperzia nummulariifolia, you’ll find the best success when you propagate during its active growing season. This typically means spring and early summer. During this time, the plant is full of energy, and your cuttings will have a much better chance of rooting and establishing themselves before the cooler, less active months arrive. Waiting for new, healthy growth to appear is the key.
Supplies You’ll Need
Gathering your tools beforehand makes the whole process smoother. Here’s what I usually have on hand:
- Sharp Pruning Shears or a Clean Knife: For taking precise cuttings.
- Well-Draining Potting Mix: A good blend for me is equal parts peat moss, perlite, and orchid bark. This mimics their natural habitat.
- Small Pots or Propagation Trays: Clean and with drainage holes, of course!
- Rooting Hormone (Optional but Recommended): A powdered or gel form can give your cuttings a helpful boost.
- Plastic Bag or Clear Dome: To create a humid environment.
- Spritzer Bottle: For gentle misting.
- Labels: To keep track of what you’ve planted and when!
Propagation Methods
The most reliable way I’ve found to propagate Huperzia nummulariifolia is through stem cuttings. Division can work, but it’s often much more stressful for the plant.
Stem Cuttings:
- Select Your Cuttings: Look for healthy, vigorous stems that are at least 3-4 inches long. You want stems that have developing, but not yet woody, tissue. Avoid anything that looks limp or discolored.
- Make the Cut: Using your sharp shears or knife, make a clean cut just below a leaf node. A leaf node is where a leaf attaches to the stem – this is where new roots will form.
- Prepare the Cuttings: Gently remove the lower leaves from the bottom 1-2 inches of the cutting. This prevents them from rotting once they’re in the soil.
- Apply Rooting Hormone (If Using): Dip the cut end of the stem into your rooting hormone, tapping off any excess.
- Plant Your Cuttings: Fill your small pots or trays with your prepared potting mix. Moisten the mix slightly, so it’s damp but not soggy. Make a small hole with your finger or a pencil in the center of the pot and insert the cut end of your Huperzia. Gently firm the soil around the stem.
- Create a Humid Environment: Water the soil lightly again, and then cover the pot with a plastic bag or a clear dome. This traps humidity, which is crucial for your cuttings. You can secure the bag with a rubber band.
- Placement: Place your pots in a warm location with bright, indirect light. Direct sun will scorch and kill your precious cuttings.
The “Secret Sauce” (Pro Tips)
I’ve learned a few tricks that really seem to make a difference:
- The Air Layering Gambit: Sometimes, instead of taking a whole cutting, I’ll carefully select a healthy stem and make a small, shallow cut on the underside just below a leaf node. Then, I’ll wrap that wounded area with a bit of damp sphagnum moss and secure it with plastic wrap. If roots form on the moss (you’ll see them through the plastic!), you can then cut the stem below the new roots and pot it up. It gives the cutting a head start.
- Bottom Heat is Your Friend: If you struggle with rooting humidity-loving plants, consider investing in a small propagation mat. Placing your potted cuttings on this mat provides gentle bottom heat, which really jumpstarts root development and significantly increases your chances of success.
Aftercare & Troubleshooting
Once your cuttings have been planted, resist the urge to fuss over them constantly!
Ongoing Care:
- Misting: Mist the leaves lightly every couple of days, especially if you don’t have a dome or bag. You want to keep the leaves hydrated but avoid waterlogging the soil.
- Checking for Roots: After about 4-6 weeks, you can gently tug on a cutting. If there’s resistance, you’ve got roots! You can also look for new leaf growth. Once you see good root development, gradually acclimate them by removing the plastic bag for longer periods each day.
- Repotting: Once the new plants are well-established and have multiple new leaves, you can transplant them into slightly larger pots with fresh potting mix.
Troubleshooting:
- Rot: This is the most common enemy. If you see mushy, black stems or leaves that are yellowing and falling off, it’s likely rot from too much moisture. Ensure good drainage and don’t overwater. You might need to start over with new cuttings if the rot is advanced.
- No Growth: If after several weeks there’s absolutely no sign of new growth or roots, your cuttings might not have taken. This can be due to insufficient humidity, poor light, or the cuttings being too old or damaged. Don’t get discouraged; simply try again with fresh material and adjust your conditions.
A Little Patience Goes A Long Way
Propagating Huperzia nummulariifolia is a journey, not a race. It requires a gentle touch and a keen eye. Celebrate the small victories – that first tiny root, that new speck of green. Enjoy the process of nurturing these charming plants, and soon you’ll have a whole collection to admire! Happy propagating!
Resource: