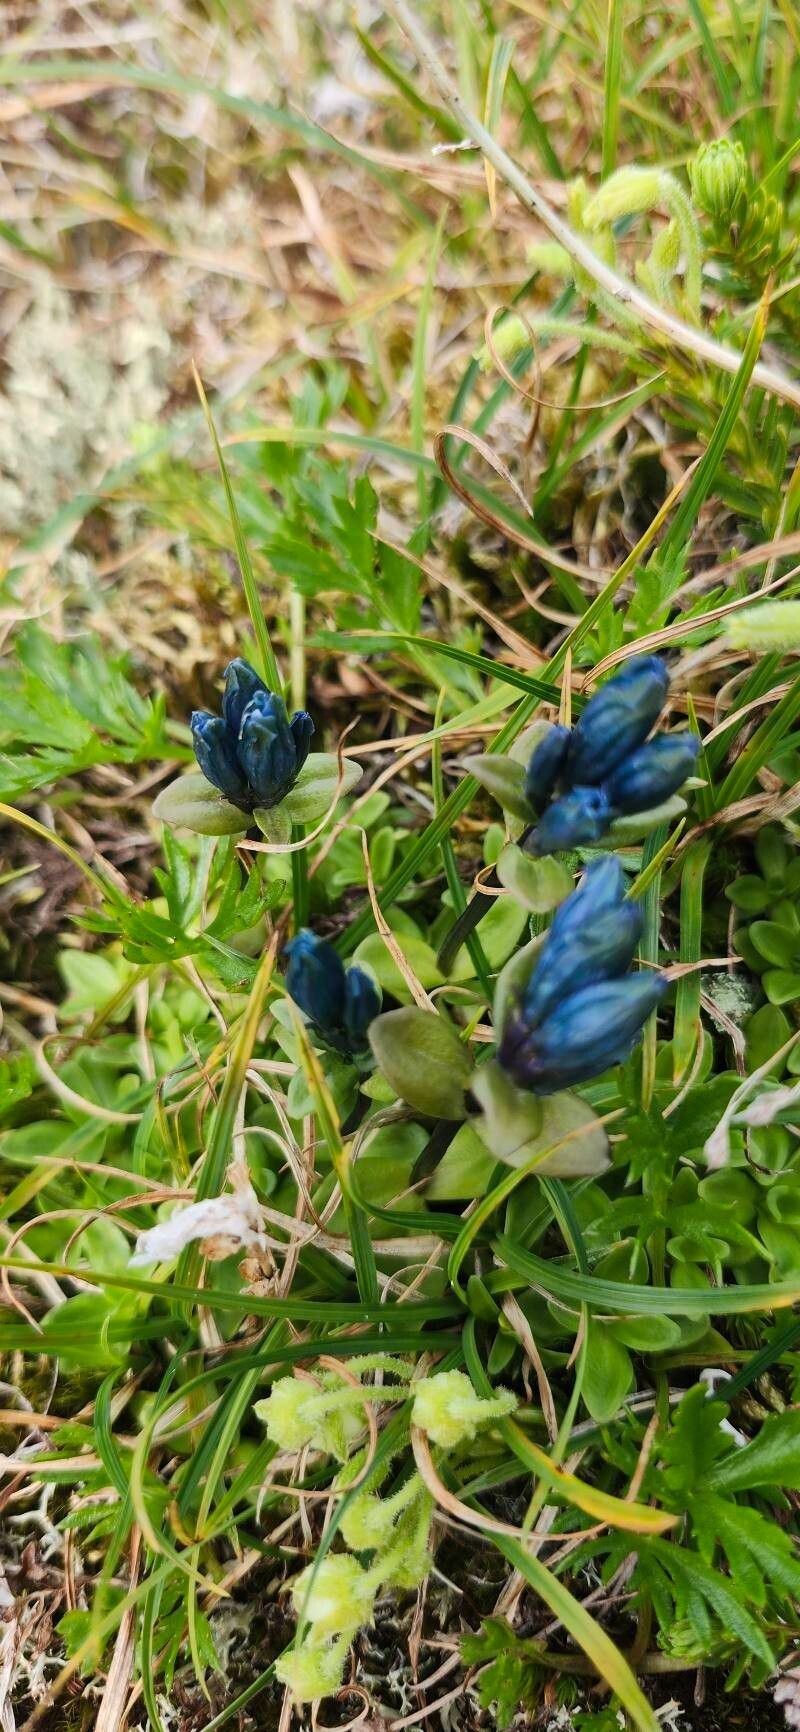
Oh, hello there! So glad you stopped by. Today, we’re going to chat about something truly special: Gentiana glauca. If you’ve ever been mesmerized by those stunning, trumpet-shaped blue flowers gracing your garden, you know exactly why I love this plant. There’s a quiet dignity to Gentiana glauca, and coaxing a new plant into existence from an existing one? That’s a kind of magic I never get tired of. Now, I won’t lie and say Gentiana glauca is an “anybody can do it” plant from day one. It requires a little finesse, a bit of patience, but oh, is it rewarding.
The Best Time to Start
For Gentiana glauca, timing is everything. I’ve found my greatest success in early to mid-spring. This is when the plant is just waking up from its winter slumber, and new, vigorous growth is starting. You’ll want to look for stems that are firm but not yet woody. Think of it as capturing that youthful energy before it gets too set in its ways.
Supplies You’ll Need
Gathering your supplies makes the whole process much smoother. Here’s what I always have on hand:
- Sharp, clean pruning shears or a razor blade: Essential for clean cuts that heal well.
- Rooting hormone powder or gel: This really gives your cuttings a head start.
- A well-draining potting mix: I usually mix my own with equal parts peat moss, perlite, and a bit of coarse sand. You want something that holds a little moisture but drains like a sieve.
- Small pots or seed trays with drainage holes: For those precious new additions.
- A clear plastic bag or humidity dome: To create that humid environment cuttings crave.
- Watering can with a fine rose: Gentle watering is key.
Propagation Methods
While Gentiana glauca can be a bit particular, stem cuttings are generally my go-to method. It’s reliable and gives you a good chance of success if you’re careful.
- Take Your Cuttings: On a cool, overcast morning, select healthy, non-flowering stems. Using your sharp shears, cut lengths of about 4-6 inches. Make the cut just below a leaf node (where a leaf attaches to the stem). This node is where the magic for root formation happens.
- Prepare the Cuttings: Gently remove the lower leaves from your cuttings, leaving just a few at the top. You can even strip off a small sliver of the outer bark at the very base, about half an inch long, if you’re feeling adventurous – this can encourage rooting.
- Apply Rooting Hormone: Dip the cut end of each stem into your rooting hormone. Tap off any excess.
- Planting: Fill your small pots with your prepared potting mix. Make a small hole with your finger or a pencil. Insert the cutting into the hole, ensuring the leaf nodes are below the soil surface. Gently firm the soil around the base.
- Create Humidity: Water the soil lightly. Then, place the pots inside a clear plastic bag, tying it loosely at the top, or cover them with a humidity dome. This creates a mini-greenhouse effect.
The “Secret Sauce” (Pro Tips)
Now for those little bits of wisdom that can make all the difference:
- No Soggy Bottoms! This is crucial. Gentiana glauca roots absolutely hate sitting in water. If you’re using the humidity dome method, check the soil moisture regularly. It should be consistently moist, not waterlogged.
- Bottom Heat is Your Friend: If you have a propagation mat, using bottom heat can really speed up the rooting process. The warmth encourages root development from below, while the top stays cooler. It mimics the perfect spring conditions.
- Don’t Rush the Water Dip: If you’re doing any form of water propagation, like rooting a cutting in water beforehand (which I find less reliable for Gentiana glauca but some have success), never let the leaves touch the water. Only the stem should be submerged.
Aftercare & Troubleshooting
Once you start seeing signs of new growth – little leaves appearing or a gentle tug on the cutting meeting resistance – you know roots are forming!
- Gradual Acclimation: Slowly start to acclimate your new plants to drier air. Open the plastic bag or humidity dome gradually over a few days.
- Water Sparingly: Continue to water when the top inch of soil feels dry.
- Transplanting: Once the roots have filled the small pot (you can often see them through the drainage holes), it’s time to pot them up into slightly larger containers with your well-draining mix.
The most common sign of trouble is rot. If your cuttings turn mushy and black, especially at the base, it’s usually a sign of too much moisture and not enough air circulation. Don’t be discouraged! Gardening is a learning process, and sometimes things just don’t work out. The key is to figure out why and try again.
Keep Going!
So there you have it! Propagating Gentiana glauca is a journey that requires a touch of patience and a keen eye. Don’t be afraid to get your hands dirty. Remember, even the most seasoned gardeners have failed attempts. Celebrate your successes, learn from your challenges, and most importantly, enjoy the wonderful process of bringing more of that stunning blue into your life. Happy gardening!
Resource:
https://identify.plantnet.org/k-world-flora/species/Gentiana%20glauca%20Pall./data