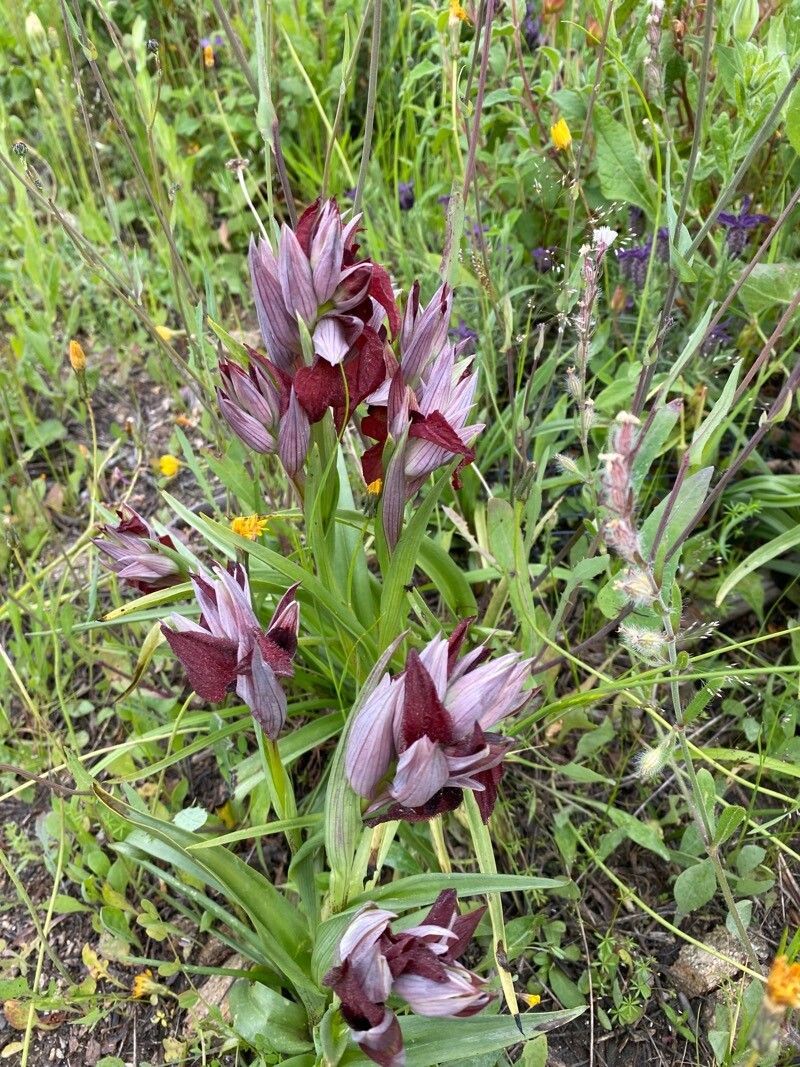
Oh, hello there! Come on in, grab a mug. Let’s chat about one of my absolute favorite plants, the charming Serapias cordigera. If you’re drawn to delicate beauty and a touch of the unique, you’re going to adore this little orchid.
Why Propagate Serapias cordigera?
There’s something incredibly satisfying about creating new life from a plant you already love. For me, watching a tiny Serapias seedling unfurl its first leaves is just pure magic. These terrestrial orchids, with their heart-shaped bracts and intricate blooms, are truly special. Propagating them isn’t something you’ll find in every garden center guide, and that’s part of the allure, isn’t it? Now, is it a walk in the park for a complete novice? I’d say it requires a bit of patience and attention to detail, but with a little guidance, absolutely anyone can have success.
The Best Time to Start
Timing is everything, as they say, and with Serapias cordigera, the best time to think about propagation is usually late summer to early autumn. This is after the plant has finished flowering and is entering its dormant or semi-dormant phase. It’s a crucial window when the plant has enough stored energy to focus on producing new growth. Waiting until the current year’s Pseudobulbs are fully formed and matured is key.
Supplies You’ll Need
Don’t worry, it’s not an overwhelming list! We mostly need things you might already have on hand or can easily find at your local nursery or garden center.
- Sterile cutting tool: Sharp pruning shears, a clean knife, or even a razor blade will do. Hygiene is paramount to prevent disease.
- Well-draining potting mix: A good blend for orchids is best. I like to use a mix of fine orchid bark, perlite, and a bit of coco coir. The goal is excellent aeration.
- Small pots or trays: Clean, small containers are perfect for starting your new propagations.
- Rooting hormone (optional but helpful): A gentle rooting hormone powder or gel can give your cuttings a little boost.
- Watering can with a fine rose: Gentle watering is crucial.
- Labels: Don’t forget to label your efforts!
Propagation Methods: Let’s Get Our Hands Dirty!
For Serapias cordigera, the most rewarding method is likely through division of existing tubers, or propagation from basal shoots. While seed propagation is possible, it’s a very specialized and lengthy process, not ideal for most home growers.
Division of Tubers (When Your Plant is Mature)
This is the most common and successful way to propagate established Serapias.
- Gently unpot your mature plant. The best time is just as you see the tops starting to die back, indicating dormancy.
- Carefully brush away excess soil from the root ball. You’re looking for tubers.
- Identify individual growth points. A mature plant will often have multiple tubers attached. You’re looking for sections that have their own distinct growth point and root system.
- Using your sterile cutting tool, carefully separate these divisions. Make a clean cut between them. If there are any withered or diseased parts, trim those away entirely.
- Allow the cut surfaces to dry for a few hours. This helps prevent rot.
- Pot each division into its own small pot. Use your well-draining mix. Ensure the tuber is just slightly below the surface of the soil, with the growing tip exposed.
- Water very sparingly initially. You want the soil to be slightly moist, not waterlogged.
Propagating Basal Shoots (If Your Plant Produces Them)
Sometimes, your Serapias will produce new shoots directly from the base of the plant. These are prime candidates for propagation!
- Wait until the basal shoot is a good size, with its own small leaves and hopefully a developing tiny tuber.
- Using your sterile tool, carefully cut the shoot away from the parent plant, ensuring you get as much of the basal stem and any developing roots as possible.
- Allow the cut end to callus over for a few hours in a dry, airy spot.
- Pot the shoot into a small pot with your orchid mix, burying the base lightly.
- Water very lightly, just enough to settle the soil.
The “Secret Sauce” (Pro Tips)
Here are a few little tricks that I’ve picked up over the years that can make a big difference:
- Don’t rush the dormancy. Resist the urge to water and fertilize heavily just because you see a new shoot forming. Let the plant truly complete its flowering and rest cycle. This is when it’s building its reserves for the next season.
- Bottom Heat is Your Friend (Sometimes). If you’re starting divisions in a cooler environment, providing a little gentle bottom heat (like a seedling heat mat set to a low temperature) can encourage root development. Just make sure the heat isn’t too extreme, as it can dry out the tubers.
- Think “Airy,” not “Wet.” This is the golden rule for most orchids, and Serapias are no exception. They hate sitting in soggy soil. Good airflow around the roots is crucial for preventing fungal issues.
Aftercare & Troubleshooting
Once your divisions or shoots are potted, the real waiting game begins.
- Watering: Water sparingly at first. The soil should be just barely moist. As you see signs of new growth (a new leaf unfurling, or a tiny shoot emerging), you can gradually increase watering, but always allow the top layer of soil to dry out between waterings.
- Light: Provide bright, indirect light. Avoid direct, harsh sun, which can scorch the delicate new foliage.
- Patience is key! It can take weeks, sometimes months, for new roots to establish and visible growth to appear. Don’t panic if you don’t see immediate results.
Common signs of failure:
- Rot: This is usually the biggest culprit. If the tuber turns mushy or black, it’s a sure sign of too much moisture and poor drainage. If it happens, try to cut away the rotten parts and let the healthy sections callus before repotting in bone-dry mix, then refrain from watering for a good while.
- Shriveling: If the tuber shrivels and becomes papery, it likely didn’t have enough stored energy or was kept too dry for too long. Ensure you’re providing consistent, albeit light, moisture once roots begin to form.
A Little Encouragement
There you have it! Propagating Serapias cordigera is a journey, and like all good garden adventures, it’s filled with learning and discovery. Trust your instincts, be gentle, and most importantly, enjoy the process. Watching these little wonders grow into their own is one of the most rewarding experiences in the garden. Happy propagating!
Resource:
https://identify.plantnet.org/k-world-flora/species/Serapias%20cordigera%20L./data