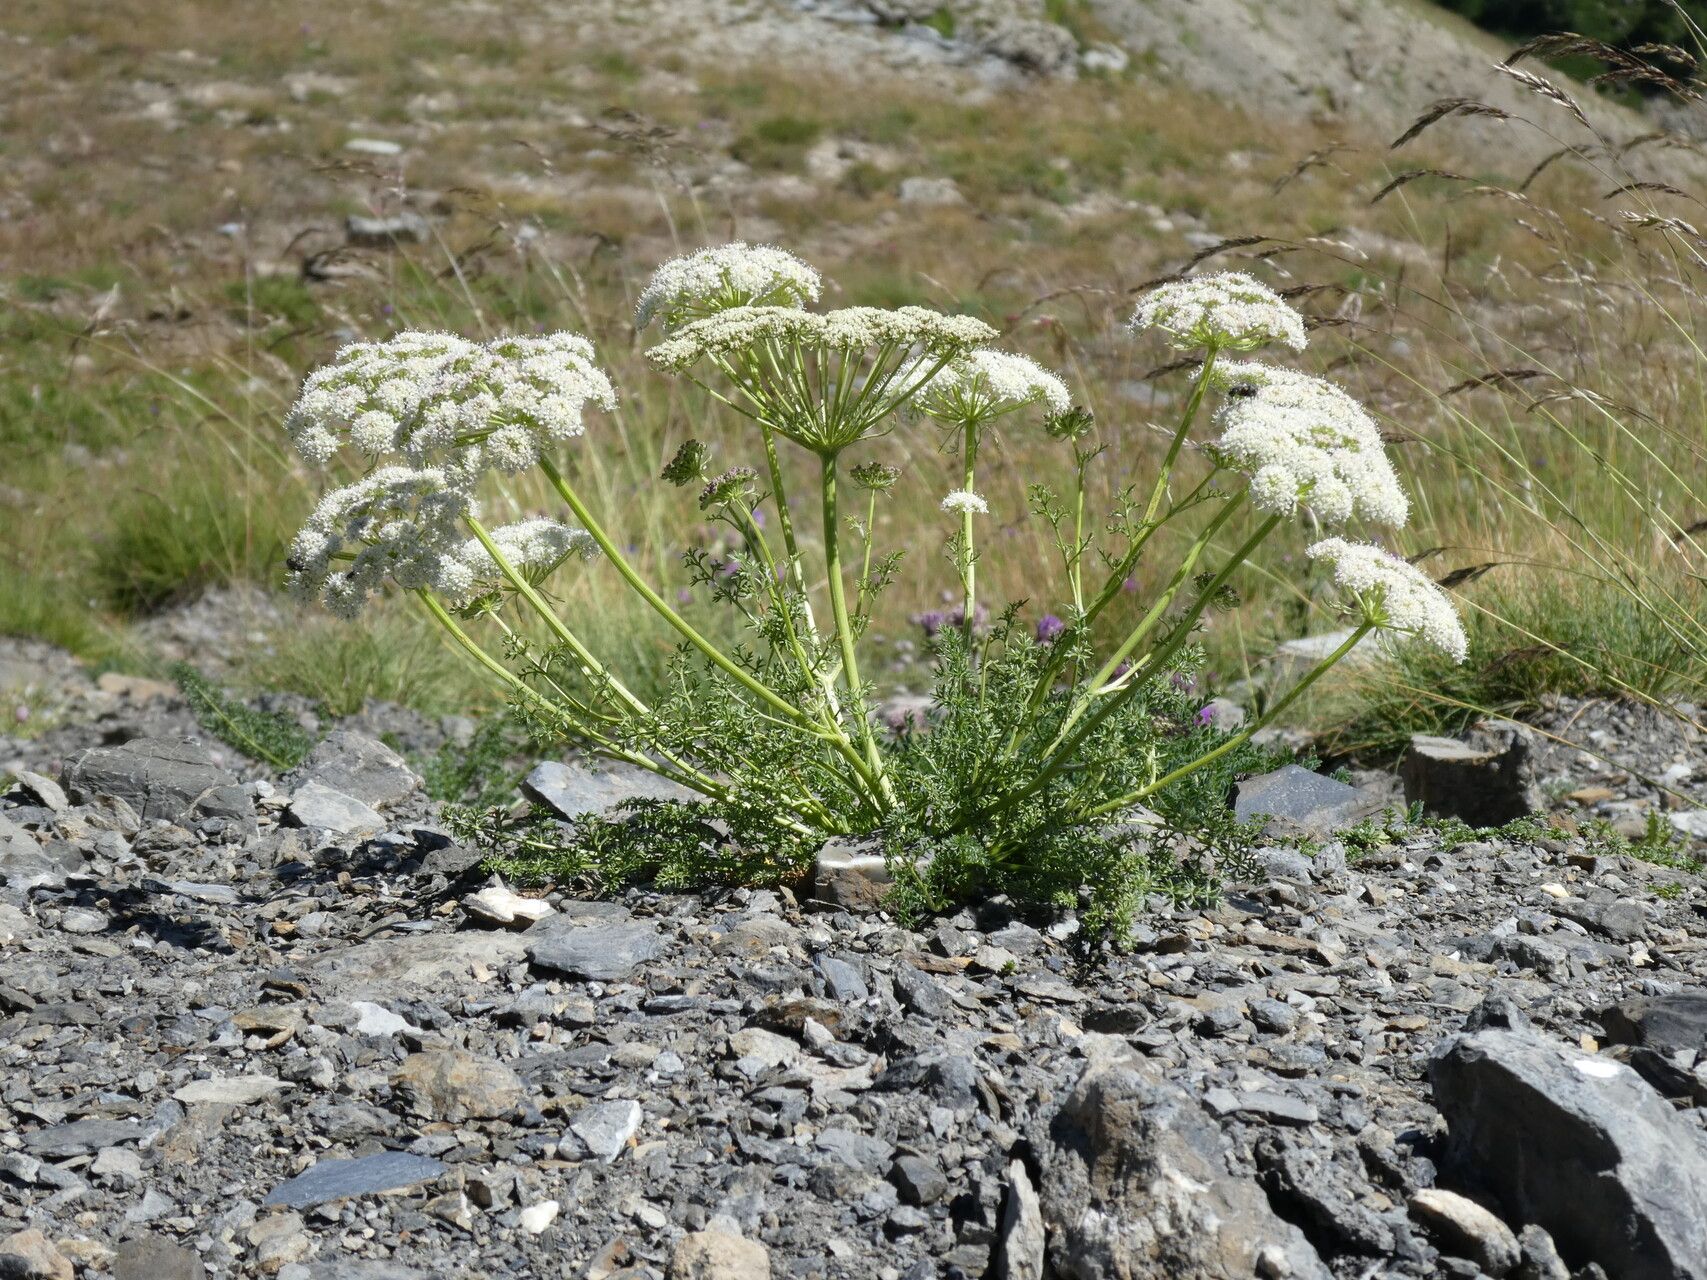
Oh, hello there! So glad you stopped by. Today we’re going to talk about a plant that’s a bit of a hidden gem, but oh-so-worth it: Ligusticum ferulaceum, or as some of us affectionately call it, “False Lovage.” With its delicate, feathery foliage and a scent that’s just a whisper of anise, it adds a lovely airiness to any garden. And you know what’s even more rewarding than admiring it? Growing more of it yourself!
Now, if you’re new to the gardening game, Ligusticum ferulaceum might present a slight challenge. It’s not exactly as straightforward as a petunia from seed, but don’t let that deter you one bit. With a little care and patience, you’ll be a pro in no time. It’s the kind of success that really builds your garden confidence.
The Best Time to Start
For Ligusticum ferulaceum, spring is truly your best friend. Aim for around late spring to early summer, just as the plant is hitting its stride and putting on new growth. This is when the stems are most vigorous and have the best chance of rooting. Trying to propagate too early in the season, when the plant is still waking up, or too late when things are winding down, can make things a bit trickier.
Supplies You’ll Need
Here’s what you’ll want to have on hand before we get started:
- Sharp pruning shears or a clean knife: For making those all-important cuts. Sterilize them to prevent disease!
- Rooting hormone (optional but recommended): A little bit can go a long way in encouraging sturdy root development. Look for one with a good track record.
- A well-draining potting mix: A blend of peat moss, perlite, and a bit of compost works wonderfully. You want it light and airy.
- Small pots or trays: Clean ones, of course. About 3-4 inches in diameter are perfect to start.
- A plastic bag or humidity dome: To keep our cuttings nice and moist.
- Watering can or spray bottle: For gentle watering.
Propagation Methods
There are a couple of ways we can go about this, but my favorite for Ligusticum ferulaceum is definitely stem cuttings. It gives you a great chance of success.
Here’s how we do it:
-
Select your cuttings: Grab your sterilized shears. Look for healthy, non-flowering stems that are about 4-6 inches long. You want to take them from the tips of the stems, where the growth is active.
-
Prepare the cuttings: Gently remove the leaves from the bottom half of the stem. This is crucial to prevent them from rotting once they’re in the soil. You want just a few leaves left at the very top. If those top leaves are quite large, I’ll often snip them in half to reduce water loss.
-
Apply rooting hormone: If you’re using it, dip the cut end of the stem into your rooting hormone. Tap off any excess. This step isn’t strictly necessary, but it really does give those roots a boost.
-
Plant your cuttings: Fill your small pots with your prepared potting mix. Make a small hole with your finger or a pencil. Carefully insert the cut end of the stem into the hole, ensuring the hormone-coated part is below the surface. Gently firm the soil around the stem.
-
Water gently: Give the soil a good, but gentle, watering. You want it moist, not soggy.
-
Create a humid environment: This is where the plastic bag or humidity dome comes in. You can slip a clear plastic bag loosely over the pot, making sure it doesn’t touch the leaves too much. Or, use a clear plastic lid designed for seed trays. This traps the moisture and keeps your cuttings from drying out.
-
Find a good spot: Place your pots in a bright location, but out of direct, harsh sunlight. A windowsill that gets bright, indirect light is ideal.
The “Secret Sauce” (Pro Tips)
Over the years, I’ve learned a few tricks that seem to make all the difference:
- Think about air circulation: Even though we’re creating humidity, don’t seal your cuttings up like a tomb! Allow for a little bit of airflow. If you’re using a plastic bag, you can poke a few small holes in it. This helps prevent fungal issues.
- Bottom heat is your friend: If you have the set-up, placing your pots on a gentle heating mat can significantly speed up root development. It mimics the warmth of spring soil and encourages those roots to get going. Just a low, consistent warmth is all you need.
- Don’t overwater, ever: This is a big one for me. It’s so tempting to drown those little cuttings, but consistently soggy soil is a one-way ticket to rot. You want the soil to be consistently moist, not wet. Check the soil; if it feels dry on the surface, then water.
Aftercare & Troubleshooting
Once you start to see signs of roots – usually a gentle tug on the cutting will offer some resistance, or you might even see tiny roots peeking out the drainage holes – it’s time for a little change.
Gradually remove the humidity cover over a few days to acclimate your new little plant to normal room humidity. Continue to keep the soil moist but not waterlogged. As the plant gets a bit bigger and stronger, you can pot it up into a slightly larger container.
The most common problem you’ll encounter is rot. If your cutting turns mushy and black, or the leaves start to yellow and drop off rapidly, it’s likely due to too much moisture. Unfortunately, at that point, it’s usually a lost cause. This is why proper drainage and careful watering are so important.
A Encouraging Closing
So there you have it! Propagating Ligusticum ferulaceum might take a little patience, but seeing those tiny roots emerge and then watching your new plant grow is incredibly satisfying. Don’t be discouraged if your first attempt isn’t perfect. Gardening is all about learning and trying again. Just keep at it, enjoy the process, and soon you’ll have a whole garden of this beautiful, fragrant plant to share. Happy growing!
Resource:
https://identify.plantnet.org/k-world-flora/species/Ligusticum%20ferulaceum%20All./data