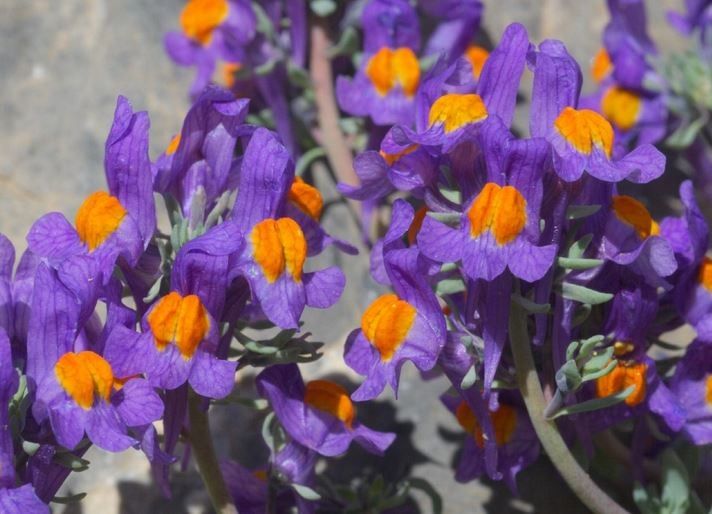
Oh, hello there! Come on in, grab a mug. Let’s chat about one of my favorite little groundcovers: Linaria alpina. If you’ve ever seen this charming alpine plant trailing over a rock garden, its tiny, vibrant “toadflax” flowers like miniature bursts of color, you know exactly why it’s so special. Propagating it has been a little joy of mine for years, and I’m excited to share how you can too.
Why Propagate Alpine Toadflax?
There’s something incredibly satisfying about taking a piece of your beloved plant and coaxing it into a whole new one. With Linaria alpina, you get to expand that splash of color, fill in gaps in your rockeries, or even share these beauties with fellow garden enthusiasts. Now, I’ll be honest, this isn’t quite as foolproof as potting up a succulent, but with a bit of attention, it’s definitely achievable for beginners. You’ve got this!
The Best Time to Start
For the highest chance of success, spring is your golden ticket. Aim to take cuttings when the plant is actively growing, usually after it has finished its initial flush of flowering, or from new, tender shoots emerging in the early part of the season. This is when the plant has the most energy to put into root development.
Supplies You’ll Need
Gathering your tools beforehand makes the whole process smoother. Here’s what I like to have on hand:
- Sharp pruning shears or a clean razor blade: For making precise cuts.
- Small pots or seed trays: With good drainage holes, of course!
- A well-draining potting mix: I usually use a mix of equal parts seed-starting mix or perlite and coarse sand. This is crucial for preventing rot.
- Rooting hormone (optional but helpful): A powder or gel formulation designed for stem cuttings.
- A misting bottle: For keeping cuttings hydrated.
- Plastic bags or a propagator: To create a humid environment.
- A small trowel or dibber: For making planting holes.
Propagation Methods
We’ll focus on the most reliable method for Linaria alpina: stem cuttings.
- Select Your Cuttings: Look for healthy, non-flowering stems that are about 4-6 inches long. The stem should be somewhat firm, not woody, but not so soft that it wilts instantly.
- Make the Cut: Using your sharp shears or razor, make a clean cut just below a leaf node (where a leaf attaches to the stem). This is where the magic happens, as roots are more likely to form.
- Prepare the Cuttings: Gently remove the lower leaves from the cutting, leaving just 2-3 sets of leaves at the top. If your cuttings are particularly long, you can pinch back the tip to encourage bushier growth later.
- Apply Rooting Hormone (if using): Dip the cut end of the stem into the rooting hormone, tapping off any excess.
- Plant Your Cuttings: Fill your small pots or trays with your prepared well-draining mix. Use your dibber or finger to make a hole deep enough to accommodate the leafless portion of the cutting.
- Insert and Firm: Gently insert each cutting into a hole, ensuring the leaf nodes are below the surface of the soil. Lightly firm the soil around the base of the cutting to ensure good contact.
- Water Gently: Water thoroughly until you see it drain from the bottom of the pot.
The “Secret Sauce” (Pro Tips)
Here are a few tricks I’ve picked up over the years that can really boost your success:
- Bottom Heat is Your Friend: While not strictly essential, placing your pots on a heated propagator mat can significantly speed up root formation. These mats provide gentle warmth from below, mimicking ideal conditions.
- Keep it Humid, Not Soggy: Once planted, cover your pots with a clear plastic bag or place them in a propagator. This creates a mini-greenhouse effect, keeping humidity high and preventing the cuttings from drying out. Crucially, ensure the leaves don’t touch the sides of the plastic, as this can encourage rot. If you see condensation building up excessively, vent the bag for a few hours.
- Patience with the “Willies”: Don’t despair if a cutting looks a bit droopy for the first week or two. This is normal as it adjusts. As long as the leaves remain green, there’s a good chance it’s establishing itself.
Aftercare & Troubleshooting
Once your cuttings have been in their humid environment for a few weeks, it’s time to check for roots. You can gently tug on a cutting – if it resists, you likely have roots!
- Introduce Gradually: Once rooted, gradually acclimate your new plants to normal room conditions by removing the plastic cover for increasing periods each day.
- First Watering: Water them well, but then allow the soil surface to dry out slightly between waterings. Overwatering is the quickest way to lose your new charges.
- Signs of Trouble: The most common issue is rot, which will manifest as mushy, blackened stems. This is usually due to too much moisture and not enough air circulation. If you see this, sadly, that cutting is likely a goner. Another sign of failure is if the leaves turn yellow and drop off, which can indicate insufficient light or dryness.
Happy Propagating!
Bringing new life into your garden doesn’t have to be complicated. With a little care and these tips, you’ll soon have a whole patch of cheerful Linaria alpina to enjoy. Be patient, observant, and most importantly, have fun with the journey! Happy gardening!
Resource:
https://identify.plantnet.org/k-world-flora/species/Linaria%20alpina%20(L.)%20Mill./data