Hello, fellow plant enthusiasts! It’s so wonderful to connect with you from my little corner of the garden. Today, we’re diving into the fascinating world of Commiphora glandulosa.
A Gem Worth Growing
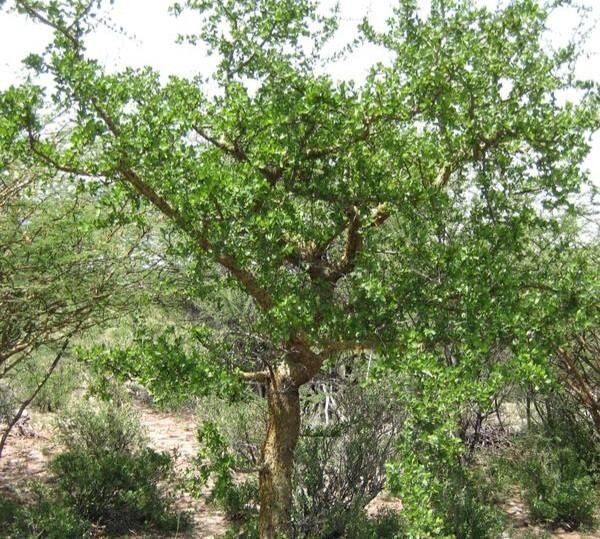
Now, if you’ve ever seen Commiphora glandulosa truly shine, you know why it’s such a special plant. Its unique, almost sculptural form and often attractive bark make it a real statement piece. And the incredibly rewarding feeling of nurturing a brand new plant from a small cutting? Well, that’s just pure gardening joy. For those of you just starting out, I’d say Commiphora glandulosa is a moderately easy plant to propagate. It’s not something you’ll get right on the first try every single time, but with a little attention, you’ll be successful.
The Right Moment Matters
Timing is everything when it comes to plant propagation! For Commiphora glandulosa, the sweet spot is definitely late spring to early summer. This is when the plant is in its most vigorous growth phase. You want to take cuttings from new, yet slightly hardened growth. Think of it as looking for stems that are green and flexible, but not so soft they’ll easily snap. Avoid old, woody stems or brand new, floppy shoots.
Your Propagation Toolkit
Before we get our hands dirty, let’s gather our supplies. Having everything ready makes the whole process much smoother.
- Sharp Pruning Shears or a Clean Knife: This is crucial for making clean cuts that heal well.
- Rooting Hormone (Optional but Recommended): It’s like a little boost for your cuttings. Look for one with IBA.
- Well-Draining Potting Mix: A good blend of perlite, coarse sand, and a bit of peat moss or coco coir works wonders. I often use a mix I create myself, about 50% perlite and 50% a good quality potting soil.
- Small Pots or Trays: Clean pots are a must to prevent disease. About 4-inch pots are usually a good size.
- Plastic Bags or a Mini Greenhouse: This helps create a humid environment for your cuttings to root.
- Watering Can with a Fine Rose or a Spray Bottle: Gentle watering is key.
Bringing New Life to Your Garden
Now for the fun part – the propagation itself! We’ll focus on the most reliable method for Commiphora glandulosa: stem cuttings.
- Gather Your Cuttings: Select healthy stems that meet our criteria (late spring/early summer, new but slightly hardened growth). Using your clean shears or knife, take cuttings about 4-6 inches long.
- Prepare the Cuttings: Remove all but the top 2-3 leaves. If the remaining leaves are very large, you can even cut them in half to reduce water loss through transpiration.
- Apply Rooting Hormone (Optional): Dip the cut end of each stem into your rooting hormone powder. Gently tap off any excess.
- Potting Up: Fill your clean pots with your prepared potting mix. Make a hole in the center of the soil with your finger or a pencil, deep enough to accommodate the cut end of the stem.
- Plant Your Cuttings: Insert the prepared cutting into the hole, ensuring the nodes (where leaves were) are below the soil surface. Gently firm the soil around the stem. Water them in gently.
- Create Humidity: Place the potted cuttings into a plastic bag, forming a mini-greenhouse. Secure it loosely around the pot to trap moisture. Alternatively, you can use a clear plastic lid over a tray of cuttings.
- Find a Good Spot: Place your newly potted cuttings in a bright location, but out of direct, harsh sunlight. They prefer warmth, so a spot with consistently mild temperatures is ideal.
My Little Secrets for Success
Over the years, I’ve learned a few tricks that seem to make a real difference.
- The Bottom Heat Trick: If you can, place your pots on a heat mat designed for plant propagation. This gentle bottom warmth encourages root development from below, which is a game-changer, especially if your ambient room temperature is a bit cooler.
- Let Them Breathe (Sometimes!): While humidity is vital, don’t forget to open the plastic bag or lid for a few minutes each day to allow for air circulation. This helps prevent fungal issues from setting in. It’s a delicate balance!
Nurturing Your New Sprouts
Patience is truly a virtue in gardening, and it’s especially true with new cuttings.
- Check for Roots: After about 4-8 weeks, you can gently tug on a cutting. If you feel resistance, it means roots have formed! If you’re unsure, you might see tiny roots peeking out of the drainage holes.
- Acclimatize Gradually: Once you’ve confirmed rooting, it’s time to let them get used to the outside world. Slowly begin to open the plastic bag or greenhouse over a week or two. Gradually expose them to normal room humidity.
- Watering: Continue to water your new plants when the top inch of soil feels dry. Avoid letting them sit in soggy soil, as this is the quickest way to invite rot.
Troubleshooting Common Issues
- Wilting Cuttings: This can happen if the cutting is too soft, the environment is too dry, or it hasn’t rooted yet. Make sure your humidity is good and avoid direct sun.
- Rotting: This is usually a sign of too much moisture and not enough air circulation, or using unsanitary pots. Discard any cuttings that show black, mushy stems. Ensure your soil drains exceptionally well.
Keep Growing and Exploring!
There you have it! Propagating Commiphora glandulosa is a journey of learning and observation. Don’t be discouraged if your first attempt isn’t perfect. Each cutting you nurture is a step further in your gardening adventure. Enjoy the process, celebrate every small success, and soon you’ll have beautiful new plants to admire and share! Happy growing!
Resource:
https://identify.plantnet.org/k-world-flora/species/Commiphora%20glandulosa%20Schinz/data