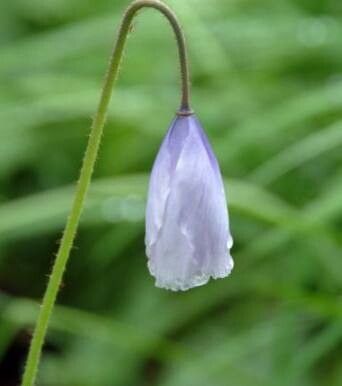
Hello plant friends! Today, we’re diving into the magical world of Meconopsis quintuplinervia, the delightful Himalayan blue poppy. If you’ve ever seen these ethereal beauties gracing a garden, you know their appeal – those stunning sapphire-blue blooms are truly unforgettable. Propagating them yourself is a deeply satisfying endeavor, bringing the promise of more of that celestial color to your own patch. Now, I won’t sugarcoat it: Meconopsis can be a bit particular, so while it’s not the easiest plant for absolute beginners, it’s certainly achievable with a little care and patience. Trust me, seeing your own little blue poppy start to unfurl is a joy that’s hard to beat.
The Best Time to Start
For Meconopsis quintuplinervia, the sweet spot for propagation is typically late spring to early summer. This is when the plant is actively growing and has plenty of energy to put into developing new roots. We’re looking for healthy, non-flowering shoots. If you’ve just missed this window, don’t despair! You might have some luck with divisions in the early autumn as the plant begins to slow down its growth, but spring is generally your best bet for cuttings.
Supplies You’ll Need
Here’s what you’ll want to have on hand before you begin:
- Sharp, sterile pruning shears or a sharp knife: Cleanliness is key to preventing disease.
- Potting mix: A good mix for Meconopsis is crucial. I like a blend of equal parts peat moss, perlite, and a bit of sharp sand. This ensures excellent drainage while retaining a touch of moisture. You can also find specialized Meconopsis or alpine plant mixes.
- Small pots or seed trays: Clean ones, of course!
- Rooting hormone (optional but recommended): A powder or gel can give your cuttings a real boost.
- Plastic bags or a propagator lid: To create a humid environment for your cuttings.
- Labels: To keep track of what’s what!
Propagation Methods
The most reliable way to propagate Meconopsis quintuplinervia is through division. While stem cuttings are possible, they can be more challenging with this particular species.
Division: Your Best Bet
- Gently excavate: When your plant is dormant or just finishing flowering (usually in late summer or early autumn), carefully dig around the base of the plant. You want to expose the root ball without causing too much damage.
- Inspect and separate: Look for natural breaks where the root system divides into distinct crowns. You might see several growing points clustered together.
- Use your hands or a clean tool: Gently pull the sections apart. If they are stubborn, a little help from a clean trowel or knife might be needed, but try to keep as much of the root system intact on each division as possible.
- Trim any damaged roots: Snip off any broken or bruised portions.
- Pot them up: Plant each division into its own pot filled with your well-draining potting mix. Ensure the crown is just at soil level.
- Water gently: Water thoroughly but avoid waterlogging.
The “Secret Sauce” (Pro Tips)
- Don’t let the leaves touch the water: If you do attempt stem cuttings (and I still lean towards division for these), make sure the leaves are not submerged. Any leaf or stem tissue sitting in water will just rot, bringing your propagation efforts to a sad end. Keep leaves above the waterline.
- Bottom heat is a game-changer: Especially if you’re trying cuttings or starting divisions in cooler conditions, a gentle bottom heat source – like a heated propagation mat – can significantly speed up root development. It mimics the warmth of spring soil and really encourages those roots to get going.
- Don’t rush the repotting: When you’ve divided your plant, resist the urge to repot it into a massive container right away. Start with smaller pots. This encourages the plant to focus its energy on root growth within that confined space, leading to a stronger root system before you eventually size up.
Aftercare & Troubleshooting
Once your divisions are potted up, place them in a cool, humid environment and out of direct sunlight. Keep the soil consistently moist but never soggy. In about 4-6 weeks, you should start to see new growth, which is a good sign that roots have formed.
The most common culprit for failure is rot, often due to overwatering or poor drainage. If you see wilting that isn’t due to dryness, or slimy stems, it’s a sign of trouble. Sadly, if rot sets in, it’s usually difficult to save the plant. Prevention through good drainage and careful watering is your best defense. If you’re using a propagator, open it up for a few hours each day to allow for some air circulation and prevent the build-up of too much moisture.
A Little Patience Goes a Long Way
Propagating Meconopsis quintuplinervia is a journey, not a race. There will be moments of doubt, but the reward of seeing those beautiful blue blooms brighten your garden from your own propagated plants is truly special. Be patient, observe your new charges, and enjoy the process of coaxing new life from your existing treasures. Happy gardening!
Resource:
https://identify.plantnet.org/k-world-flora/species/Meconopsis%20quintuplinervia%20Regel/data